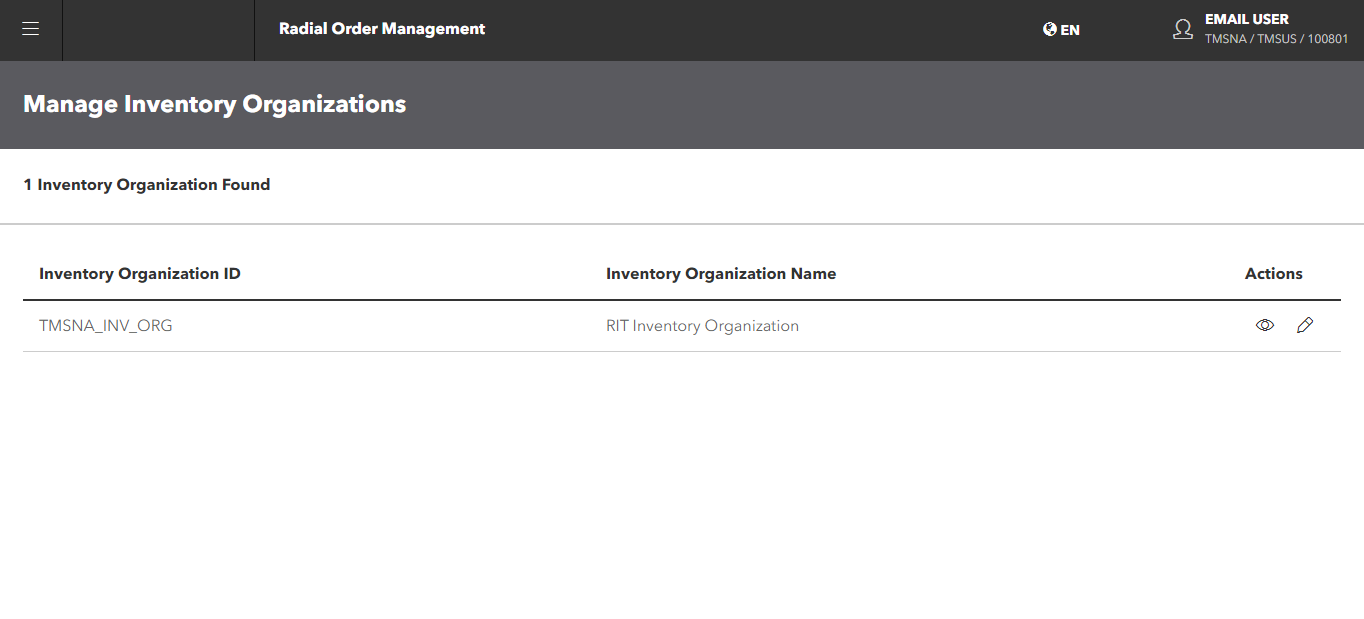
Manage Inventory Organizations
The Inventory Organization owns the inventory. A client can have multiple inventory organizations. An inventory organization can be associated with multiple sellers; however, a seller can be associated with only one inventory organization.
The Inventory Organization is defined and configured at implementation; therefore, you cannot add inventory organizations, but you can edit them to reflect any changes.
To manage the Inventory Organizations:
- Click or tap the
 icon in the upper-left corner. The Main Menu appears.
 - Click or tap Omni Administration. The Omni Administration submenu appears.
- Click or tap Inventory Organization. The Manage Inventory Organizations screen appears.
- To view an organization's settings, click or tap the
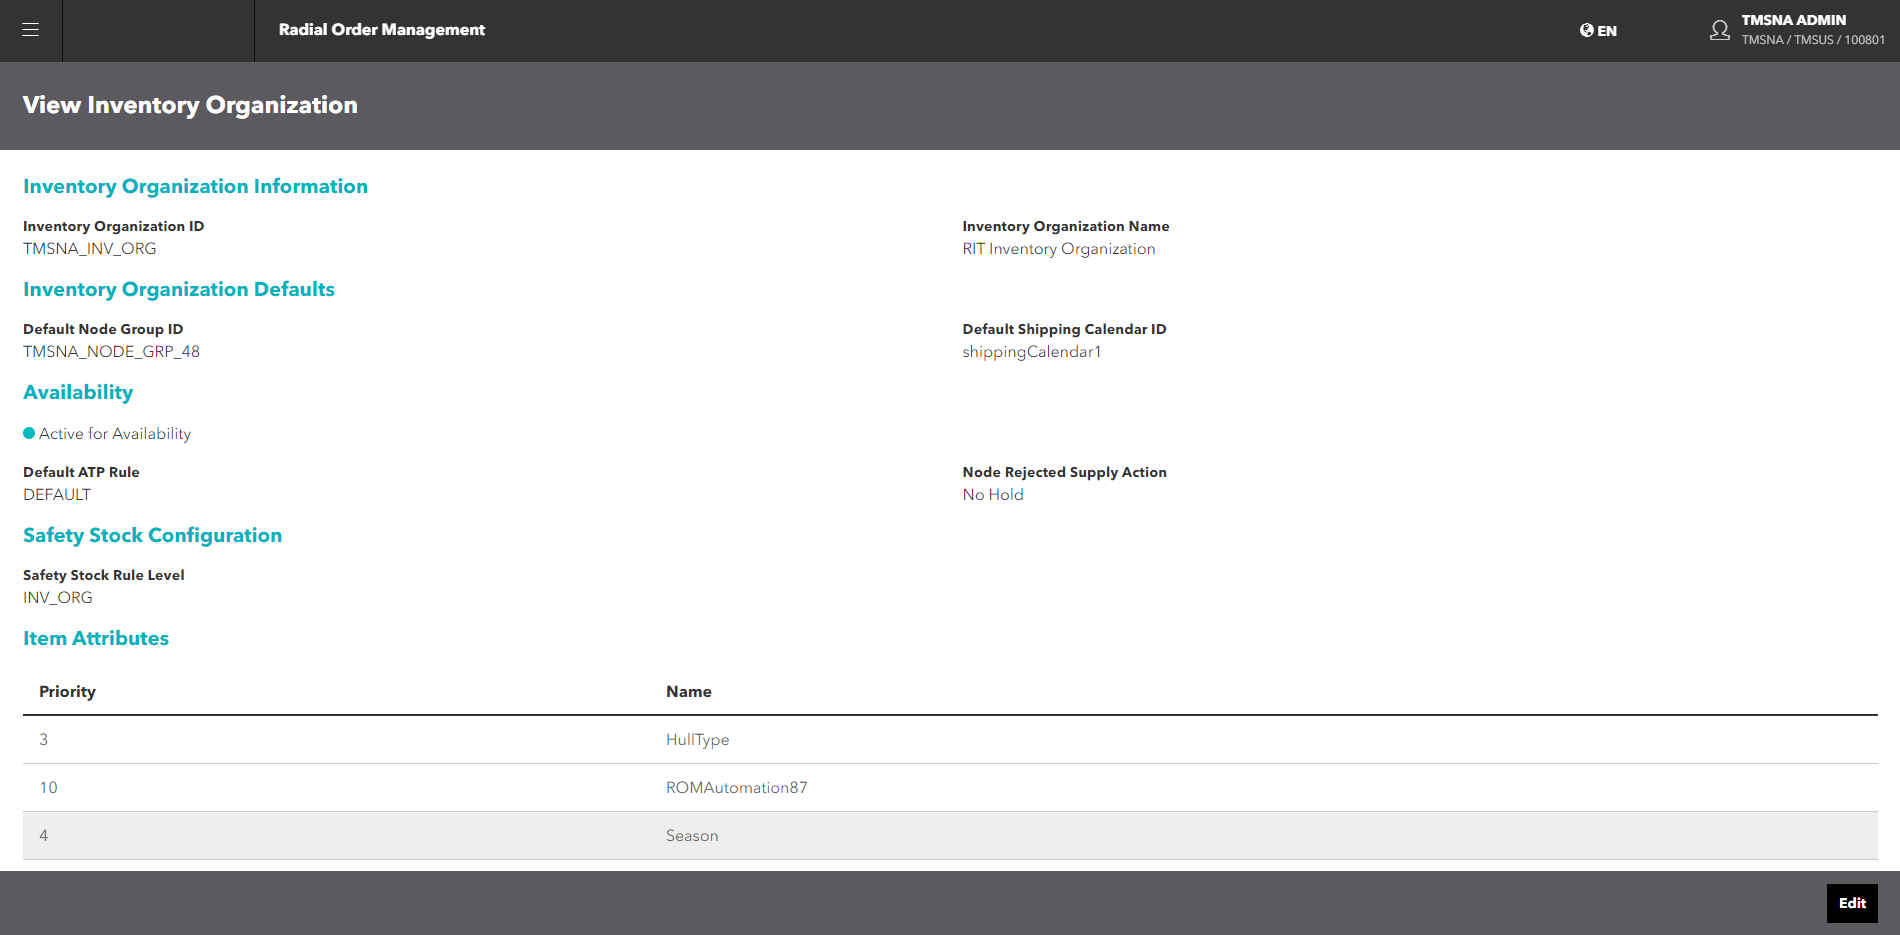
 icon. The View Inventory Organization screen appears.
You can look at the specific inventory organization settings, but you cannot change them. If you want to change the settings, click or tap the Edit button.
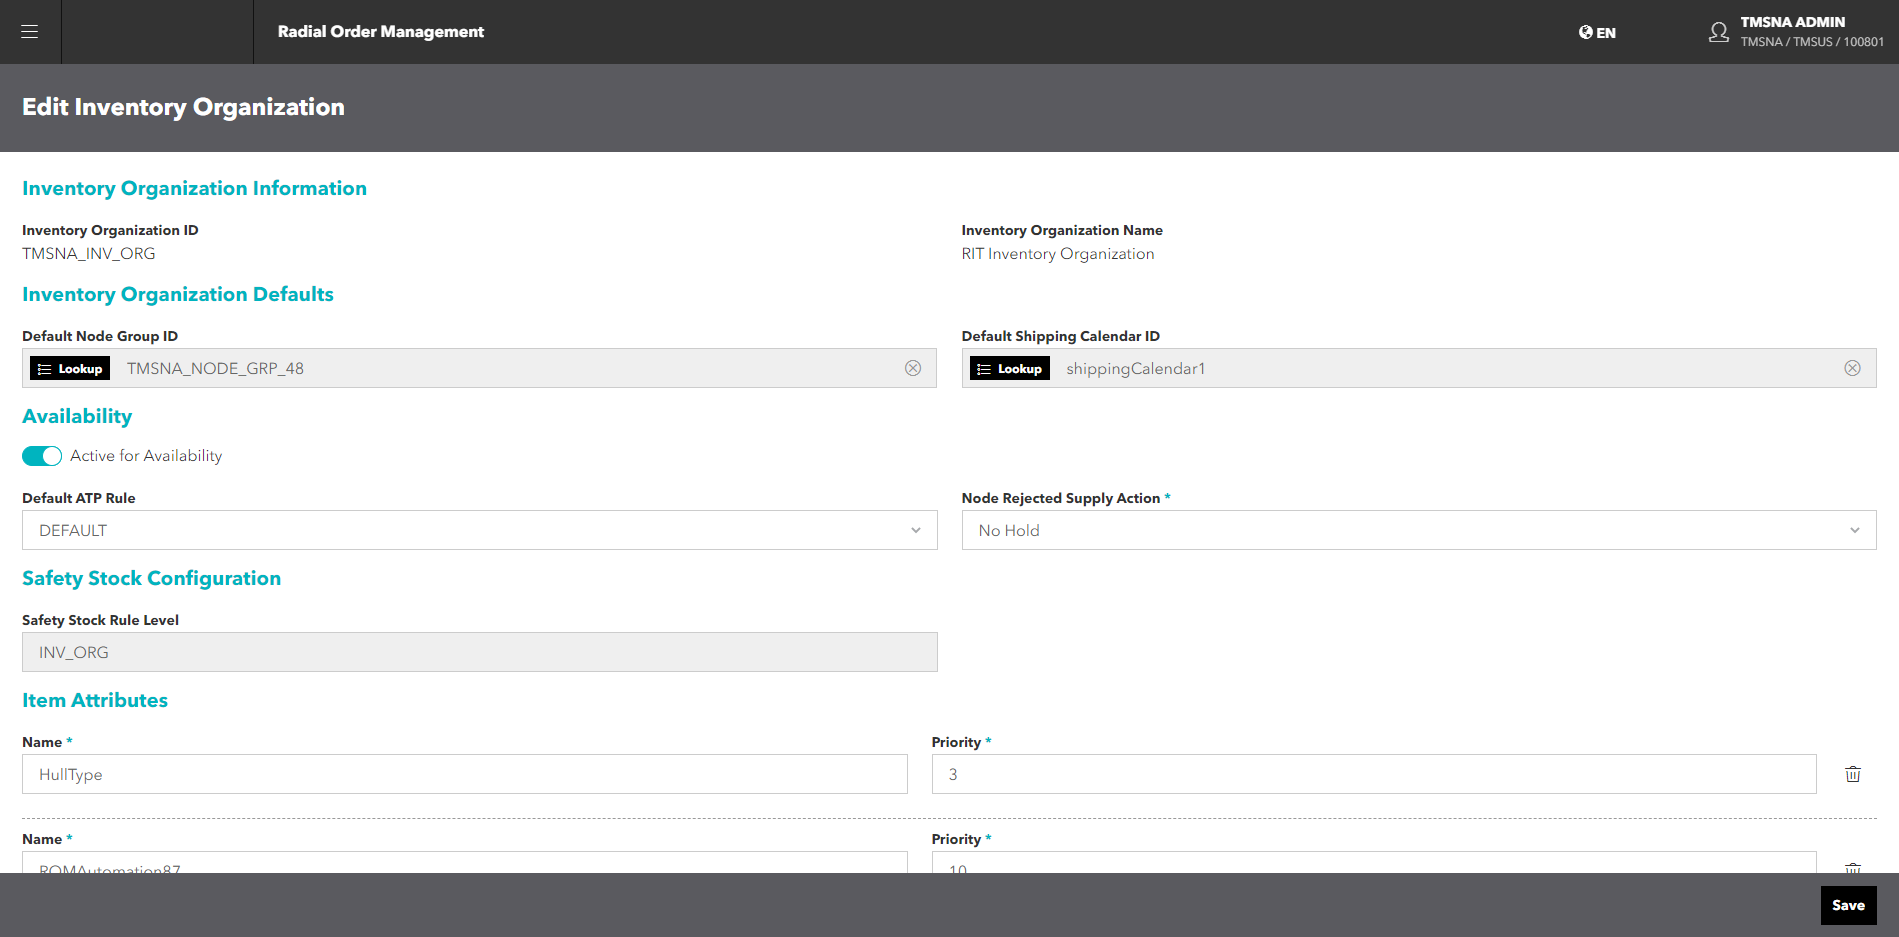
- To edit the settings for a specific Inventory Organization, either click or tap the Edit button on the View Inventory Organization screen, or click or tap the
 icon on the Inventory Organizations screen. The Edit Inventory Organization screen appears.
You can change the following settings:
- Default Node Group ID: Enter new node group ID. If you don't know the ID, click or tap the Lookup button to select the node groups from the Manage Node Groups popup.
- Default Shipping Calendar ID: Enter the default shipping calendar ID. If you don't know the ID, click or tap the Lookup button to select the calendar from the Manage Node Calendars popup.
- Active for Availability toggle: Slide the toggle left to turn availability off; slide the toggle right to turn it on.
- Default ATP Rule: Select the new rule from the dropdown.
- Node Rejected Supply Action: Select the new action from the dropdown. This defines the action taken when an order is rejected from the inventory node.
- Item Attributes:
- To modify the Attribute Name and Priority, overwrite with the existing value.
- To delete an attribute, click or tap the
 icon to the right of the attribute you want to delete.
 - To add a new attribute, click or tap the Add Attributes button, then enter a name and priority for the new attribute.
You cannot change the following settings:
- Inventory Organization ID
- Inventory Organization Name
- Safety Stock Rule Level
- When you are done, click or tap the Save button to save your changes.