Manage Store Messages
At the bottom of the Dashboard, you can post messages for store personnel.
To manage store messages:
- Click or tap the
 icon in the upper-left corner. The Main Menu appears.
 - Click or tap Omni Administration. The Omni Administration submenu appears.
- Click or tap Manage Store Messages. The Manage Messages screen appears.
From this screen, you can:
- Search for messages.
- Edit a message.
- Delete a message.
- Add a message.
- To search for specific messages, enter your search criteria in the search fields, then click or tap the Search button. You can search by:
- Message Type
- Effective Date From (when the message is first posted)
- Effective Date To (when the message is no longer posted)
- To delete a message, click or tap the
 icon of the message you want to delete. Once you click or tap the icon, the message is deleted.
 - To edit a message, click or tap the
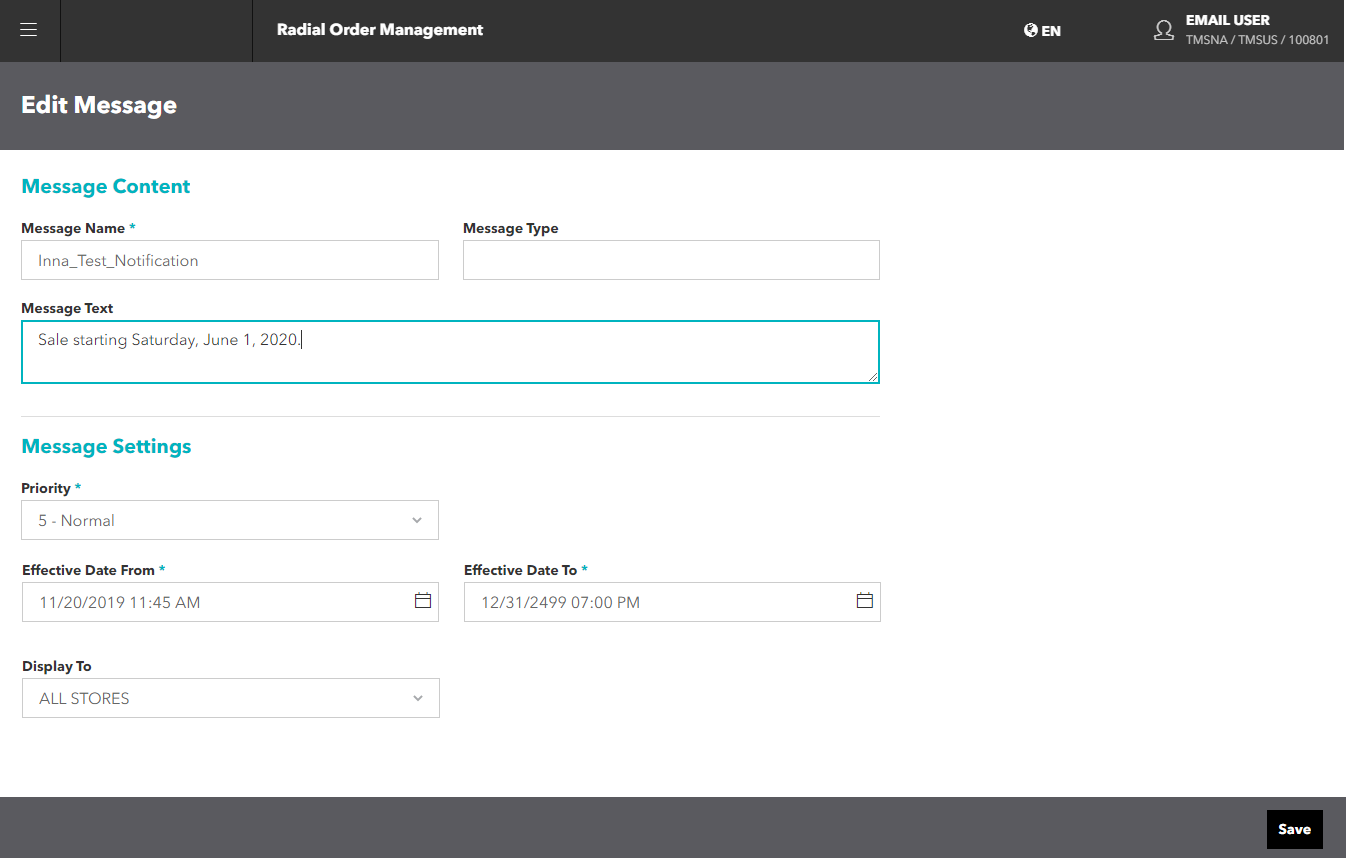
 icon. The Edit Message Details screen appears.
Make the necessary edits. To save your changes, click or tap the Save button.
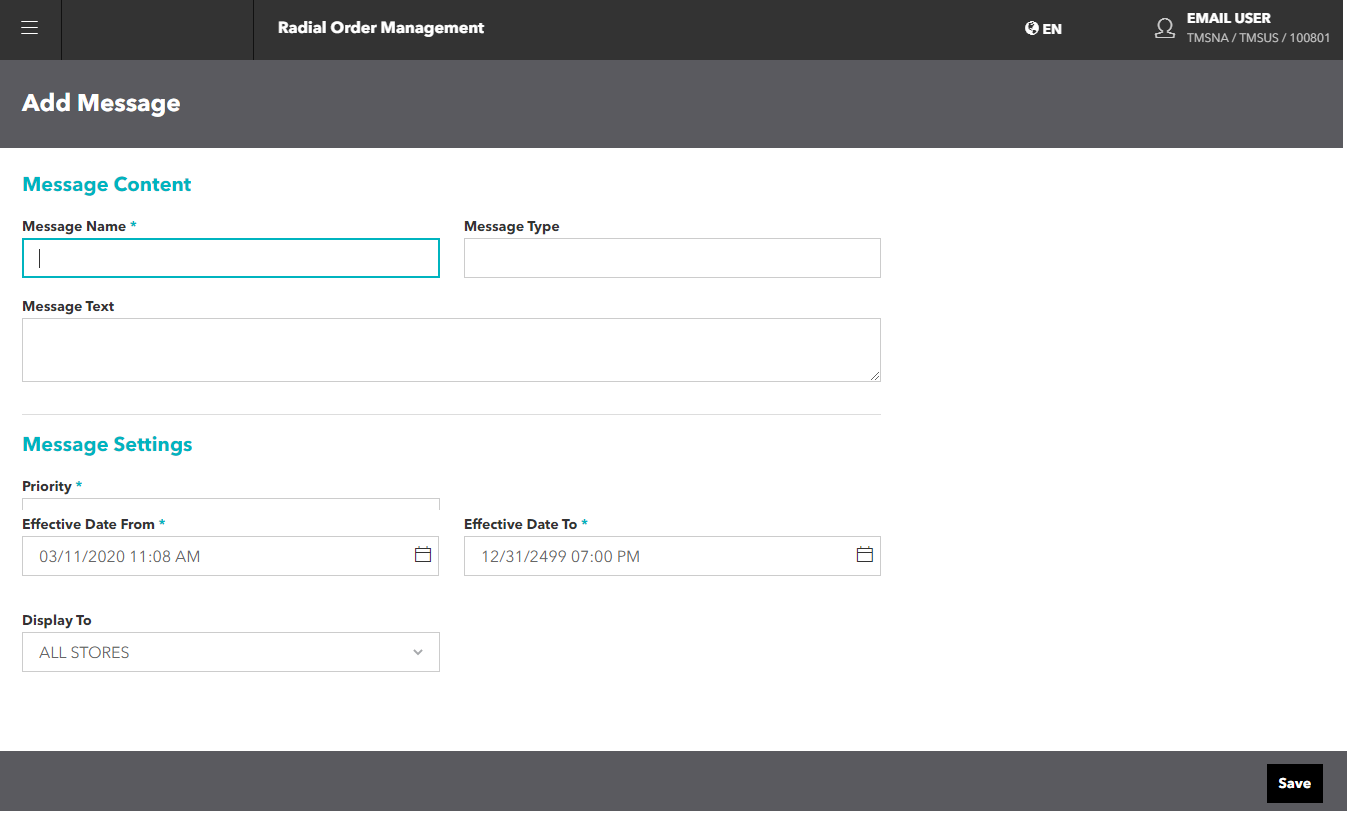
- To add a new message, click or tap the Add button on the Manage Messages screen. The Add Message screen appears.

- In the Message Content section, enter:
- Message Name
- Message Type
- Message Text
- In the Message Settings section, enter:
- Priority
- Effective Date From
- Effective Date To
- In the Display To field, select a store (or ALL STORES) from the dropdown.
- Click or tap the Save button. The message posts to the Dashboard on the date entered in the Effective Date From field, and is removed from the Dashboard on the Effective Date To field.
When a message is removed from the Dashboard, it is not deleted. You must explicitly delete the message.
- To delete a message, click or tap the
 icon. You are asked to confirm the deletion. To continue with the deletion, click or tap Confirm; otherwise, click or tap Cancel.