Configure Order Queues
An Order Queue is a list of orders waiting to be processed; that is, waiting to be picked, packed, pick up by a customer, and so on. As an order moves through the fulfillment workflow, it's assigned to an appropriate queue. For example, when an order is allocated and released for fulfillment, it's assigned to a Waiting for Pick queue. Initially, Order Queues are configured at launch; clients can define multiple queues for a seller, fulfillment type, and queue group. A queue group represents a collections of queues designated to support a specific step in the fulfillment workflow. Queue Groups are set up by Radial during initial implementation for each step in the fulfillment workflow. As an administrator, you can set up, edit, and delete order queues.
To configure order queues:
- Click or tap the
 icon in the upper-left corner. The Main Menu appears.
 - Click or tap Omni Administration. The Omni Administration submenu appears.
- Click or tap Configure Order Queues. The Manage Order Queue Configurations screen appears.
From this screen, you can view, edit, or delete existing queues; or add a new queue.
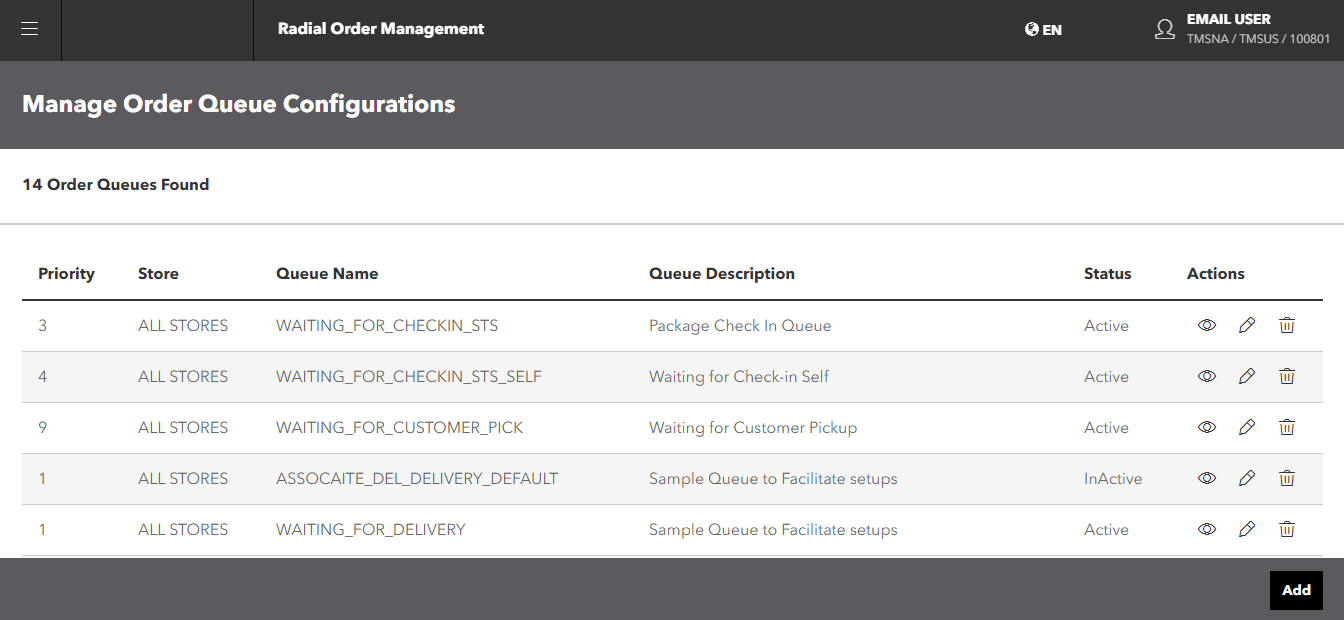
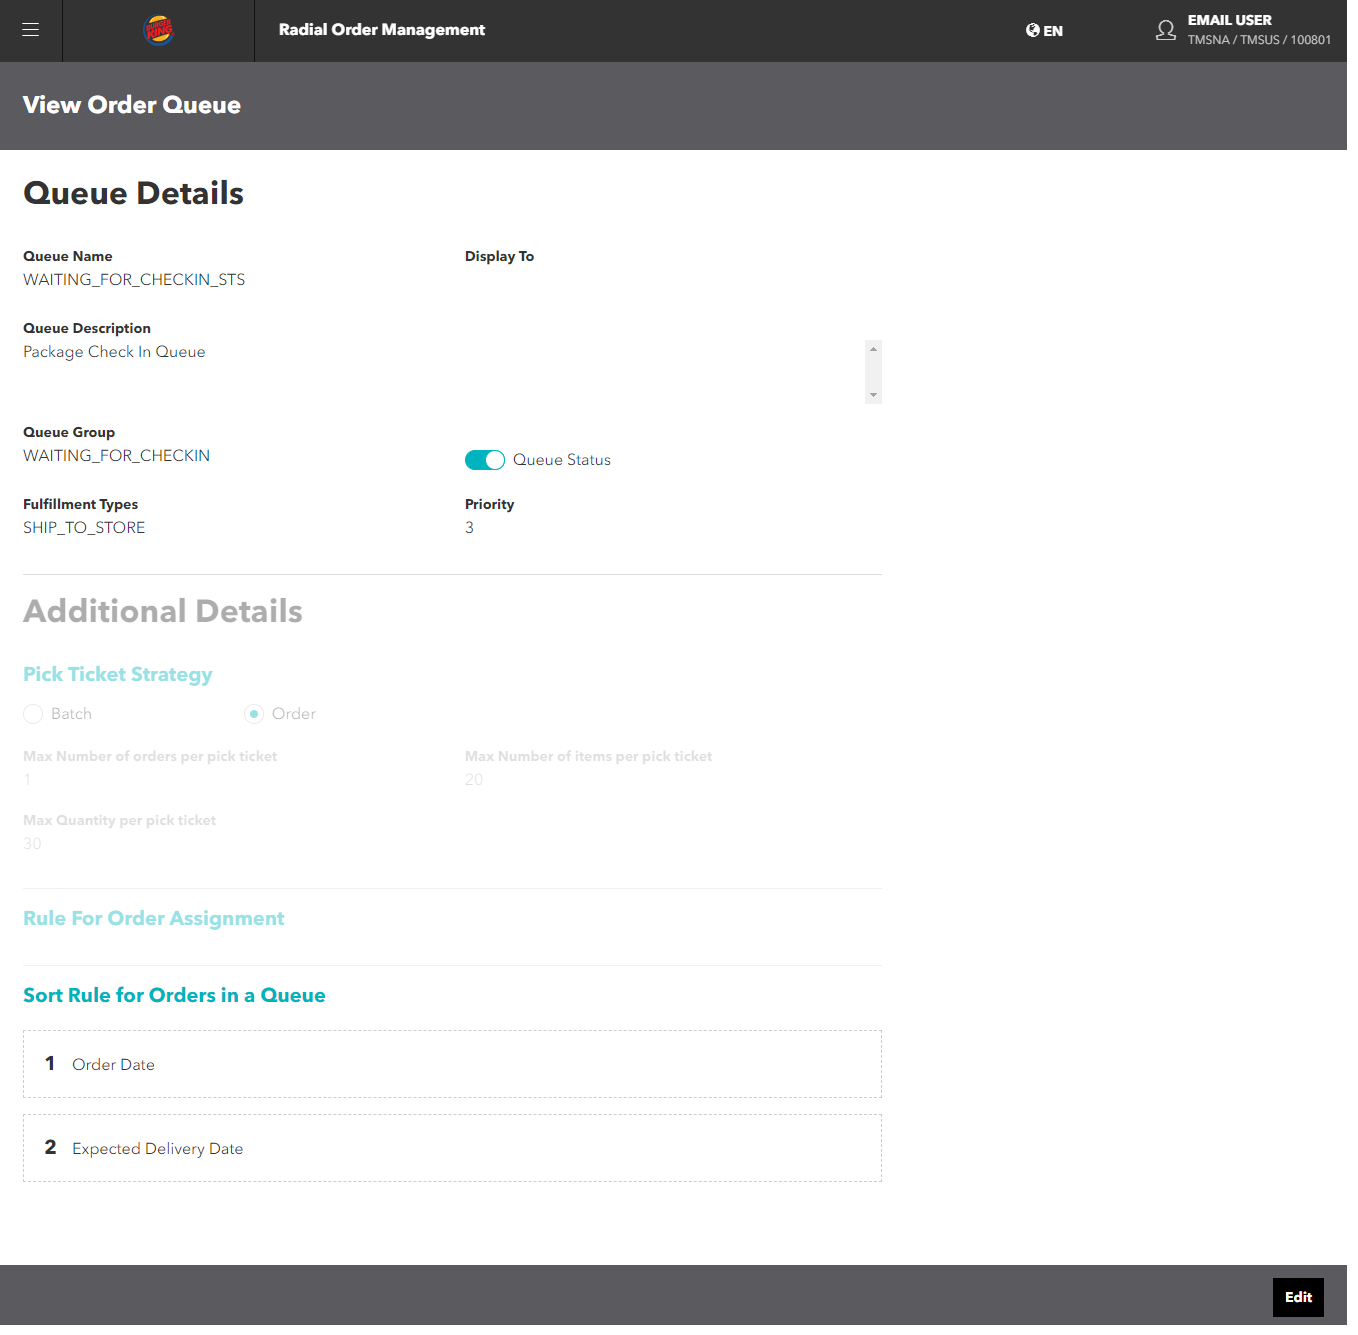
View a Queue
To view a queue:
- Click or tap the
 icon in the Actions column of the queue you want to view. The View Order Queue screen appears.
- From this screen, you can see all of the settings for this particular queue.
- If you need to change or update a setting, click or tap the Edit button. See Edit a Queue for details.
Delete a Queue
To delete a queue:
- Click or tap the
 icon in the Actions column of the queue that you want to delete. The systems prompts you to confirm the deletion.
 - Click or tap the Confirm button to delete the queue; otherwise, click Cancel.
If you delete a queue, you cannot recover it. You must recreate it.
Edit a Queue
To edit a queue:
- From the Manage Order Queue Configurations screen, click or tap the
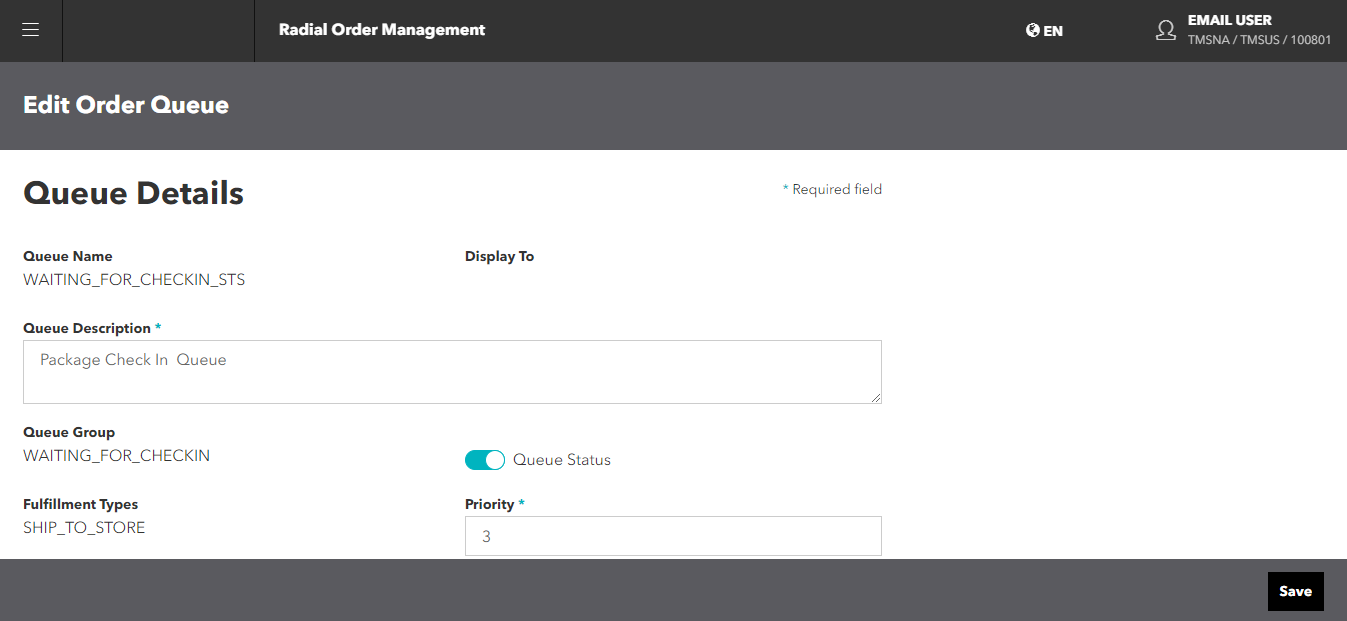
 icon in the Actions column of the queue that you want to modify. Alternatively, from the View Order Queue screen, click or tap the Edit button. The Edit Order Queue screen appears.
- In the Queue Details - General Information section, you can modify the Queue Description and the Priority.
- In the Additional Details section, you can modify:
- Pick Ticket Strategy
- Rule for Order Assignment
In addition to modifying rules, you can add additional rules.
- Sort Rule for Orders in a Queue (drag and drop the rules into the order you want)
- When you finish modifying the queue, click or tap the Save button.
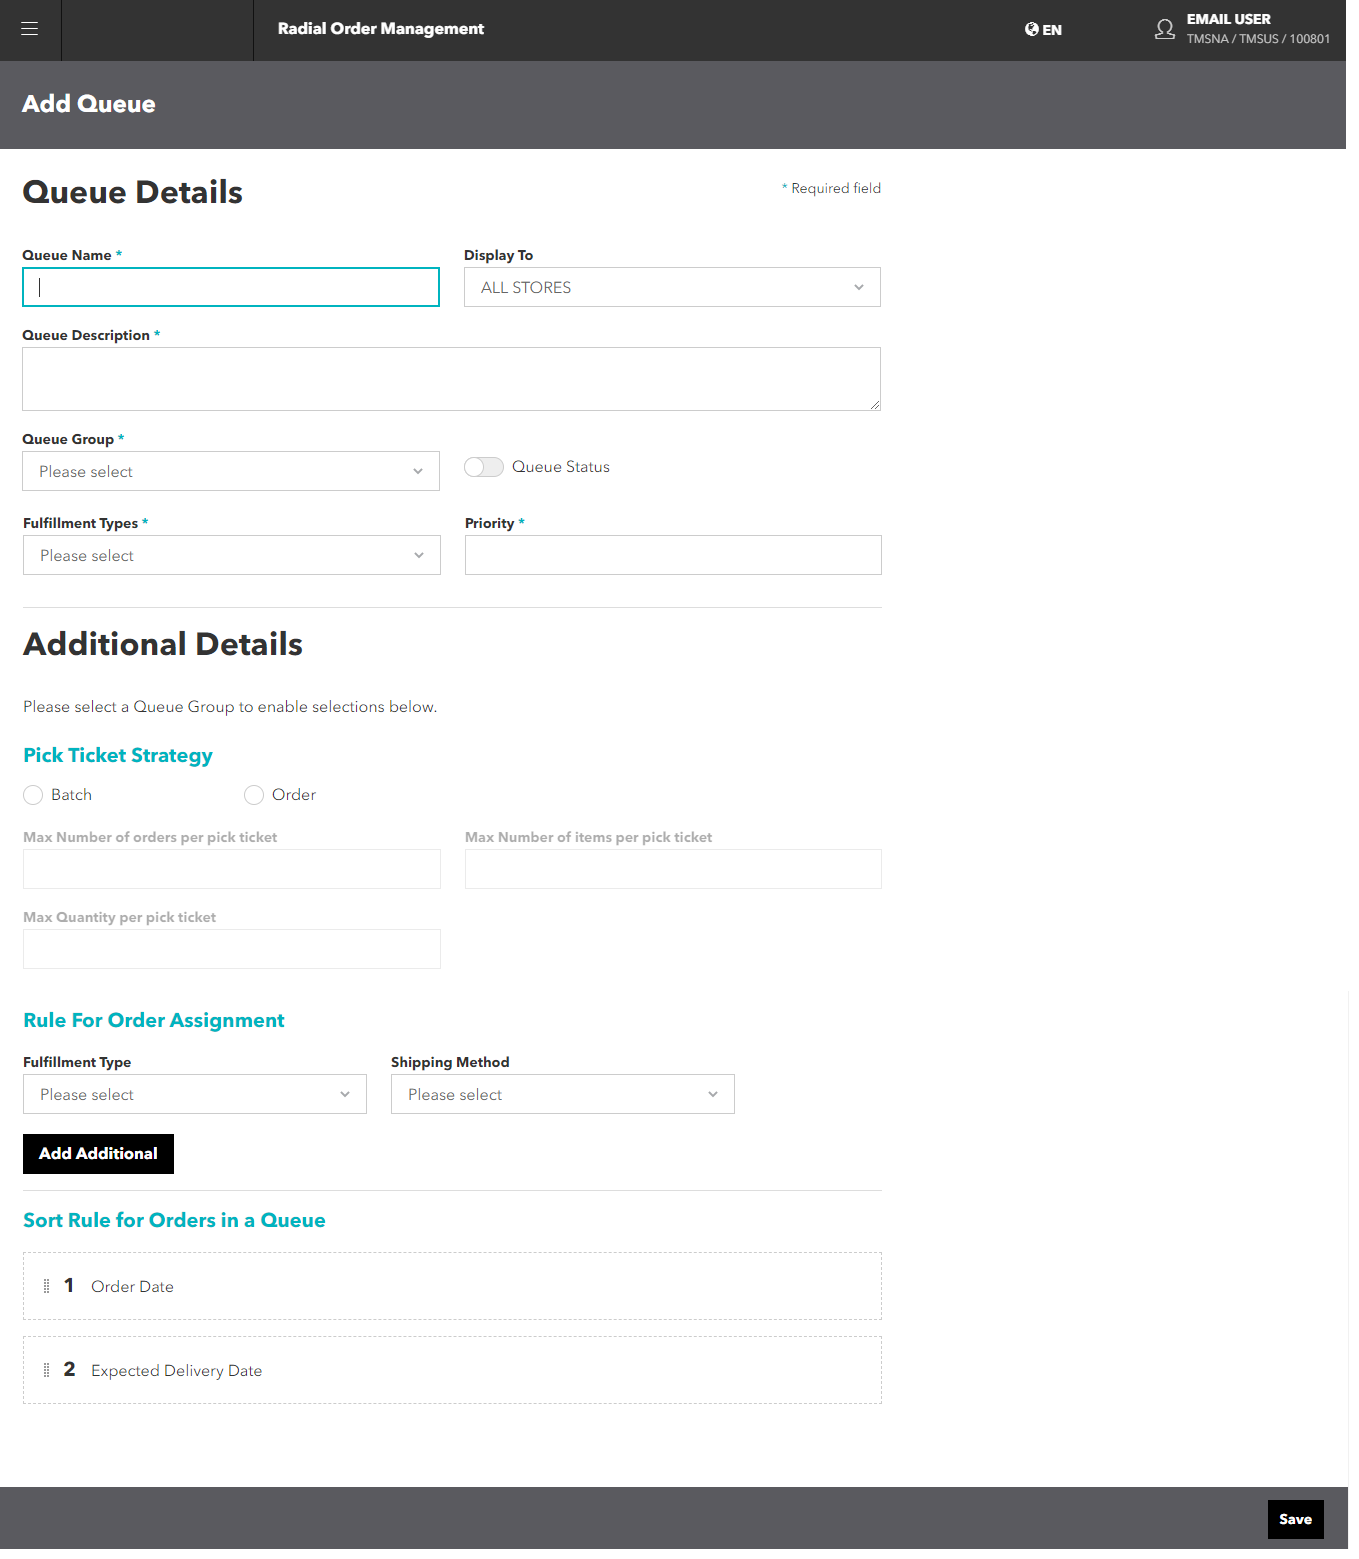
Add a Queue
- To add a new queue, click or tap the Add button on the Manage Order Queue Configurations screen. The Add Queue screen appears.

- In the Queue Details - General Information section, enter:
- Queue Name
- Queue Description
- Select a Queue Group. When you select a Queue Group, you activate the fields in the Additional Details section.
- To activate the Queue Status, click the toggle in the Queue Status field.
- Select a Fulfillment Type.
- Specify the priority.
- Once you activate the Additional Details fields, you can specify
- Pick Ticket Strategy
- Rule for Order Assignment
You can add as many rules as you like.
- Sort Rule for Orders in a Queue (drag and drop the rules into the order you want)
- When you finish defining the queue, click or tap the Save button.