Manage Sellers
Your organization is made up of sellers. Sellers are created and initially configured when Radial Order Management is implemented, but you may need to update certain settings as time goes on.
To manage the sellers in your organization:
- Click or tap the
 icon in the upper-left corner. The Main Menu appears.
 - Click or tap Omni Administration. The Omni Administration submenu appears.
- Click or tap Seller Configurations. The Seller Configurations submenu appears.
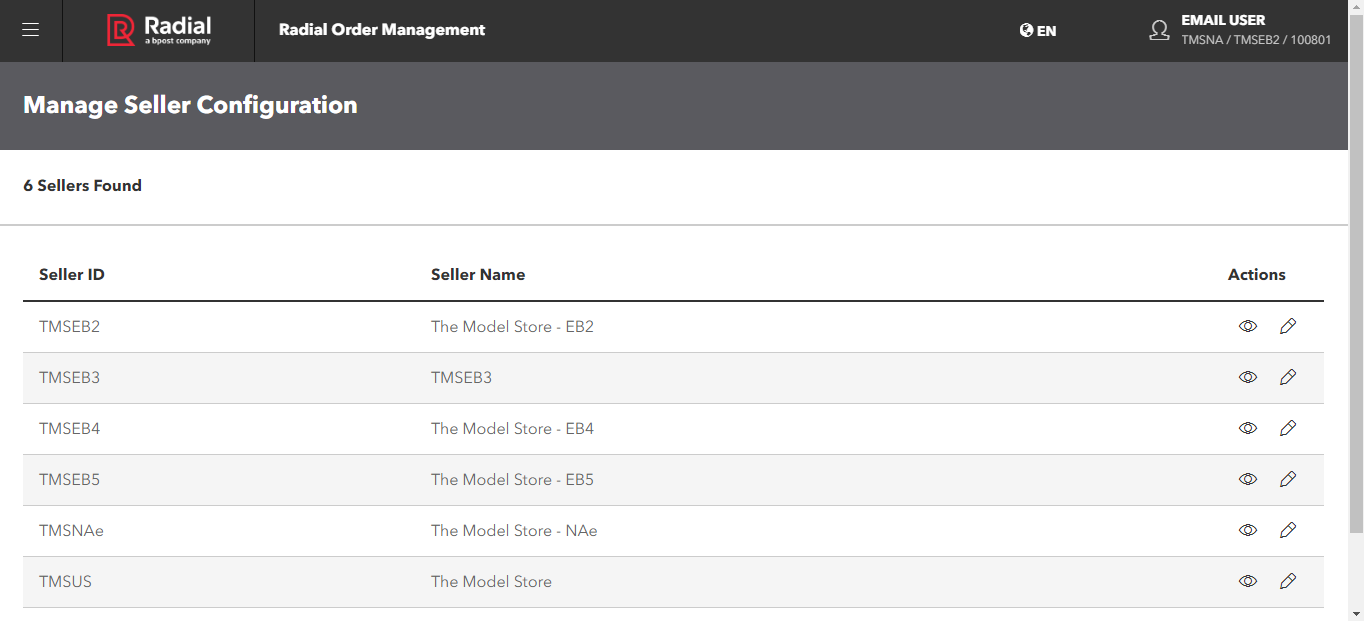
- Click or tap Seller. The Manage Seller Configuration screen appears.
- To view the settings for a specific Seller, click or tap the
 icon. The View Seller Configuration screen appears.
 You cannot change any of the fields on this screen. However, if you need to update a setting, click or tap the Edit button.
- To edit the settings for a specific Seller from the Manage Seller Configuration screen, click or tap the
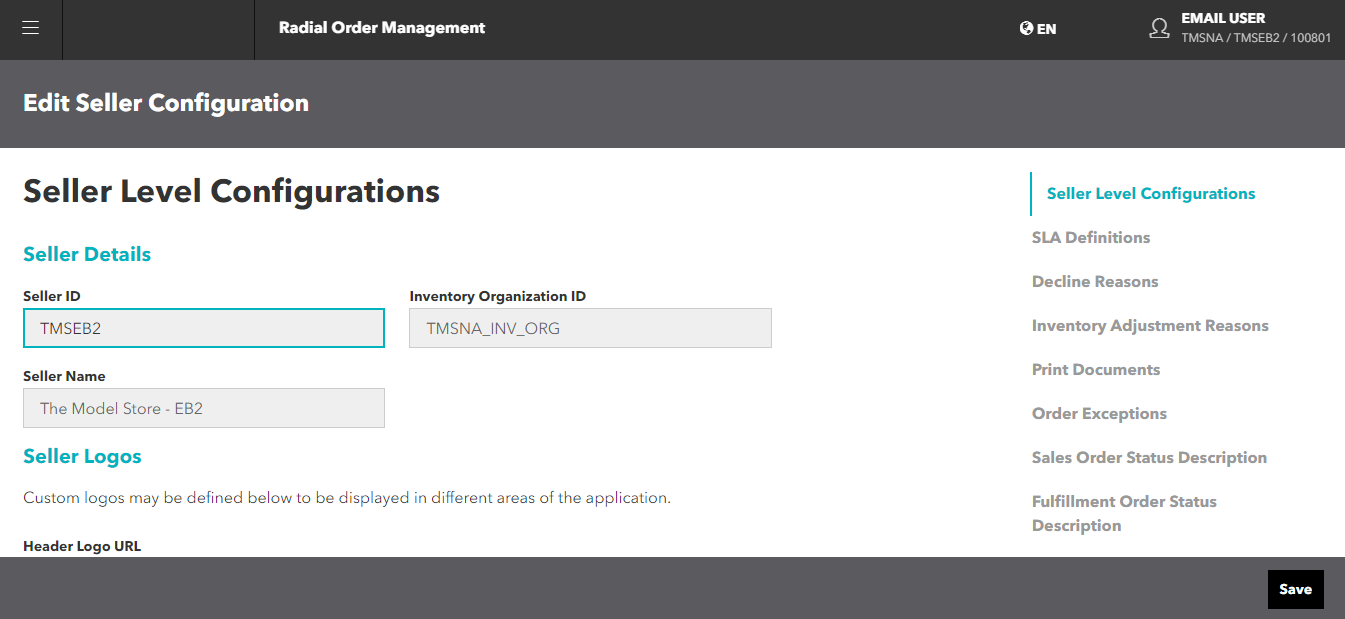
 icon. The Edit Seller Configuration screen appears.
This screen is long; you must scroll to see all the sections. To move quickly to a section, click or tap the section title in the screen table of contents on the right.
The following table describes this screen and what you can do.
Section Subsection Editable? Fields Notes Seller Level Configurations Seller Details No Seller ID
Seller Name
Inventory Organization IDThese fields are set up during implementation. You cannot edit them. Seller Logos Yes Header Logo URL
Menu Logo URL
You can define custom logos to appear in different areas of the application. Enter the applicable logo URLs. Max Duration Yes Max Duration Allowed to Ship (Days) The maximum number of days that this seller can ship orders. This value is used to calculate the shipping window. Fulfillment Types for Availability Yes In-Store Pickup
Ship-to Store
Ship-from Store
Associate Delivery
Distribution Center
Drop Ship
Check these fields to enable the different fulfillment types for this seller.
These fulfillment options are used for availability calculations when a fulfillment type is not available. For example, an Inventory Quantity request from a webstore (usually from the product page) on the ROM UI Availability Search screen. These options control at a seller level whether distribution center inventory, dropship inventory, and/or store inventory should be considered for availability calculations.
SLA Definitions and Notifications ISPU Yes Start Pick Process Approaching/Expired
Complete Picking Approaching/Expired
Customer Pickup Approaching/Expired
These fields define the Service Level Agreement for how long the Seller has to complete the defined processes for the In-Store Pickup fulfillment type. All SLAs for ISPU are based on the fulfillment order create time, with the exception of Customer Pickup Approaching SLA, which is based on the date/time when an order status is updated as Ready for Pickup. SFS Yes Start Pick Process Approaching/Expired
Complete Picking Approaching/Expired
Complete Packing Approaching/Expired
Pick Expired Cancel SLA
Auto Resource
These fields define the Service Level Agreement for how long the Seller has to complete the defined processes for the Ship-from Store fulfillment type. All SLAs for SFS are based on a fulfillment order create date/time.
The Auto Resource toggle activates or deactivates automatic re-sourcing. When Auto Resource is activated, the Pick Expired Cancel SLA field appears. When the Pick Expired Cancel SLA time is reached, the order is pulled from the Pick queue and re-sourced to another node.
STS Yes Start Pick Process Approaching/Expired
Complete Picking Approaching/Expired
Complete Packing Approaching/Expired
Customer Pickup Approaching/Expired
Pick Expired Cancel SLA
Auto Resource
These fields define the Service Level Agreement for how long the Seller has to complete the defined processes for the Ship-to Store fulfillment type. All SLAs for STS are based on the fulfillment order create time, with the exception of Customer Pickup Approaching SLA, which is based on the date/time when an order status is updated as Ready for Pickup.
The Auto Resource toggle activates or deactivates automatic re-sourcing. When Auto Resource is activated, the Pick Expired Cancel SLA field appears. When the Pick Expired Cancel SLA time is reached, the order is pulled from the Pick queue and re-sourced to another node.
Associate Delivery Yes Start Pick Process Approaching/Expired
Complete Picking Approaching/Expired
Complete Packing Approaching/Expired
Customer Delivery Approaching/Expired
These fields define the Service Level Agreement for how long the Seller has to complete the defined processes for the Associate Delivery fulfillment type.All SLAs for Associate Delivery are based on a fulfillment order create date/ time. Decline Reasons Pick Decline Reasons Yes Code
Enter Reason
To add a decline reason, click or tap the Add Decline Reason button. By default, the entry fields are hidden; they do not appear until you click or tap the Add button.
To delete a decline reason, click or tap the
 icon.
icon.Customer Pickup Decline Reasons Yes Code
Enter Reason
To add a decline reason, enter the new code and reason. To add more reasons, click or tap the Add Decline Reason button.
To delete a decline reason, click or tap the
icon.Pack Decline Reasons Yes Code
Enter Reason
To add a decline reason, enter the new code and reason. To add more reasons, click or tap the Add Decline Reason button.
To delete a decline reason, click or tap the
icon.Check In Decline Reasons Yes Code
Enter Reason
To add a decline reason, enter the new code and reason. To add more reasons, click or tap the Add Decline Reason button.
To delete a decline reason, click or tap the
icon.Inventory Adjustment Reasons Yes Code
Description
To add an adjustment reason, click or tap the Add Adjustment Reason button. By default, the entry fields are hidden; they do not appear until you click or tap the Add button.
To delete a decline reason, click or tap the
icon.Print Documents Require Documents Yes Pick Ticket
Hold Ticket
Customer Receipt
Pack Slip
Order Created Receipt
Delivery Slip
Return ReceiptTo mark a document as required, click or tap the checkbox next to the document type. Order Exceptions Require Order Exceptions Yes Carrier Exception
Max Split Exception
Max Resource Exception
To enable Client Administrators to view and resolve order exceptions, click or tap the checkbox next to the applicable exception. Sales Order Status Descriptions Custom Status Descriptions Yes Included in Shipment
Released
Scheduled
Ready For Pickup
Return Created
Return Received
Order Delivered
Cancelled
Pickup Complete
Shipped
In-Store Return Created
STS Order Cancelled
ISPU Order Cancelled
Created
Back Ordered
Shipment Packed
To create a customized description for these status descriptions, enter the new description in the Description field. Fulfillment Order Status Descriptions Custom Status Descriptions Yes Shipment Shipped
Shipment Invoiced
Customer Picked
Shipment Packed
Ready For Backroom Pick
Ready For Pickup
Ready For Packing
Pick Ticket Generated
Shipment Delivered
Shipment Cancelled
Shipment Created
To create a customized description for these status descriptions, enter the new description in the Description field. Package Configuration Add a Package Yes Package Description
Weight
Packing Material Weight
Height
Width
Length
Package Type
To add a package, click or tap the Add a Package button. By default, the entry fields are hidden; they do not appear until you click or tap the Add button. Enter the package description, weight, packing material weight, height, width, and length in the applicable fields. Be sure to specify the appropriate units for each. To add additional packages, click or tap the Add a Package button. You must enter a value greater than zero in the weight, packing material weight, height, width, and length fields; otherwise, you receive a validation error.
To specify an expanded package type, such as a polybag, use the Package Type field.
To delete a package, click or tap the
icon.ISPU Charge Yes Complete Picking
Customer PickupIn this section, you can configure when a customer's method of payment should be charged:
- Complete Picking:The customer is charged when the store associate completes the pick and the order status changes to "Ready for Pickup"
- Customer Pickup: The customer is changed when they actually pick up the order
PIN Configuration Yes Active (toggle)
PIN Length
In this section, you can activate a requirement for a PIN number and set the length. The length can be from 2 to 20 digits. Seller Region Lookup Strategy Yes Lookup Level Determines how seller regions are searched:
- Main Div Code
- Country Code
- Postal Code
You must select a Seller Region Lookup Strategy for each country that you ship to. These countries are specified during implementation. You cannot add or delete a country.
Push Notifications SMS
Email
In this section, you can select SMS or email delivery methods for push notifications, and enable or disable specific notifications in the toggle-based list for each fulfillment type.
- When you complete your updates, click or tap the Save button.