Configure Carrier Shipping Labels
Overview
When you set up your Seller![]() A seller is part of an organization. It can represent a sales channel, geographic region, or line of business. Organizations can have more than one seller, but a seller can have only one organization. configurations, you can also configure shipping labels specific to the various carriers you might use:
A seller is part of an organization. It can represent a sales channel, geographic region, or line of business. Organizations can have more than one seller, but a seller can have only one organization. configurations, you can also configure shipping labels specific to the various carriers you might use:
- Consignor: Enables you to integrate with multiple carriers through the Consignor platform. This is particularly useful if you need to integrate to carriers operating in the European Union (EU).
- Fedex: Enables you to specify details to create and manage shipping labels specific to your account with Fedex.
- UPS: Enable you to specify details to create and manage shipping labels for UPS, including Economy and Express.
Procedure
To configure shipping labels:
- Click or tap the
 icon in the upper-left corner. The Main Menu appears.
 - Click or tap Omni Administration. The Omni Administration submenu appears.
- Click or tap Seller Configurations. The Seller Configurations submenu appears.
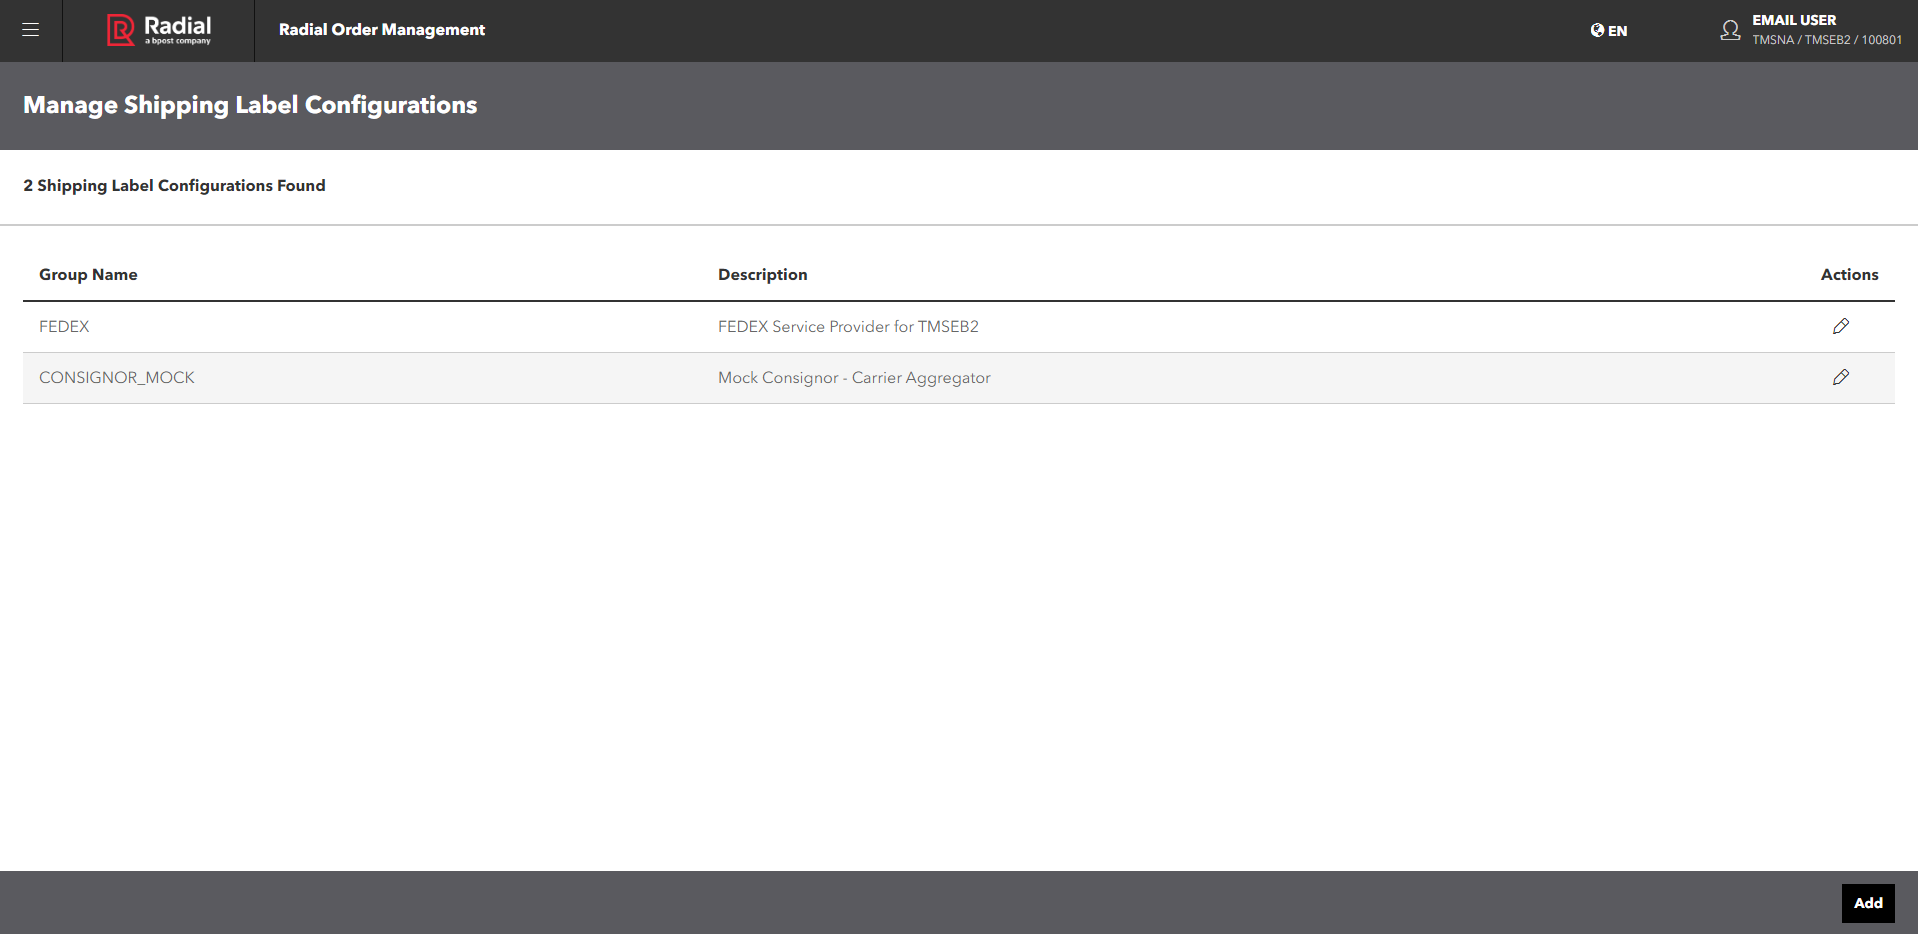
- Click of tap Shipping Label Configurations. The Manage Shipping Label Configurations screen appears.

This screen has three columns:
- Group Name: The name that represents the carrier or carrier aggregator.
- Description
- Actions: The available action is Edit (
 ).
).
From this screen, you can edit an existing shipping label configuration or add a new one.
Add a Shipping Label Configuration: Consignor
To add a shipping label configuration for Consignor:
- From the Manage Shipping Label Configurations screen, click or tap the Add button. The New Shipping Label Configuration screen appears.

- The Service Provider Name field should already display CONSIGNOR. If it does not, select CONSIGNOR from the dropdown.
- Enter a description.
- Select a Default Label Strategy from the dropdown.
- Select the Country that the shipping label configuration applies to.
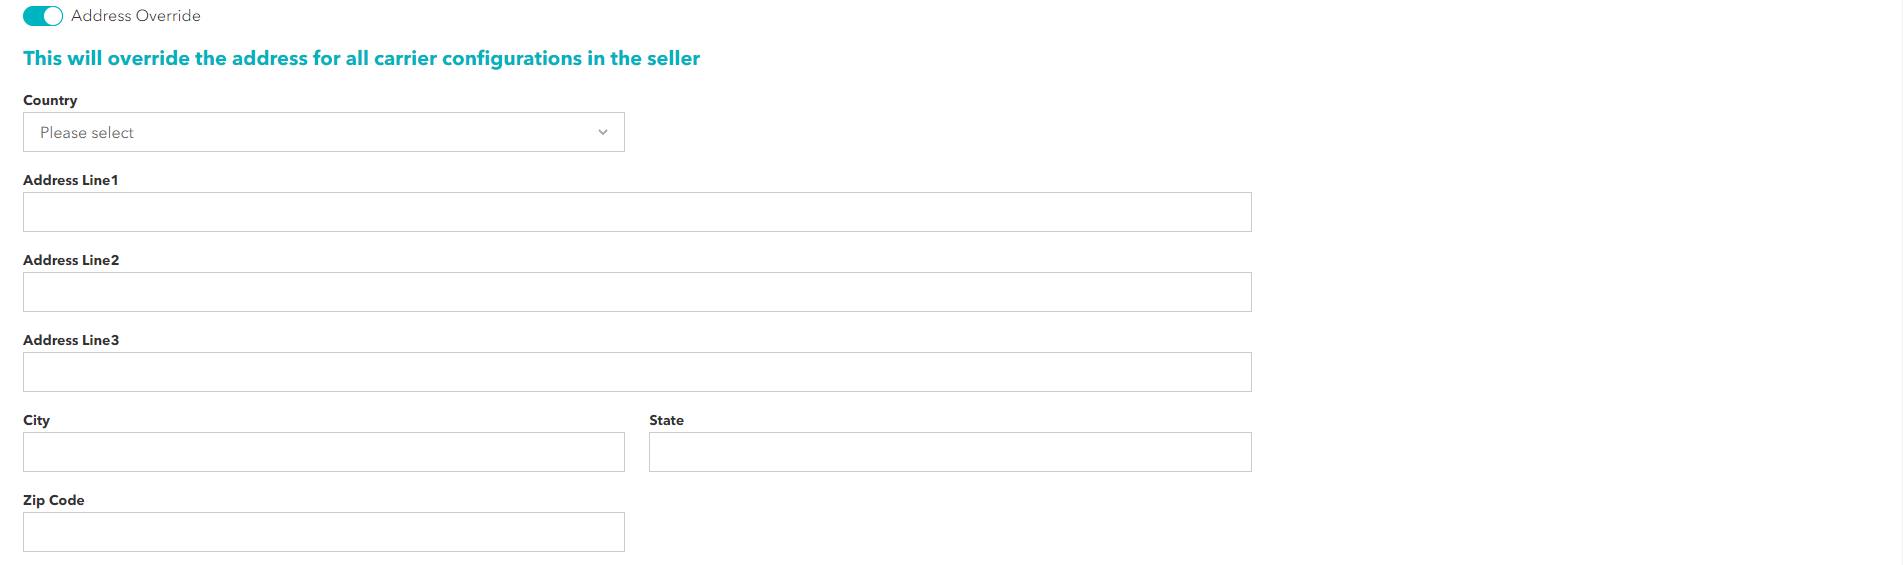
- If you want to use a single address for all carrier configurations for this Seller, activate the Address Override toggle. If not, click or tap the Save button. The Address Override fields appear.
- Select the country for this address from the dropdown. (The available countries are defined during launch.)
- Enter the address. You can enter up to three lines of address data.
- Enter the City.
- Select the State from the dropdown. Your selections change depending on the Country.
- Enter the Zip Code or Postal Code.
- Click or tap the Save button.

Add a Shipping Label Configuration: Fedex
To add a shipping label configuration for Fedex:
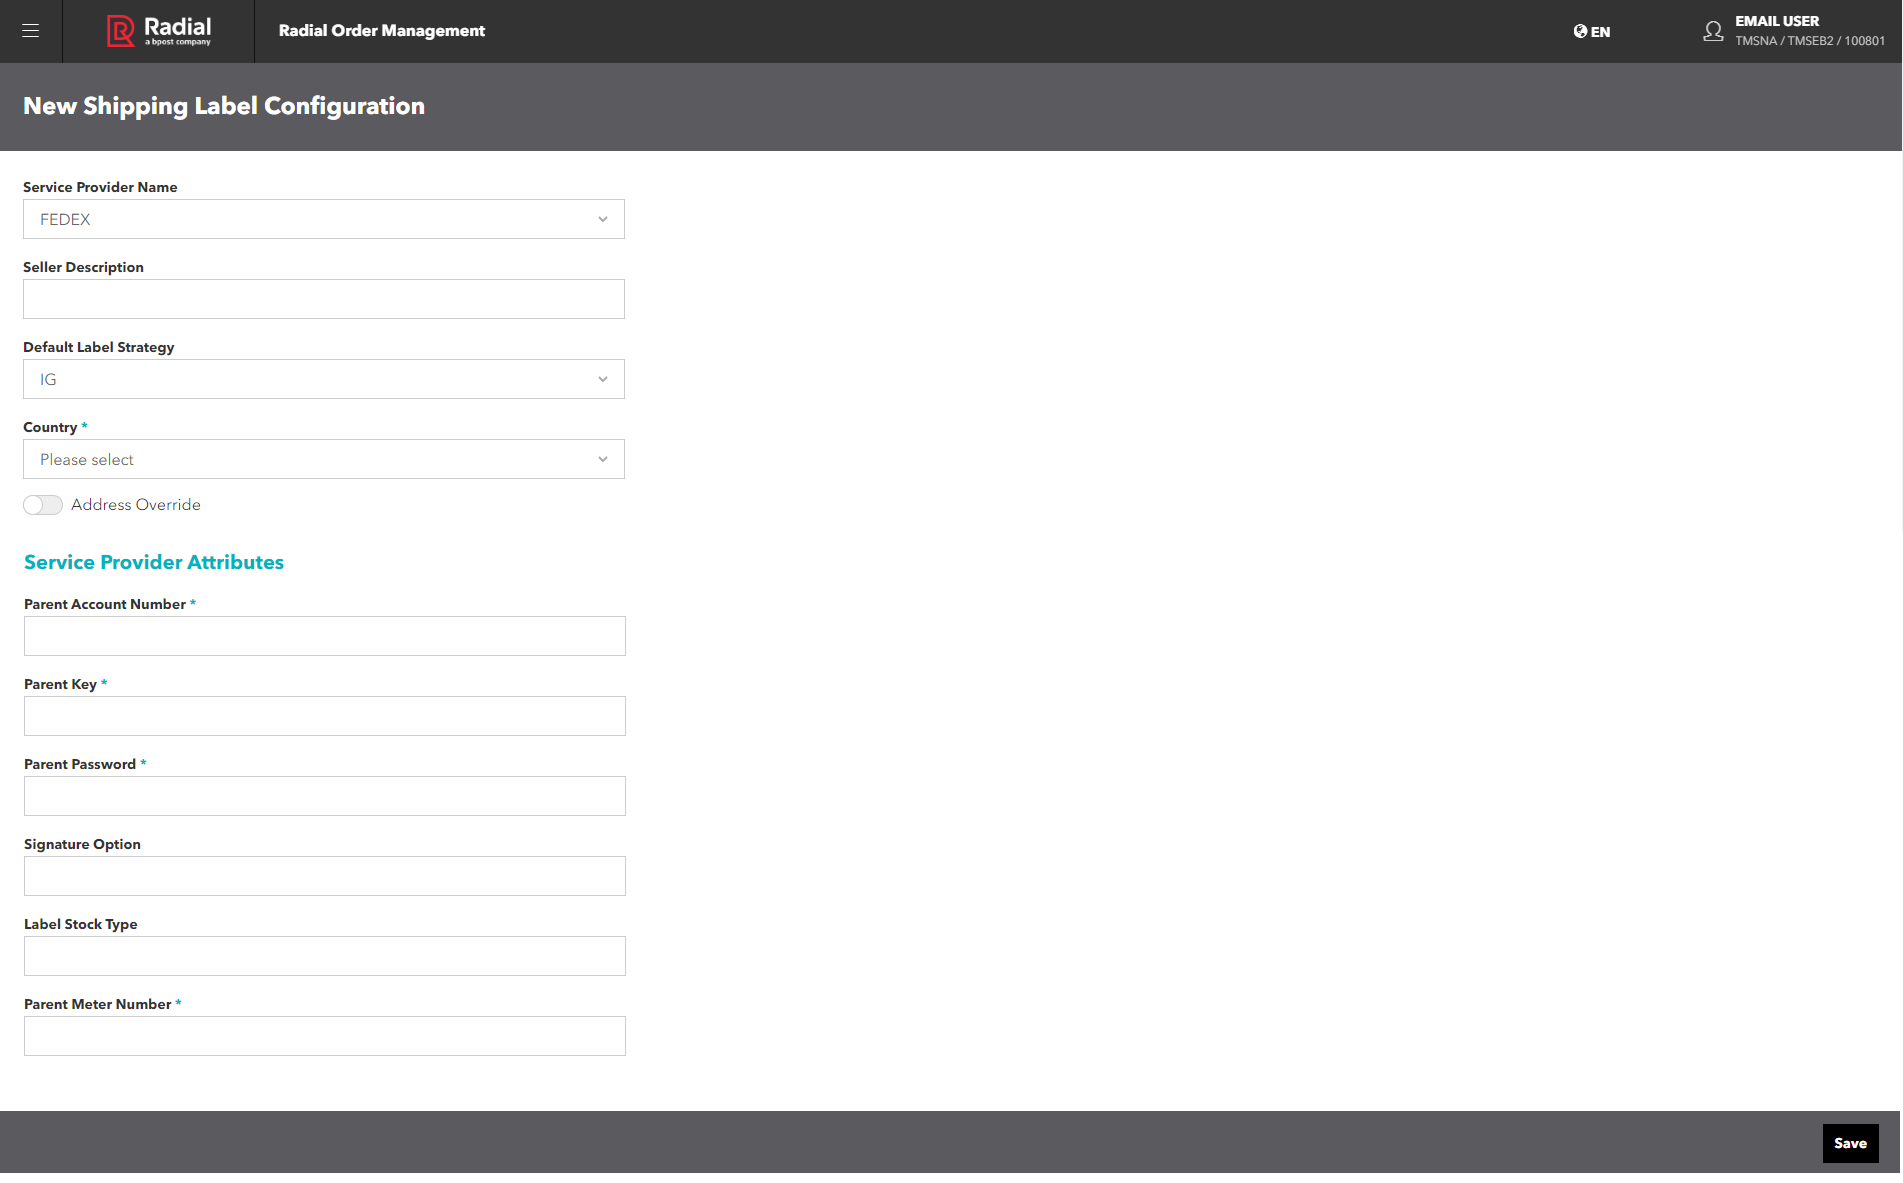
- From the Manage Shipping Label Configurations screen, click or tap the Add button. The New Shipping Label Configuration screen appears.
- In the Service Provider Name field, select Fedex from the dropdown. The Service Provider Attributes fields for Fedex appear.

- Enter a description.
- Select a Default Label Strategy from the dropdown.
- Select the Country that the shipping label configuration applies to.
- If you want to use a single address for all carrier configurations for this Seller, activate the Address Override toggle. If not, click or tap the Save button. The Address Override fields appear.
- Select the country for this address from the dropdown. (The available countries are defined during launch.)
- Enter the address. You can enter up to three lines of address data.
- Enter the City.
- Select the State from the dropdown. Your selections change depending on the Country.
- Enter the Zip Code or Postal Code.
- Complete the following fields:
- Parent Account Number: Your Seller's Fedex account number.
- Parent Key: The identifier that enables to access Fedex Web Services test and production environments.
- Parent Password: The identifier that enables you to access your Fedex Web Services account.
- Signature Option: The type of signature required for package delivery, including:
- Direct Signature Required
- Indirect Signature Required
- Adult Signature Required
- Label Stock Type: The type of paper stock used for the shipping label. Generally, this paper is adhesive on one side.
- Parent Meter Number: The identifier that FedEx uses to pull your negotiated shipping rates and to keep track of your tracking requests.
- Click or tap the Save button.
Add a Shipping Label Configuration: UPS
To add a shipping label configuration for UPS:
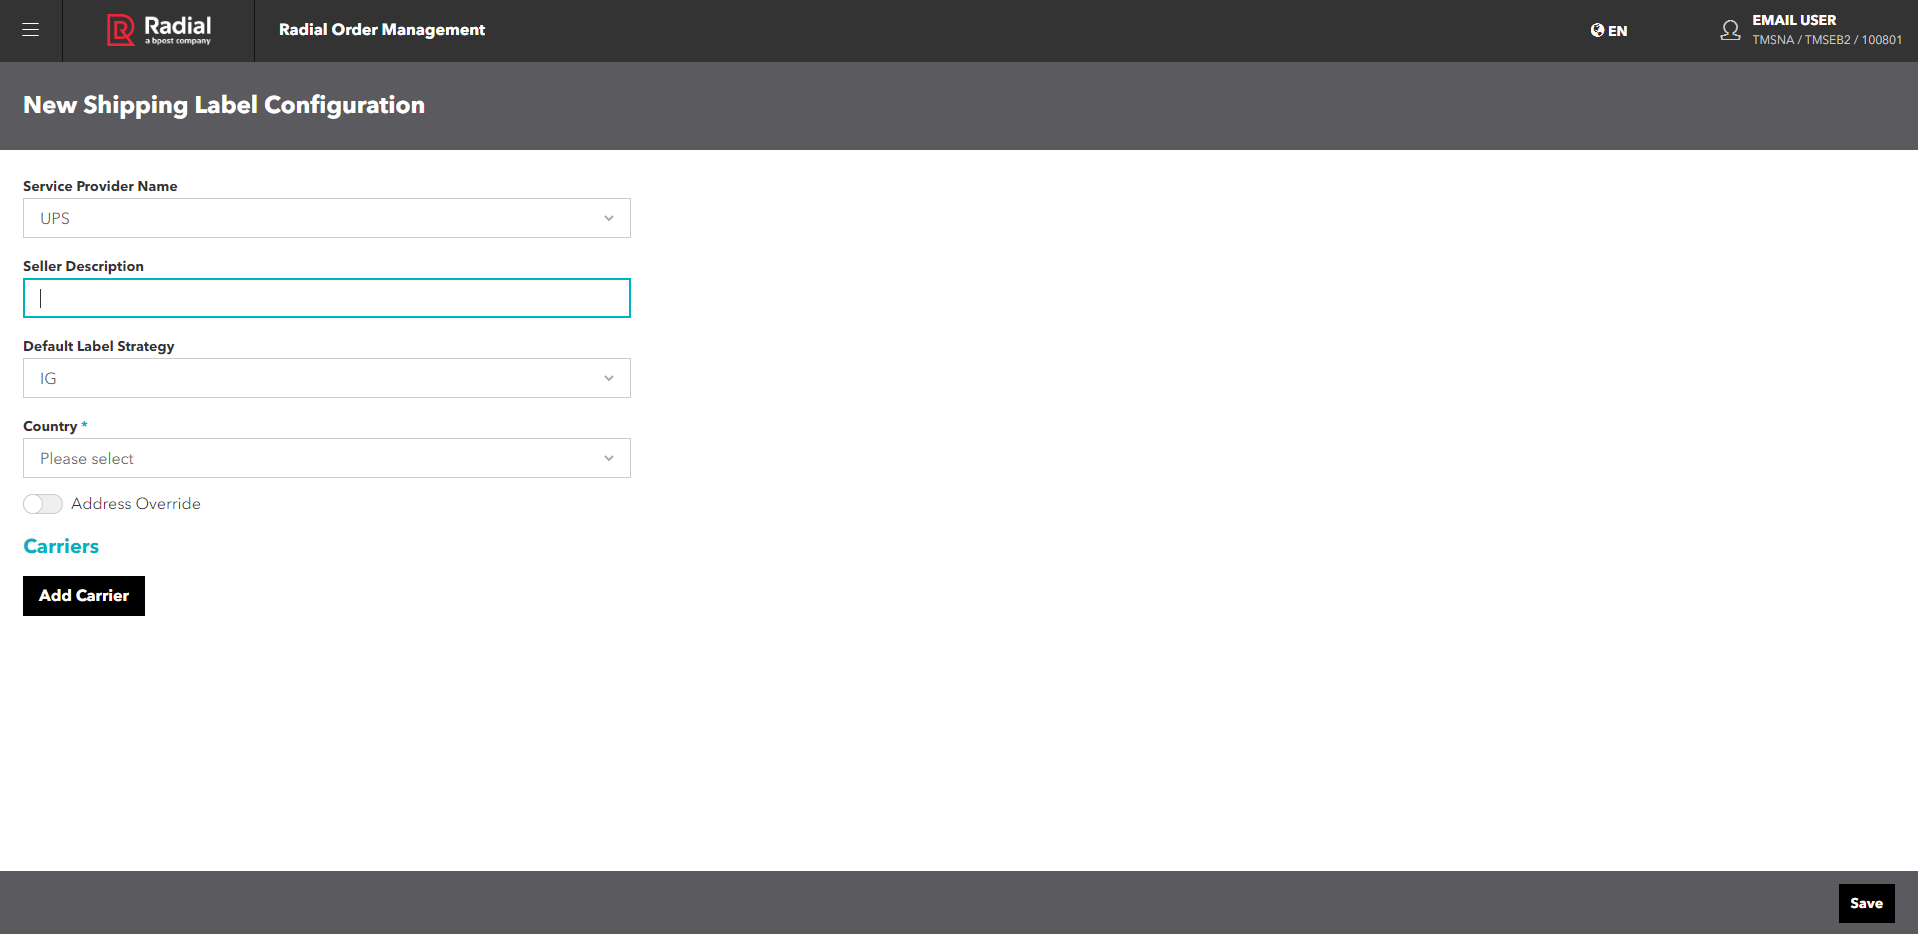
- From the Manage Shipping Label Configurations screen, click or tap the Add button. The New Shipping Label Configuration screen appears.
- In the Service Provider Name field, select UPS from the dropdown. The New Shipping Label Configuration screen appears, showing the Carriers section appears. In this section, you can add information about the types of UPS service that the Seller offers.

- Enter a description.
- Select a Default Label Strategy from the dropdown.
- Select the Country that the shipping label configuration applies to.
- If you want to use a single address for all carrier configurations for this Seller, activate the Address Override toggle. If not, click or tap the Save button. The Address Override fields appear.
- Select the country for this address from the dropdown. (The available countries are defined during launch.)
- Enter the address. You can enter up to three lines of address data.
- Enter the City.
- Select the State from the dropdown. Your selections change depending on the Country.
- Enter the Zip Code or Postal Code.
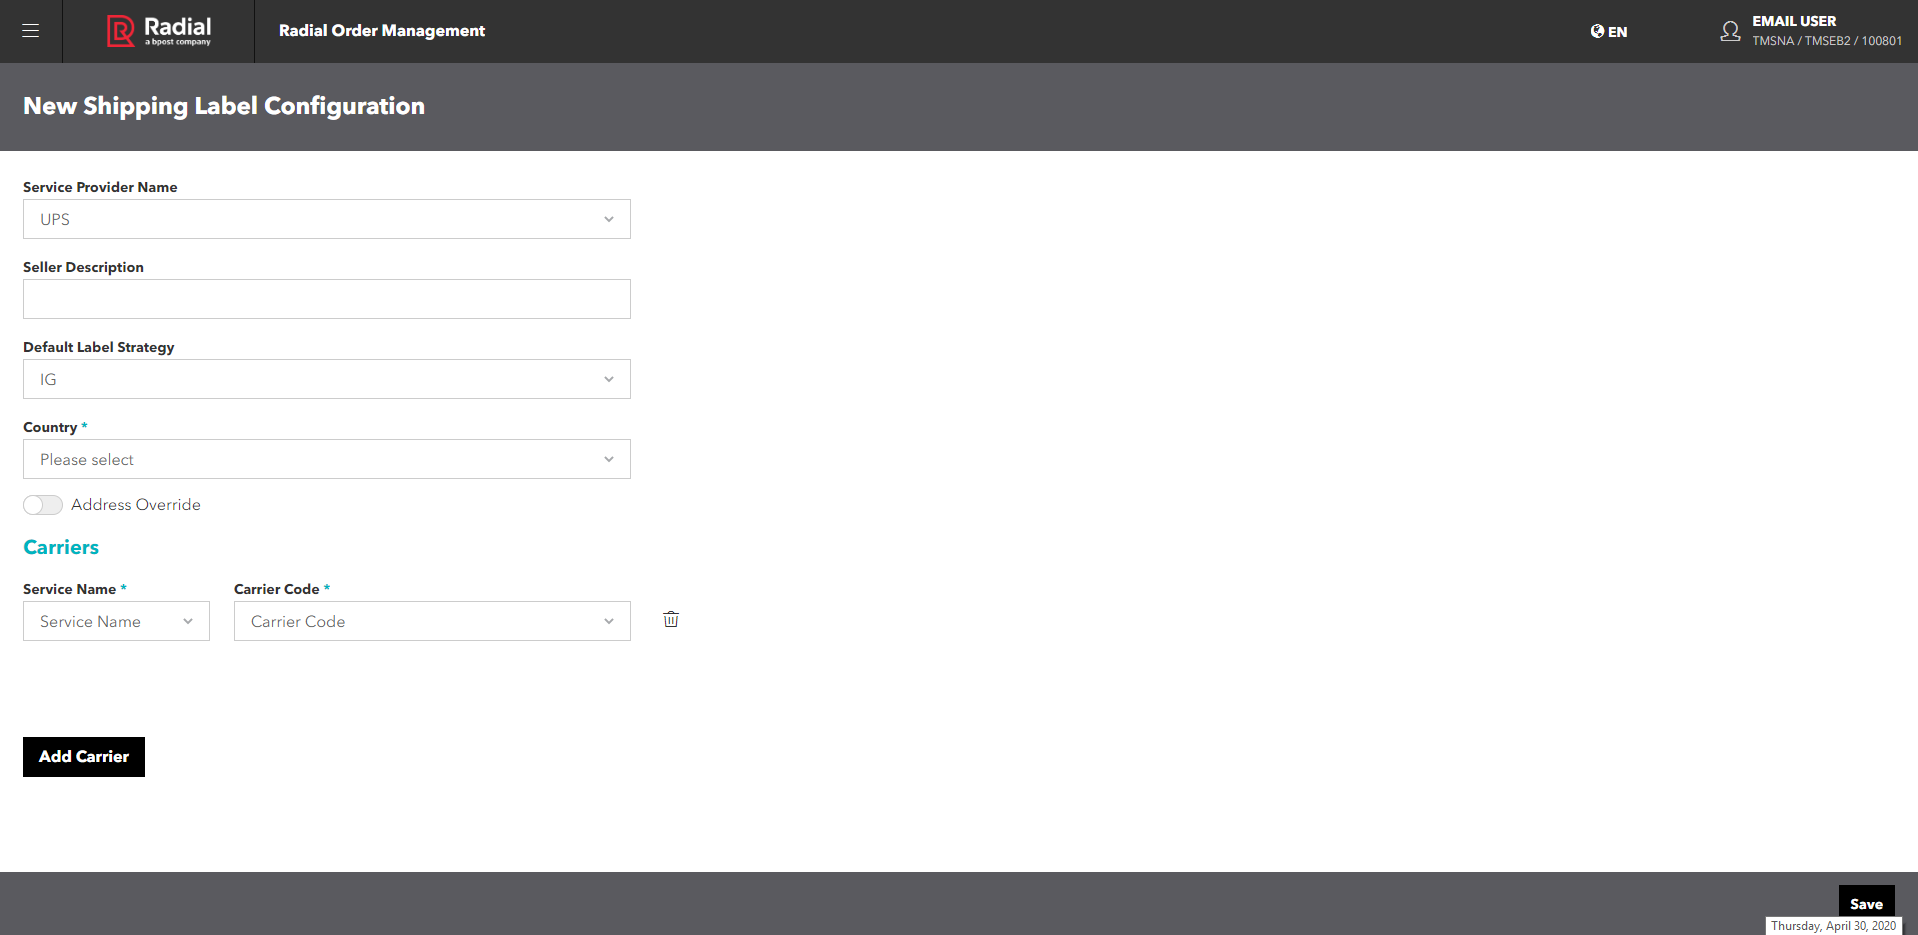
- To add a Carrier, click or tap the Add Carrier button. The Add Carrier fields appear.

- Select the Service Name from the dropdown:
- ANY_STD - Standard UPS service
- ANY_STS
 Ship-to Store. - Ship-to Store A fulfillment process in which orders are shipped to a retail store where shoppers can pick them up. Also called STS. See also ISPU. service
- Select the Carrier Code from the dropdown:
- 03 - UPS Economy - Specifies a ground shipping service.
- 03 - UPS Express - Specifies an air service.
- To add another carrier, click or tap the Add Carrier button. A new set of fields appears.
- To delete a carrier, click or tap the
 icon next to the Carrier that you want to delete.
 - Click or tap the Save button.
Edit a Shipping Label Configuration
To edit a Shipping Label Configuration:
- From the Manage Shipping Label Configurations screen, click or tap the icon for the Shipping Label Configuration that you want to edit. The Edit Shipping Label Configuration screen appears.
- Edit the fields as necessary.
You cannot edit the Service Provider Name field.
- When you have completed your edits, click or tap the Save button.