Manage Inventory Positions
To manage the inventory in your organization:
- Click or tap the
 icon in the upper-left corner. The Main Menu appears.
 - Click or tap Catalog & Inventory. The Catalog & Inventory submenu appears.
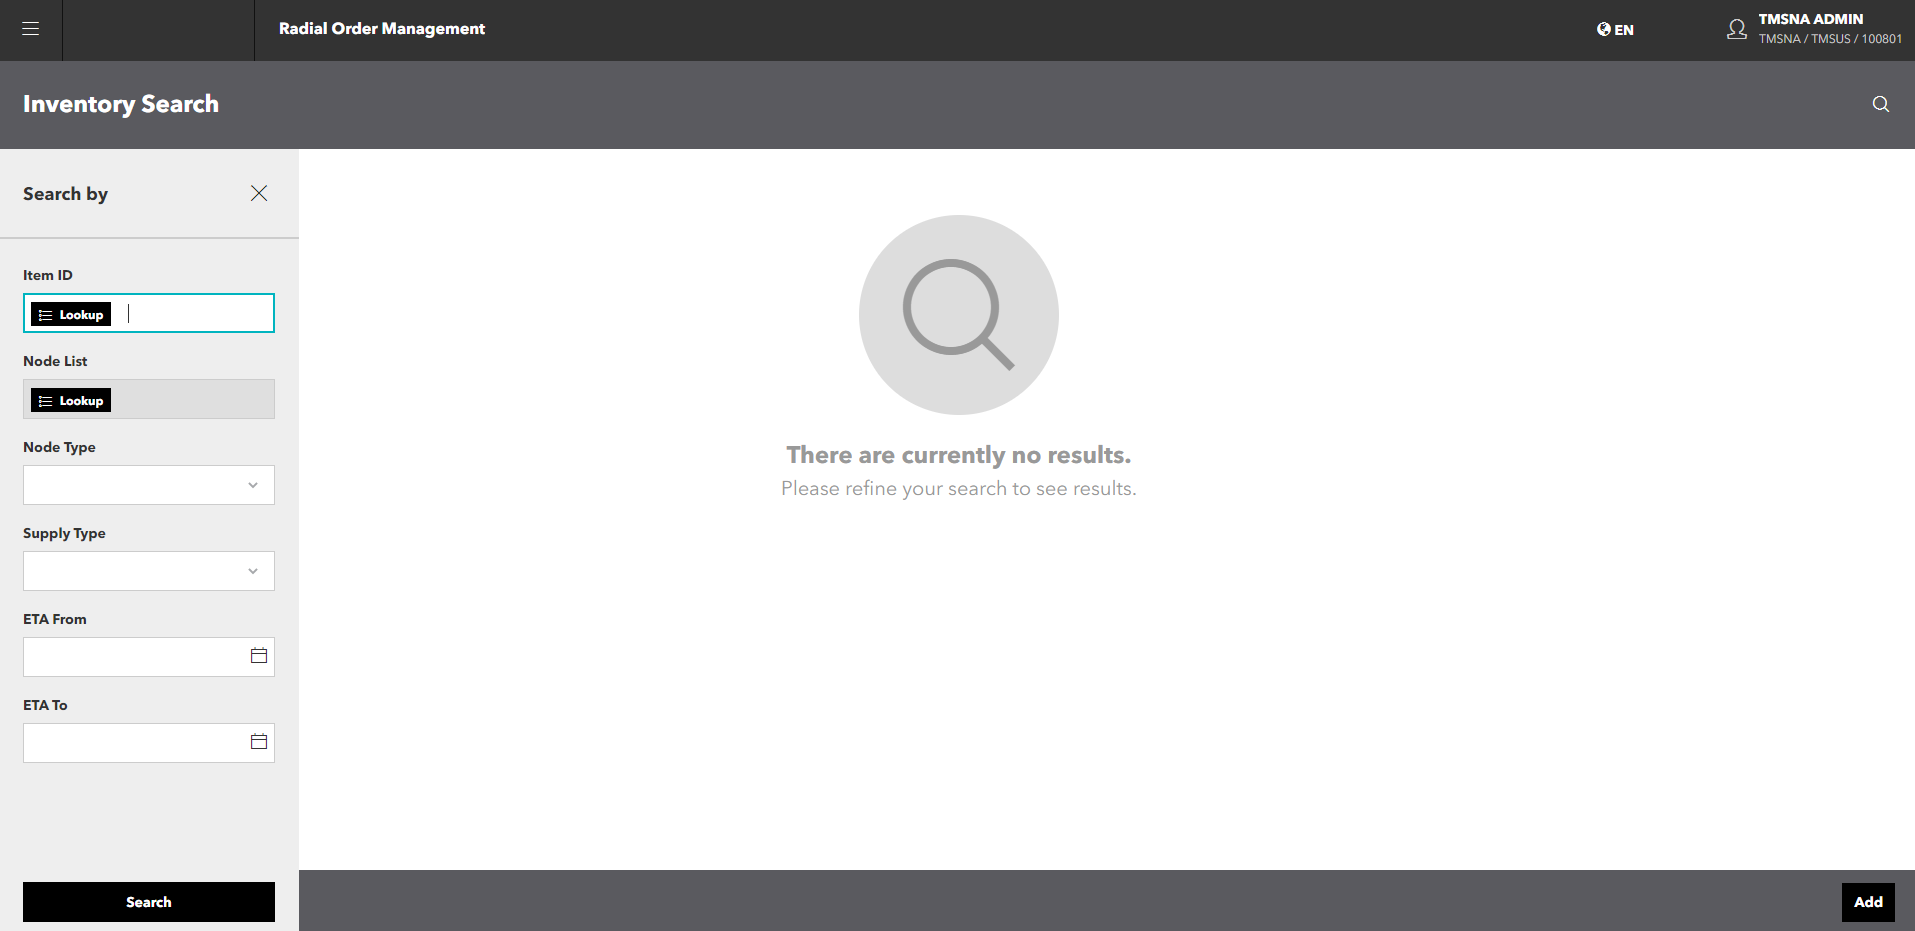
- Click or tap Inventory Search. The Inventory Search screen appears.

-
Enter a specific Item ID. If you don't know the Item ID:
- Click or tap the Lookup button. The Item Search popup appears.
- Enter a specific Item ID, a specific Vendor Partner ID, or a GII. You only need to enter the first few characters of the items that you want to search for.
- Click or tap the Search button.
- To narrow your search, click or tap the Show Advanced Search link. You can now also search by:
- Node
 A fulfillment location. Can be a distribution center, dropshipper, or retail store. List -- Click or tap the Lookup button to search for the list you want.
 - Node Type Indicates the kind of node; for example, Retail Store, Distribution Center, Dropshipper, and so on. -- Select the node type from the dropdown.
- Supply Type Identifies whether inventory is On Hand or Future Inventory (PO, INTRANSIT, and so on). -- Select the supply type from the dropdown.
- ETA From -- Click or tap the Calendar icon to select a date.
- ETA To -- Click or tap the Calendar icon to select a date.
- Node
- Click or tap the Search button. A list of the inventory positions appears.

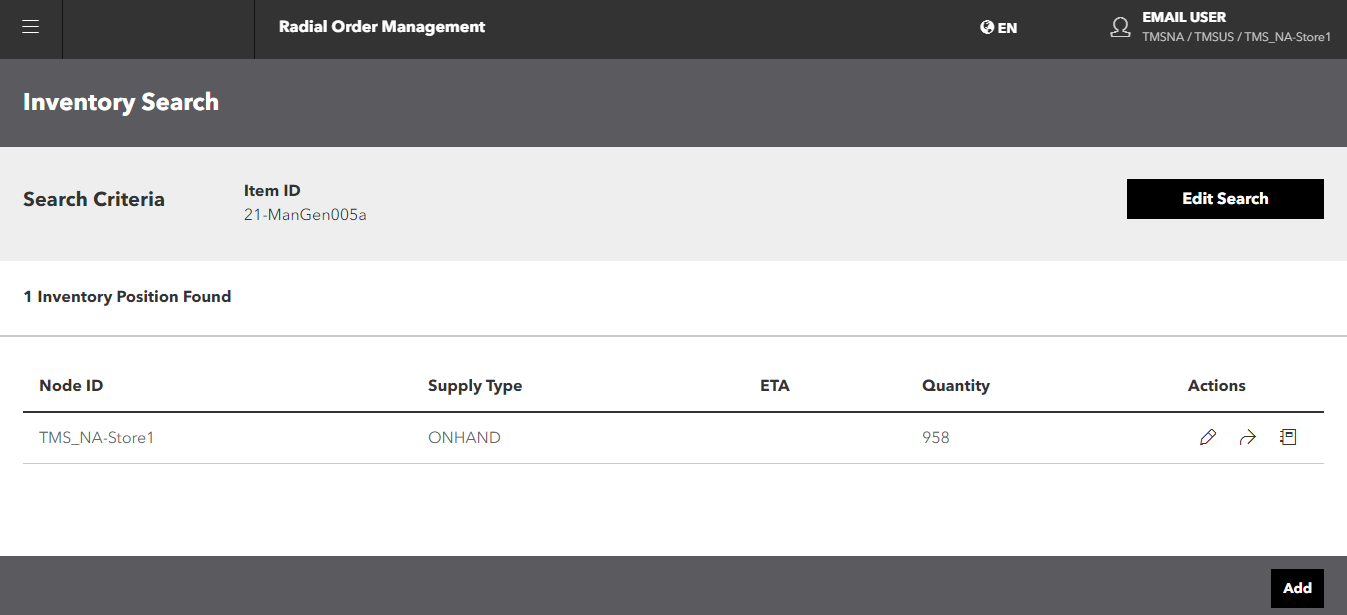
For each node listed on this screen, you can:
- Add new inventory to a node.
- Adjust inventory at a node.
- Move inventory from one node to another node.
- View inventory audits for each Node ID A unique name that identifies a specific node. in the list.
Add Inventory
To add inventory to a node:
- From the Inventory Search screen, click or tap the Add button in the Action Bar. The Add Inventory screen appears.

- Enter the Item ID of the item that you want to add to inventory.
If you don't know the Item ID, you can search for it.
- Click or tap the Lookup button in the Item field. An Item Search popup appears.
- Enter a specific Item ID, a specific Vendor Partner ID, or a GII. You only need to enter the first few characters of the items that you want to search for.
- Click or tap the Search button. A list of items that match your search criteria appear.
- Click or tap the Select link of the item that you want.
- Enter the Node ID of the node to receive the inventory.
If you don't know the Node ID, you can search for it.
- Click or tap the Lookup button in the Node field. An Inventory Nodes popup appears.
- To search for a node, complete the fields in the Search section, then click or tap the Search button.
- Click or tap the Select link of the node that you want.
- Select the Type from the dropdown.
- Enter the Quantity.
- Select a reason for adding this inventory from the dropdown.
- Click or tap the Save button. You return to the Inventory Search screen; a message banner indicates success or failure.

Adjust Inventory
To adjust the inventory at a node:
- From the Inventory Search screen, click or tap the
 icon. The Adjust Inventory screen appears.
- Select an Adjustment Type from the dropdown:
- Replace Quantity
- Increment Quantity
- Decrement Quantity
- Enter the Adjustment Quantity.
- Select a reason for the adjustment from the dropdown.
- Click or tap the Save button. You return to the Inventory Search screen; a message banner indicates success or failure.

Move Inventory
To move inventory from one node to another:
- From the Inventory Search screen, click or tap the
 icon. The Move Inventory screen appears.
-
The From Inventory section lists the inventory you want to move. You cannot change this.
- Enter the Node ID of the node to receive the inventory.
If you don't know the Node ID, you can search for it.
- Click or tap the Lookup button in the Node field. An Inventory Nodes popup appears.
- To search for a node, complete the fields in the Search section, then click or tap the Search button.
- Click or tap the Select link of the node that you want.
- Select the Supply The quantity of product that is currently available (On Hand supply) or will be available in the future (PO, INTRANSIT). Type from the dropdown.
- Enter the Quantity.
- Enter a Reason for moving this inventory.
- Click or tap the Save button. You return to the Inventory Search screen; a message banner indicates success or failure.

View Inventory Audits
To view inventory audits from the Inventory Search screen, click or tap the ![]() icon. The Inventory Audits screen appears.
icon. The Inventory Audits screen appears.
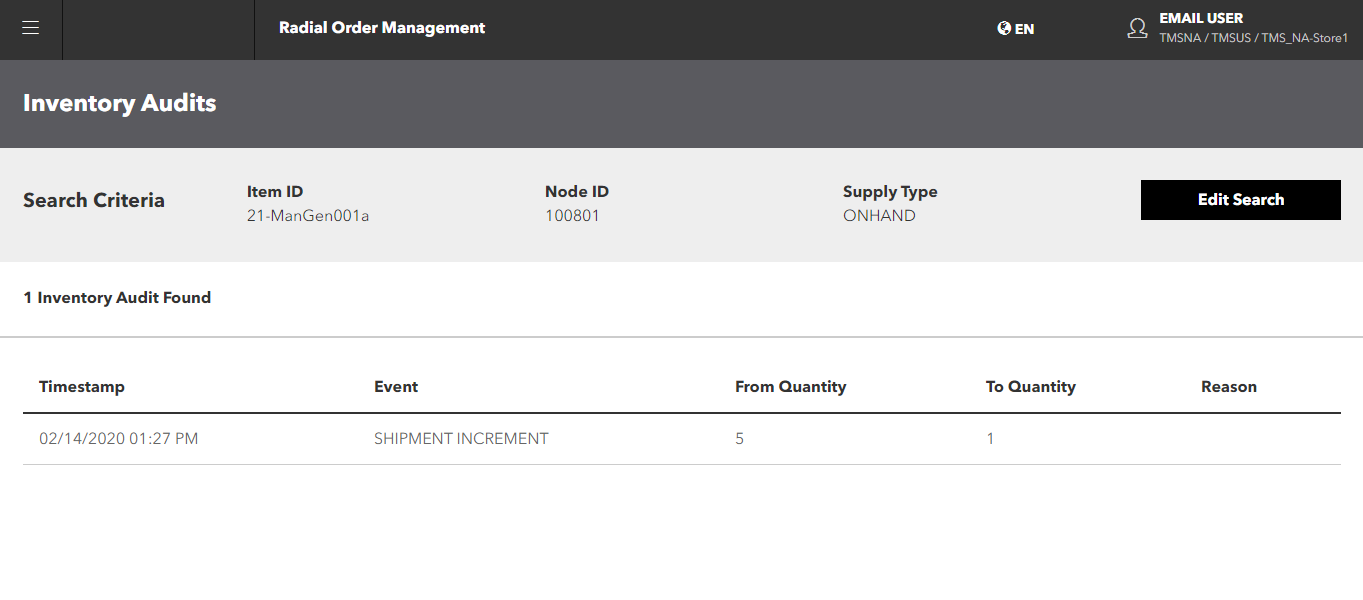
This screen shows a list of the inventory changes that have been made for the Item and Node you specified on the Omnichannel Inventory Positions screen. You cannot change the entries on the list.
To see Inventory Audits for a different Item and/or Node, use the Search function.
- Enter the Item ID.
- Enter the Node ID of the node to receive the inventory.
If you don't know the Node ID, you can search for it.
- Click or tap the Lookup button in the Node field. An Inventory Nodes popup appears.
- To search for a node, complete the fields in the Search section, then click or tap the Search button.
- Click or tap the Select link of the node that you want.
- Select the Supply Type from the dropdown.
- To search by dates, click the Show Advanced Search link.
- Enter the From Date. To search for a date, click the Calendar icon.
- Enter the To Date. To search for a date, click the Calendar icon.
- Click or tap the Search button.