Manage ATP Rules
Available to Promise![]() The quantity of inventory that can be used to fulfill orders on or before a specific date. (ATP
The quantity of inventory that can be used to fulfill orders on or before a specific date. (ATP![]() The quantity of inventory that can be used to fulfill orders on or before a specific date. Also called Available to Promise.) rules determine what Supply
The quantity of inventory that can be used to fulfill orders on or before a specific date. Also called Available to Promise.) rules determine what Supply![]() The quantity of product that is currently available (On Hand supply) or will be available in the future (PO, INTRANSIT). and Demand are considered for ATP inventory calculations. As an administrator, you can set up, edit, and delete ATP rules.
The quantity of product that is currently available (On Hand supply) or will be available in the future (PO, INTRANSIT). and Demand are considered for ATP inventory calculations. As an administrator, you can set up, edit, and delete ATP rules.
To configure ATP rules:
- Click or tap the
 icon in the upper-left corner. The Main Menu appears.
 - Click or tap Omni Administration. The Omni Administration submenu appears.
- Click or tap Inventory Availability. The Inventory Availability submenu appears.
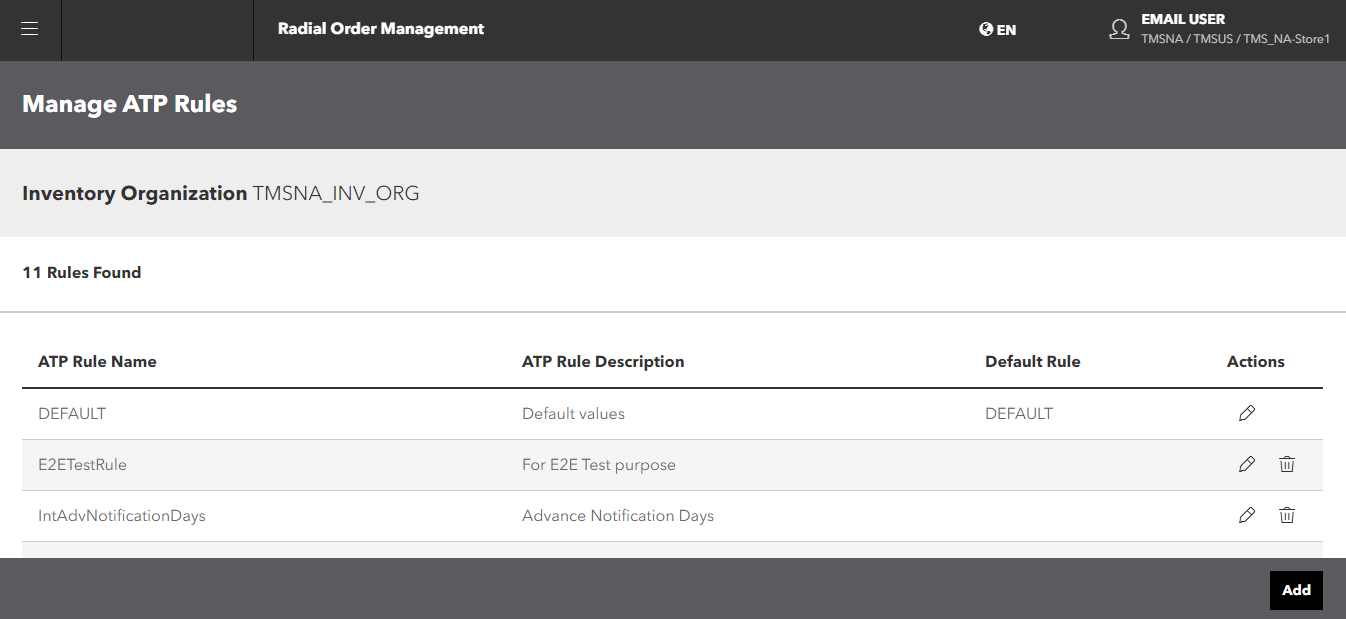
Click or tap ATP Rules. The Manage ATP Rules screen appears.
From this screen, you can edit or delete existing rules, or add a new rule.
Delete a Rule
- To delete a rule, click or tap the
 icon in the Actions column of the rule that you want to delete. The systems prompts you to confirm the deletion.
 - Click or tap the Confirm button to delete the rule; otherwise, click the Back button on your browser.
If you delete a rule, you cannot recover it. You must recreate it.
Edit a Rule
- To edit a rule, click or tap the
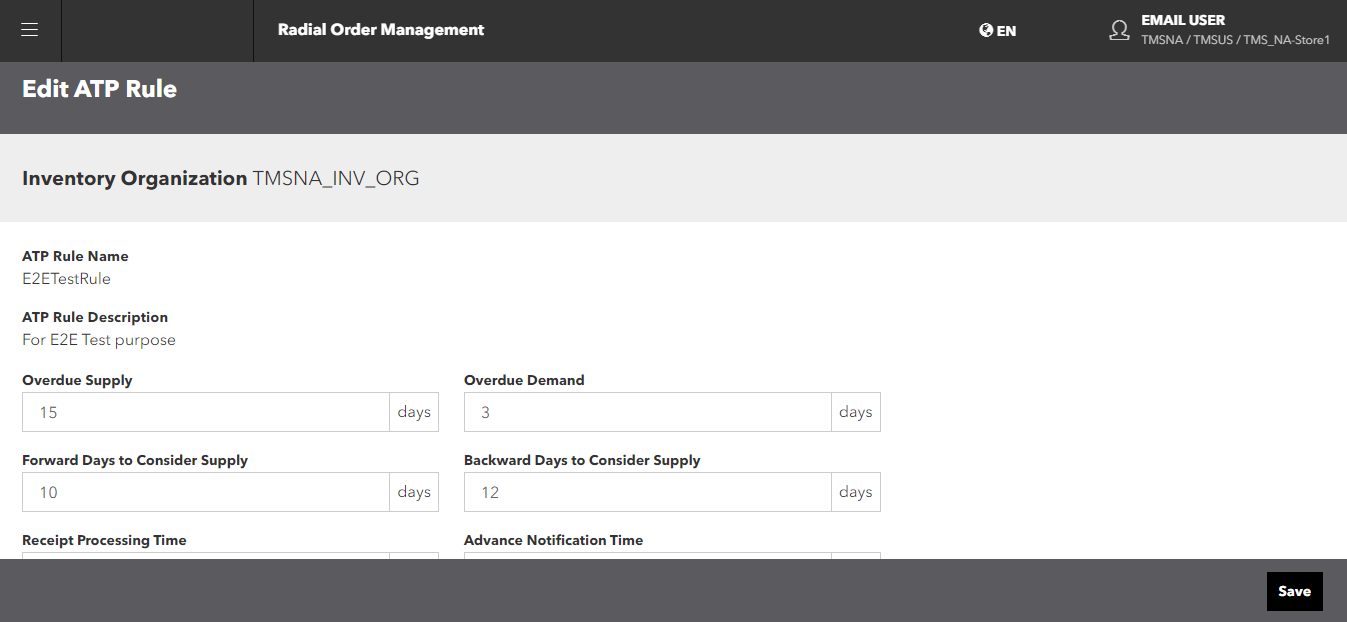
 icon in the Actions column of the rule that you want to modify. The Edit ATP Rule screen appears.
- You can update the following optional fields:
- Overdue Supply
 Supply, usually in the form of a purchase order, for which the expected arrival date is in the past (earlier than current date).: Supply, usually in the form of a purchase order, for which the expected arrival date is in the past (earlier than current date). If a Supply is not received after the configured Overdue Supply days, it's no longer considered for ATP calculations. For example, if Overdue Supply is set to two days, a supply with the Expected Arrival Date of 11/28/2018 that is not received is no longer considered for ATP calculations starting from 12/01/2018.
 - Overdue Demand Demand with an expected ship date in the past (earlier than the current date).: Demand with an expected ship date in the past (earlier than the current date). Any demand that is past due for the number of days specified in the Overdue Demand parameter is not considered for ATP calculations. For example, if Overdue Demand is set to two days, a demand with the Expected Ship Date of 11/28/2018 is longer considered for ATP calculations starting from 12/01/2018. Overdue Demand should be configured as a high number to consider all past open demand including back ordered.
- Forward Days to Consider Supply The number of days future Supply can be considered to fulfill a Demand.: The number of days future Supply can be considered to fulfill a Demand.
- Backward Days to Consider Supply The number of days to go back and check for available Supply for a Demand.: The number of days to go back and check for available Supply for a Demand. Demands are matched against the supply available on the same day. If there is not enough inventory available to fulfill the order that day, you can allow the system to consume inventory that was available several days back. You can determine how far back the system can check for available inventory before looking forward.
- Receipt Processing Time The number of days required to process receipt of a product at the inventory node. The processing time is added to the product arrival date to determine Available Date when the received merchandise is available for sale.: The number of days required to process receipt of a product at the inventory node. The processing time is added to the product arrival date to determine Available Date when the received merchandise is available for sale.
- Advance Notification Time The number of days in advance that a node needs to be notified to prepare an order for shipment.: The number of days in advance that a node needs to be notified to prepare an order for shipment.
You cannot change the ATP Rule Name or ATP Rule Description.
- Overdue Supply
- When you finish modifying the rule, click or tap the Save button.
Add a Rule
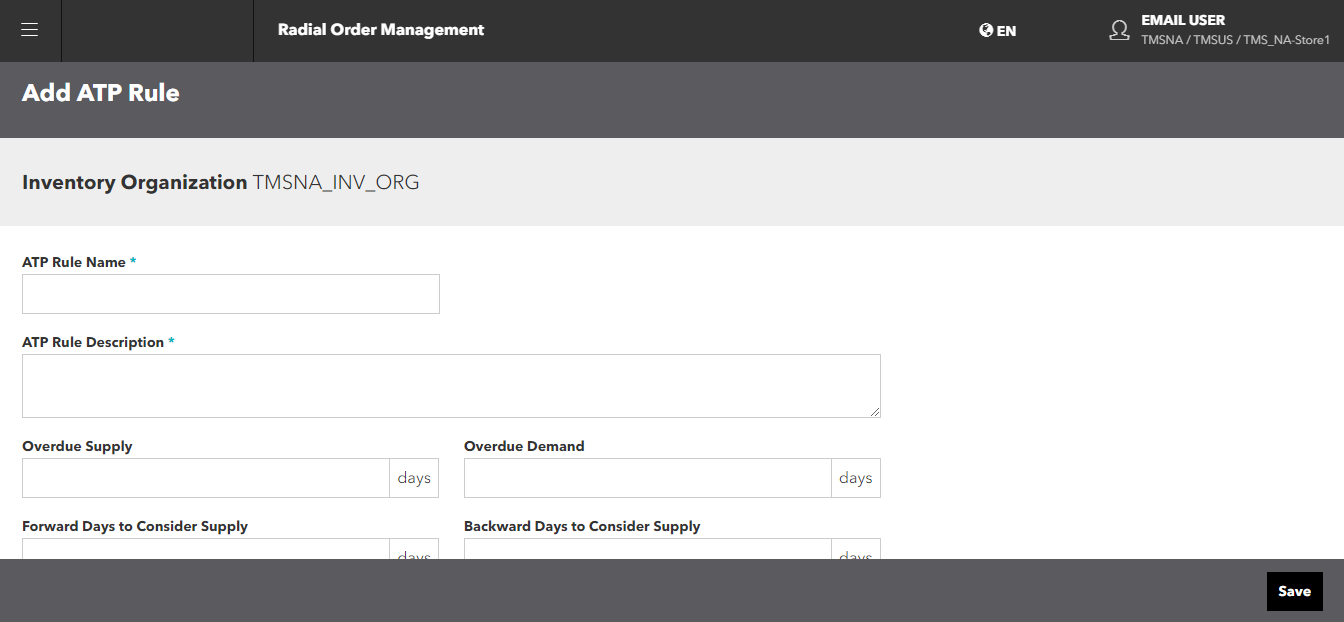
- To add a new rule, click or tap the Add button on the ATP rules screen. The Add ATP Rule screen appears.
- Enter a name and description for the new rule.
You cannot change the name or description once you've saved the rule.
- Enter the values that you want for the following fields:
- Past Due Supply Days
- Past Due Demand Days
- Forward Consumption
- Backwards Consumption
- Receipt Processing Days
- Advance Notification Time
- Click the Save button on the Action bar.