Manage Node Groups
A node group is a set of nodes that share certain characteristics. You can use node groups to:
- Create logical groupings to use in your sourcing rules. For example, you might create a node group named Retail Stores in US48 that contains all the store in the lower 48 states. You might do this to explicitly exclude Alaska, Hawaii, and Puerto Rico because those states have different sourcing requirements.
- Use the ATP
 The quantity of inventory that can be used to fulfill orders on or before a specific date. Also called Available to Promise. by Seller A seller is part of an organization. It can represent a sales channel, geographic region, or line of business. Organizations can have more than one seller, but a seller can have only one organization. feature. Consider enabling this feature only if you sell in multiple countries, share the same product catalog across multiple countries, and have sourcing restrictions on where order lines can be sourced from based on the seller webstore that originated the order. See Configure ATP by Seller for details.
Initially, Node![]() A fulfillment location. Can be a distribution center, dropshipper, or retail store. Groups are configured and implemented at launch; however, you may need to modify a group or create a new one.
A fulfillment location. Can be a distribution center, dropshipper, or retail store. Groups are configured and implemented at launch; however, you may need to modify a group or create a new one.
To manage node groups:
- Click or tap the
 icon in the upper-left corner. The Main Menu appears.
 - Click or tap Omni Administration. The Omni Administration submenu appears.
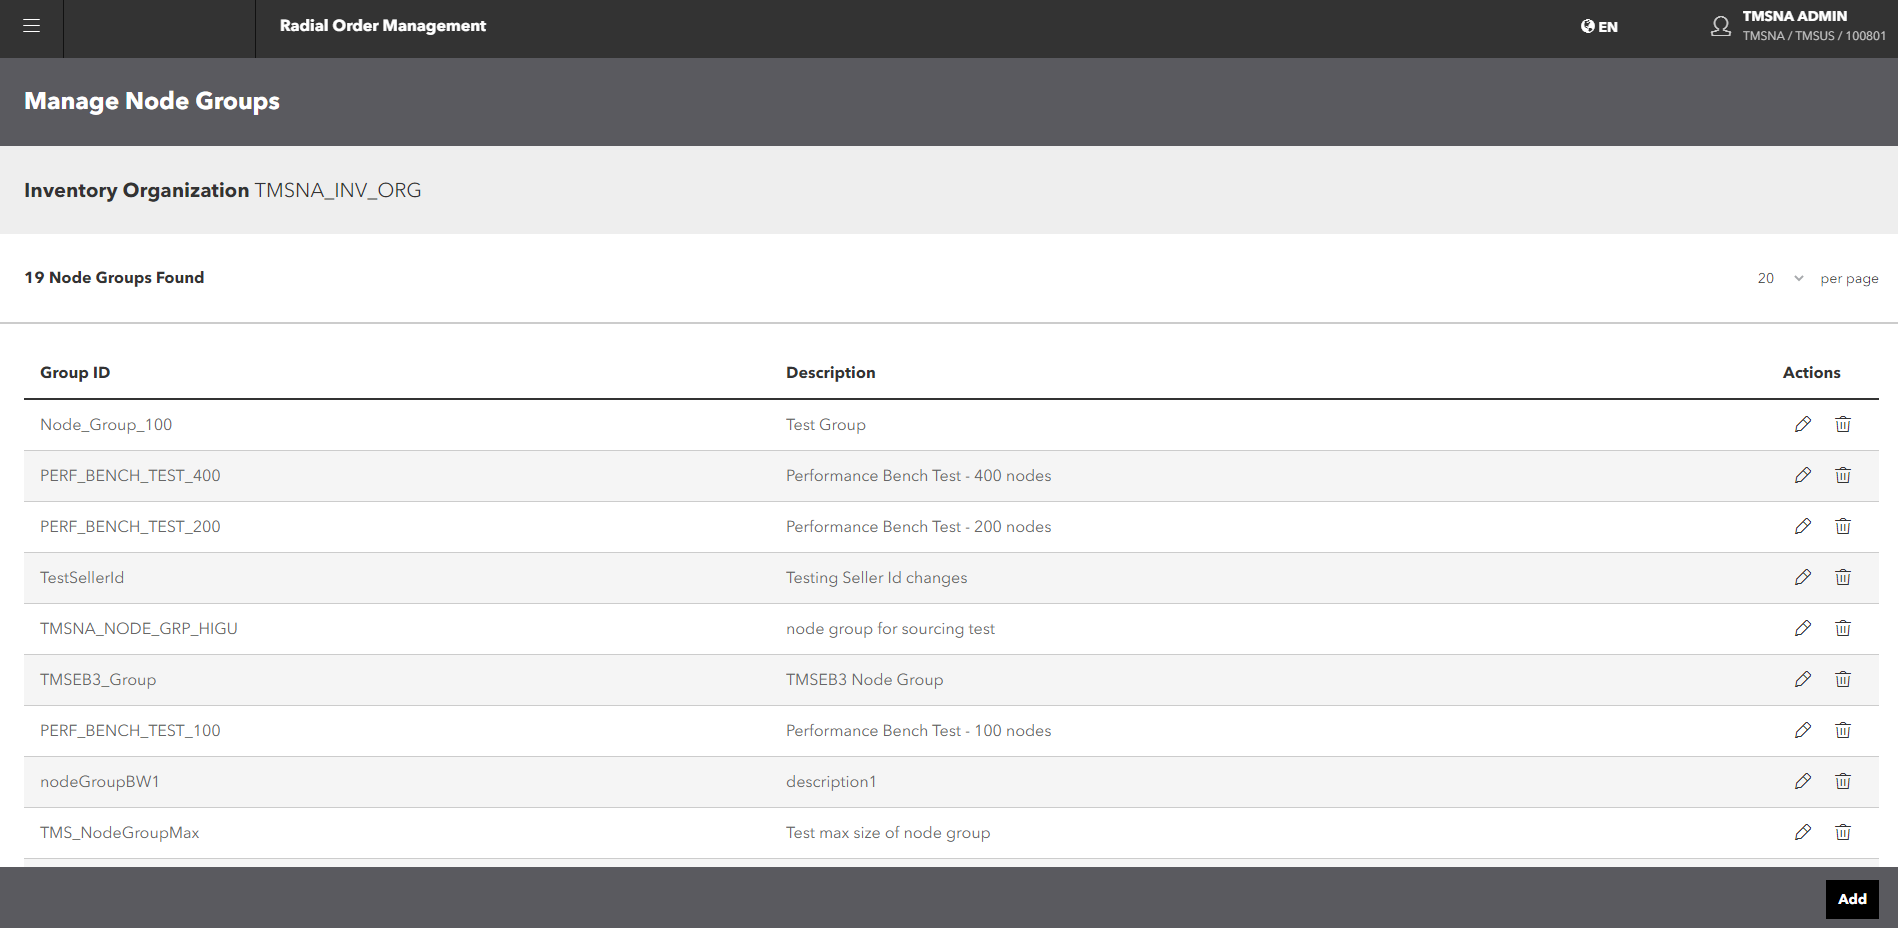
- Click or tap Fulfillment Node Group A set of fulfillment nodes that share inventory. Typically, the nodes in a node group are located in the same region.. The Manage Node Groups screen appears.

From this screen, you modify, delete, or add a node group.
Add a Node Group
Important: In Step 3 of this procedure, enter a Seller ID only if you are using the ATP by Seller feature. If you are not using this feature, leave this field blank. For details on the ATP by Seller feature, see About Safety Stock and Available to Promise Inventory.
To add a node group:
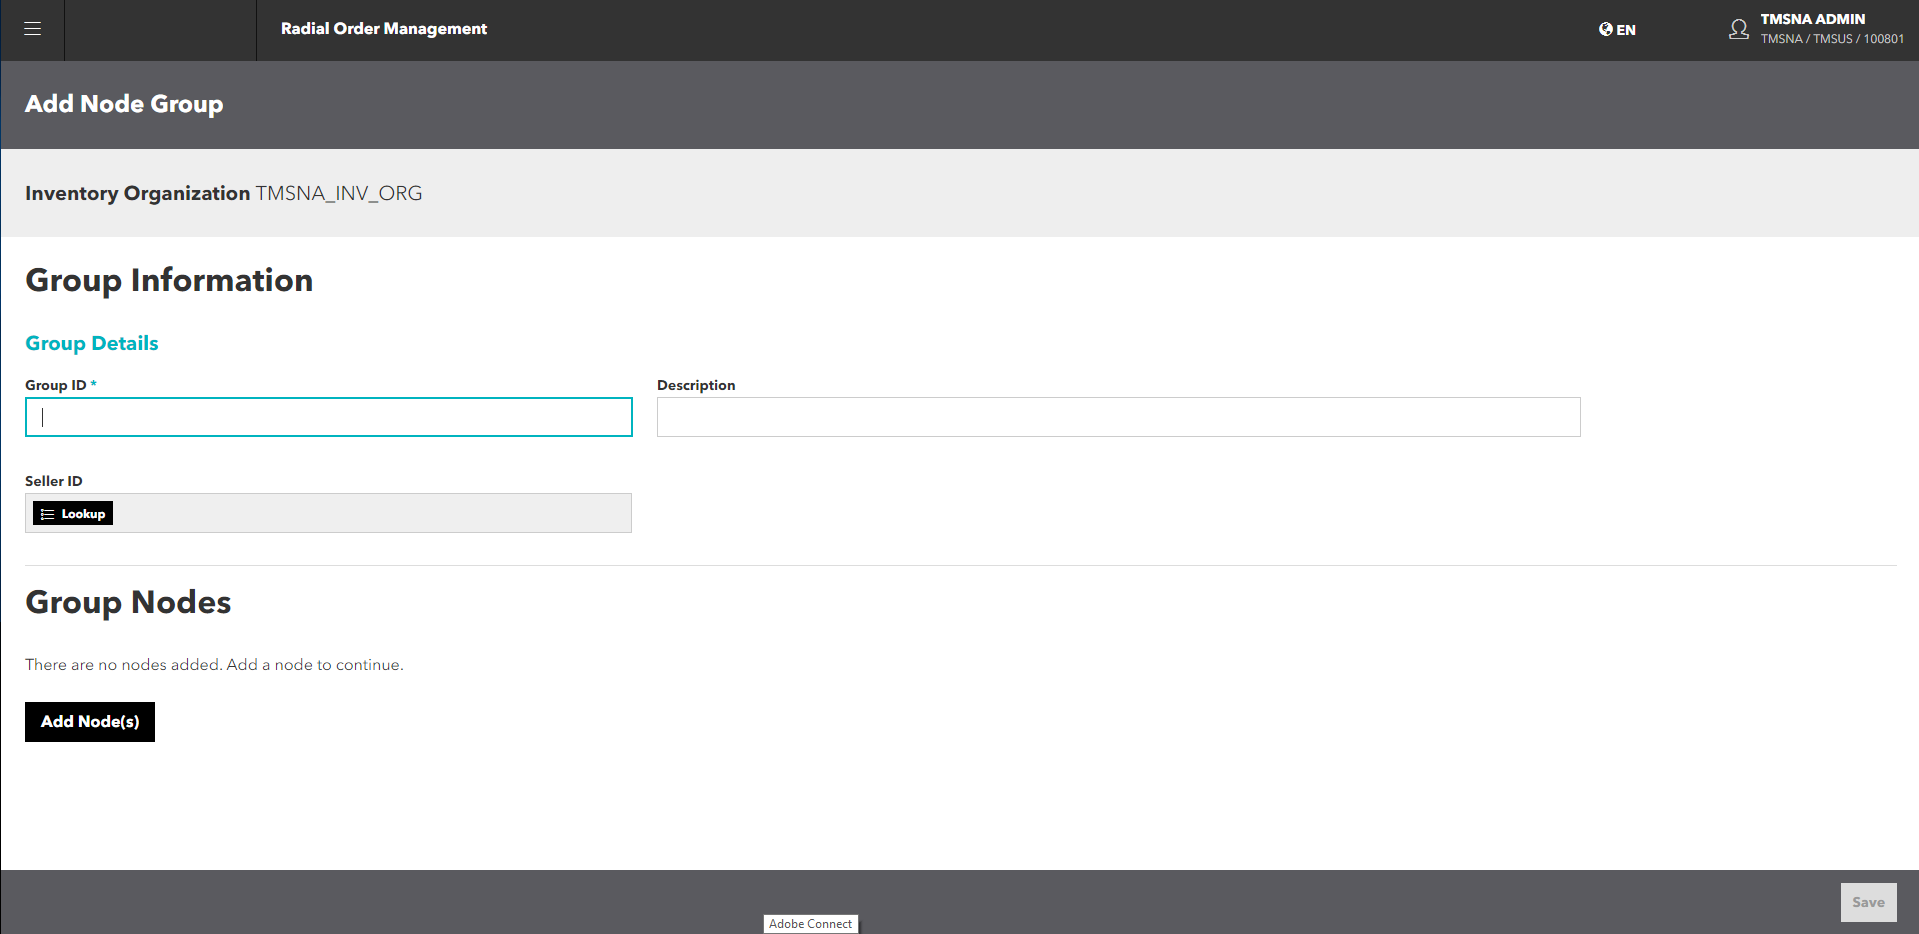
- From the Manage Node Groups screen, click or tap the Add button. The Add Node Group A collection of fulfillment nodes screen appears.

- In the Group Information section, enter a Group ID and Description for the new group.
- If you are using the ATP by Seller feature, look up and enter the Seller ID. Click or tap the Lookup button, then select the Seller ID from the pop-up screen. Remember: If you are not using this feature, leave the Seller ID field blank.
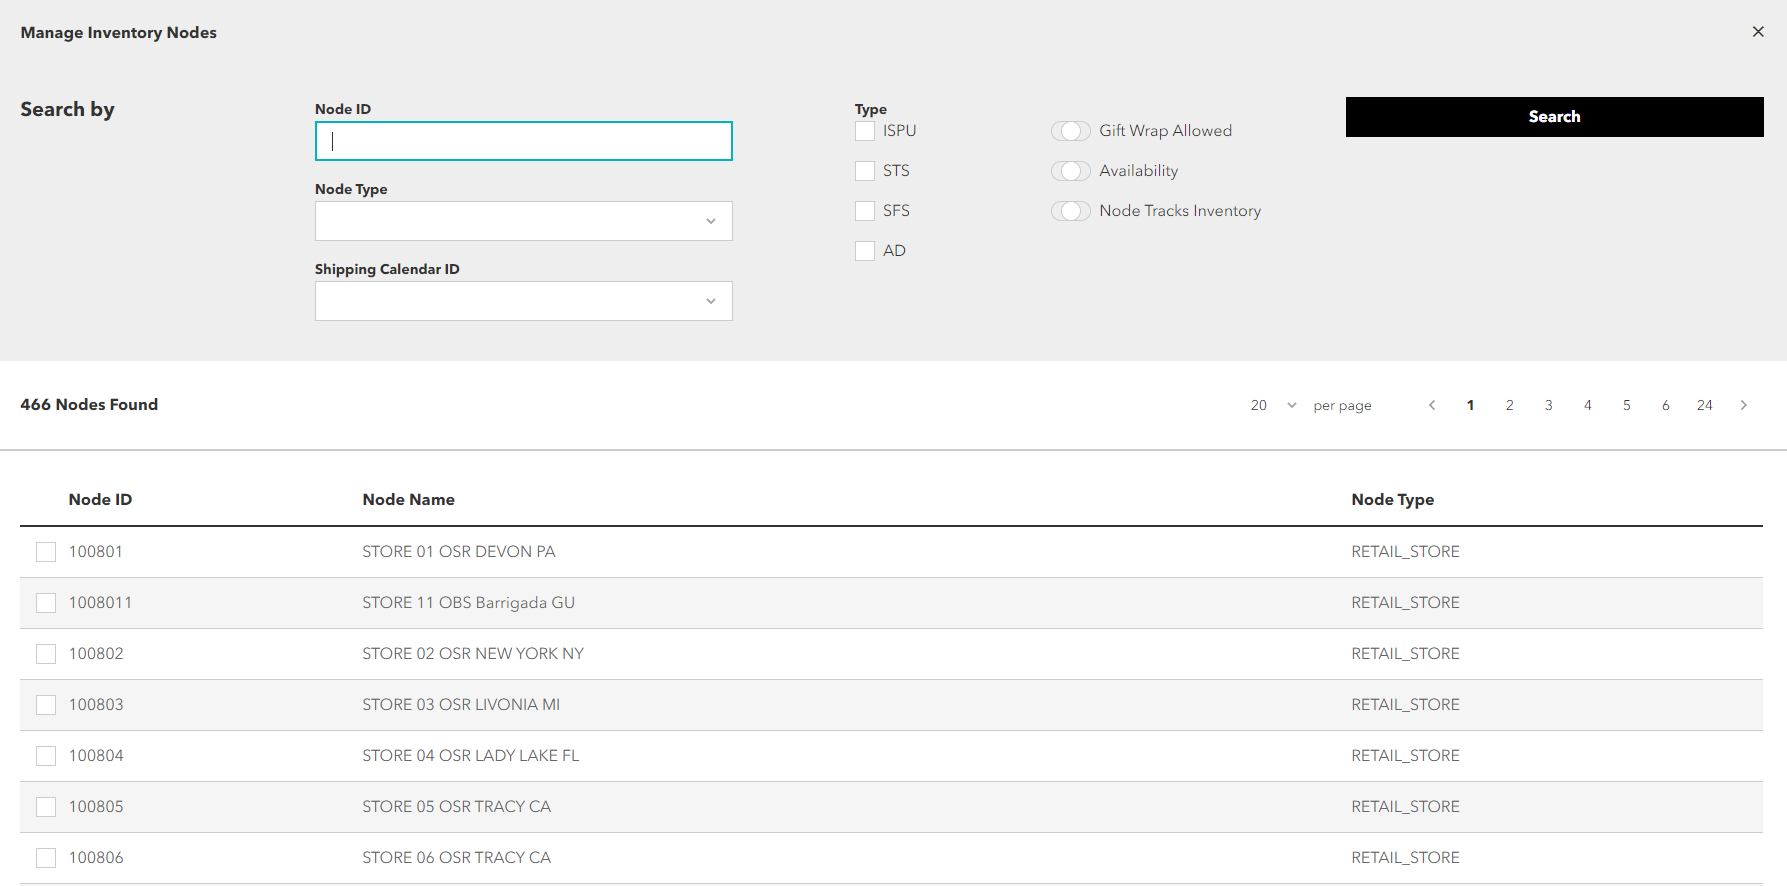
- Because this is a new group, you must add nodes to it. Click or tap the Add Node(s) button. The Manage Inventory Nodes popup appears.

- To select the nodes that you want to add to the new group, click or tap the checkboxes next to the Node ID A unique name that identifies a specific node..
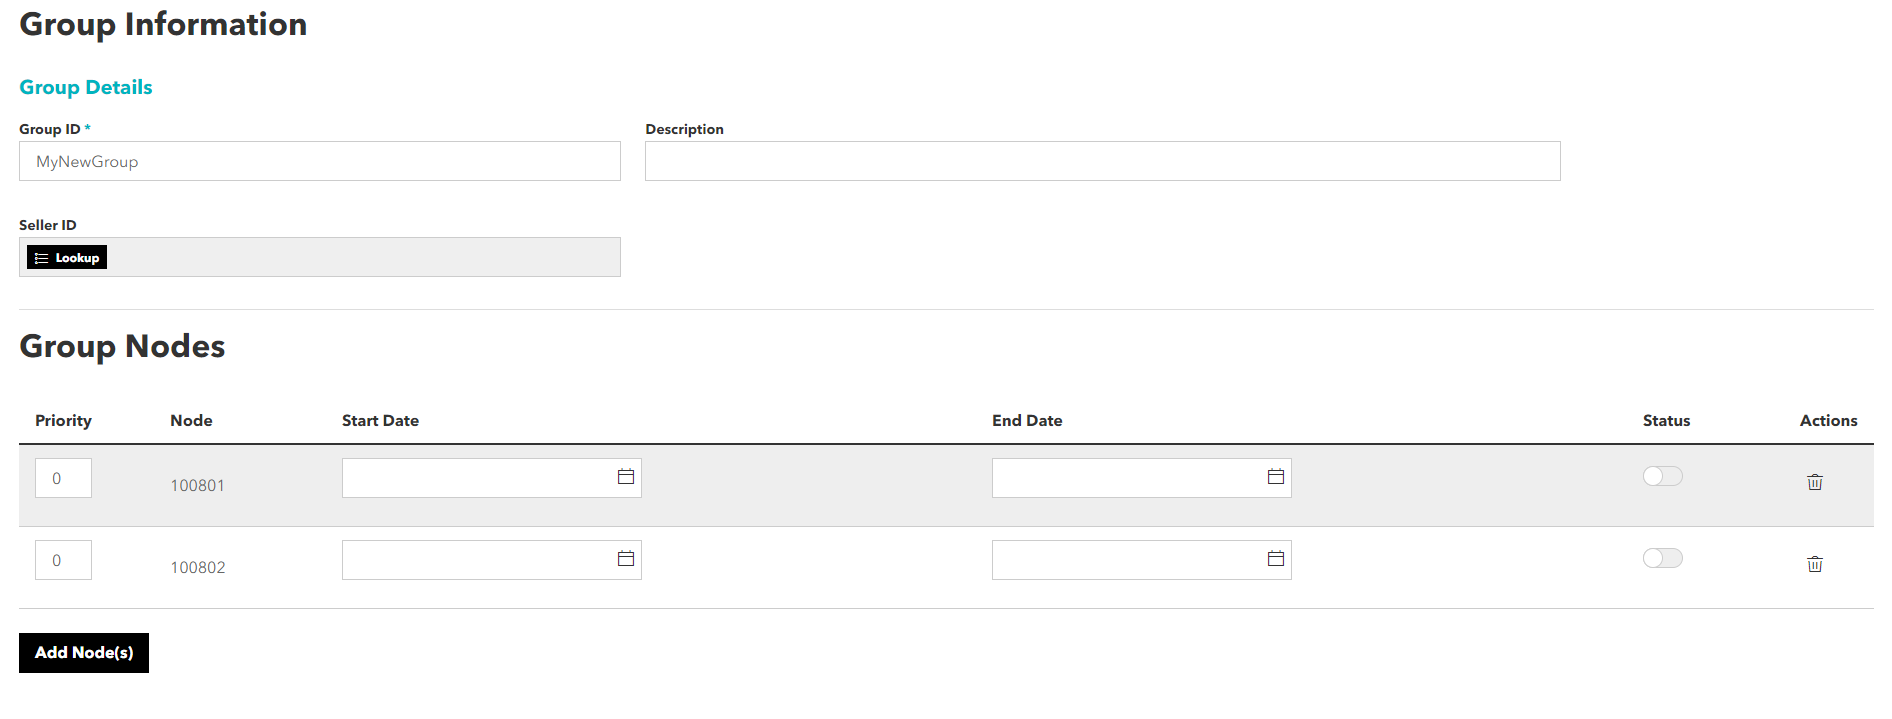
- Click or tap the Select button in the Action Bar. You return to the Add Node Group screen. The screen now shows your selections.

- Enter the following information for each node in the new group:
- Priority: Specifies the order that the system uses in sourcing an order.
- Start Date and End Date: Specifies the time period that the node can be used.
- Status: Specifies whether the node is active.
The Status field on the Node Group screen is not active at this time; however, best practice is to enable the status on this page for all nodes. If you do not want to include a node in the ATP calculations for the seller, then delete it from this page.
- Click or tap the Save button in the Action Bar.
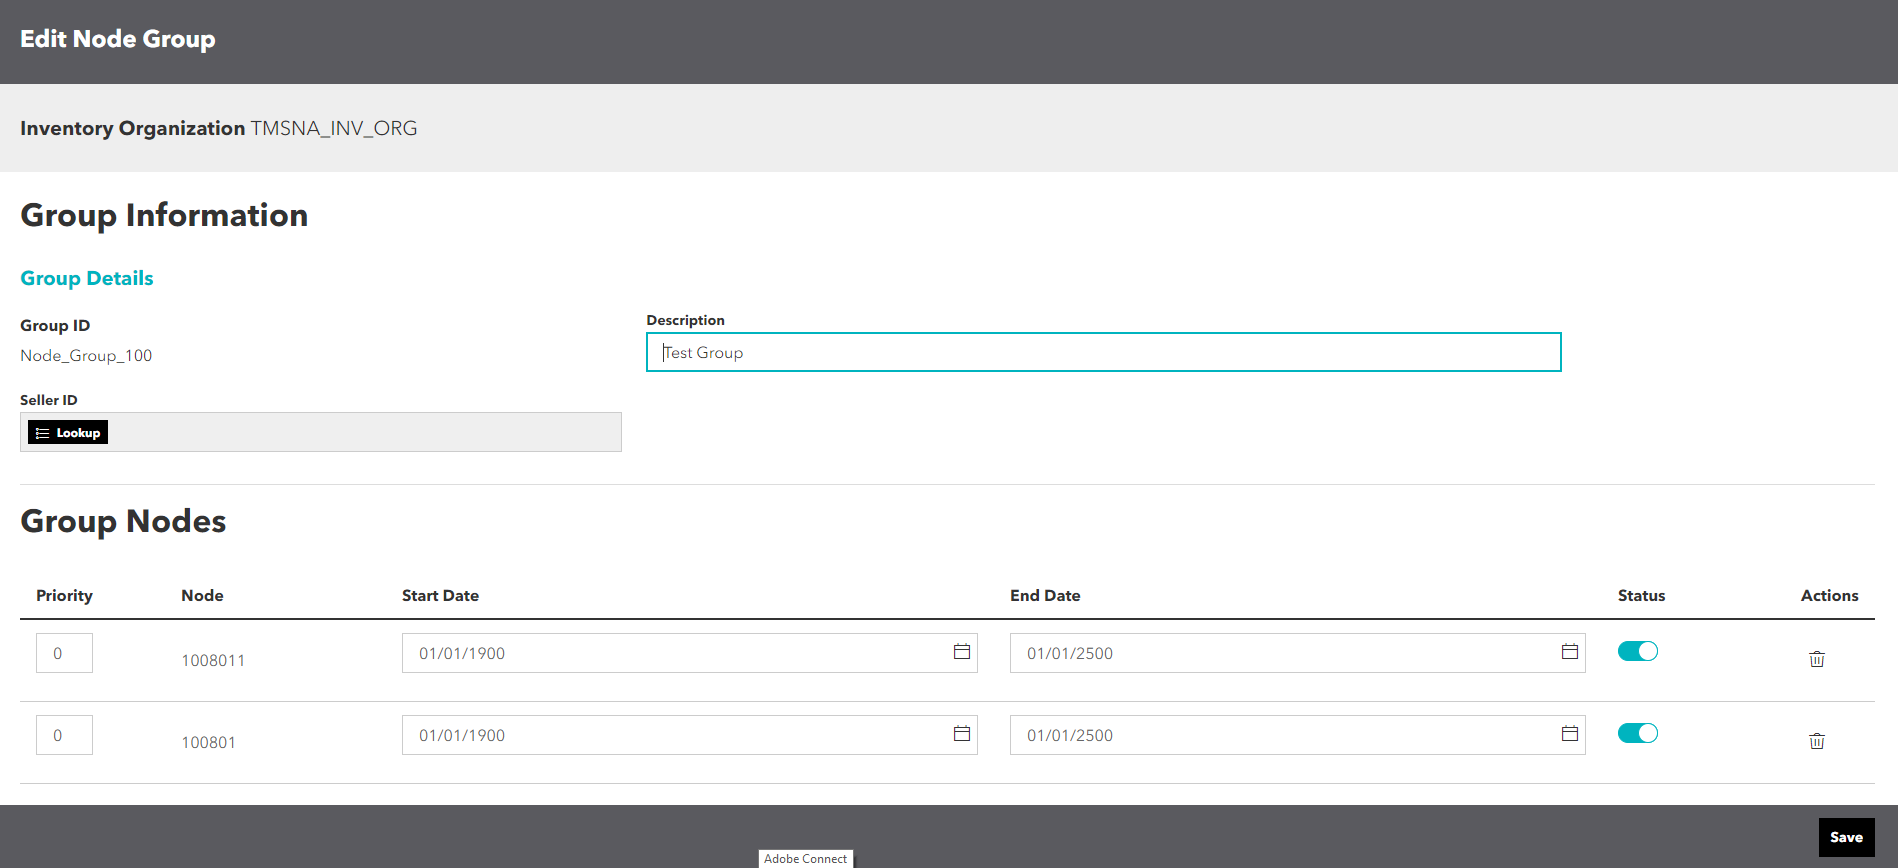
Edit a Node Group
- To edit a node group, click or tap the
 icon. The Edit Node Group screen appears.
- You can edit the following:
- Description
- Priority
- Start Date and End Date
- Status
The Status field on the Node Group screen is not active at this time; however, best practice is to enable the status on this page for all nodes. If you do not want to include a node in the ATP calculations for the seller, then delete it from this page.
- When you finish your edits, click or tap the Save button in the Action Bar.
You can also delete a node from the group and add additional nodes to the group.
Delete a Node Group
- To delete a node group, click or tap the
 icon. A confirmation dialog appears.
 - To delete the group, click or tap Continue; to cancel the deletion, click or tap Cancel.
You cannot undo this action. If you delete a group accidentally, you must recreate it from scratch.