View, Add, and Import Receiving Details
You can use the ROM user interface to view, add, and upload receiving details from WMS. This feature gives you added visibility into warehouse receiving transactions.
Note: This feature is only available to Radial Easy Deployment (RED) clients with catalogs of fewer than 1,000 SKUs. You must have the appropriate permissions to access and use this feature.
View Receiving Details
To view receiving details for your inventory:
-
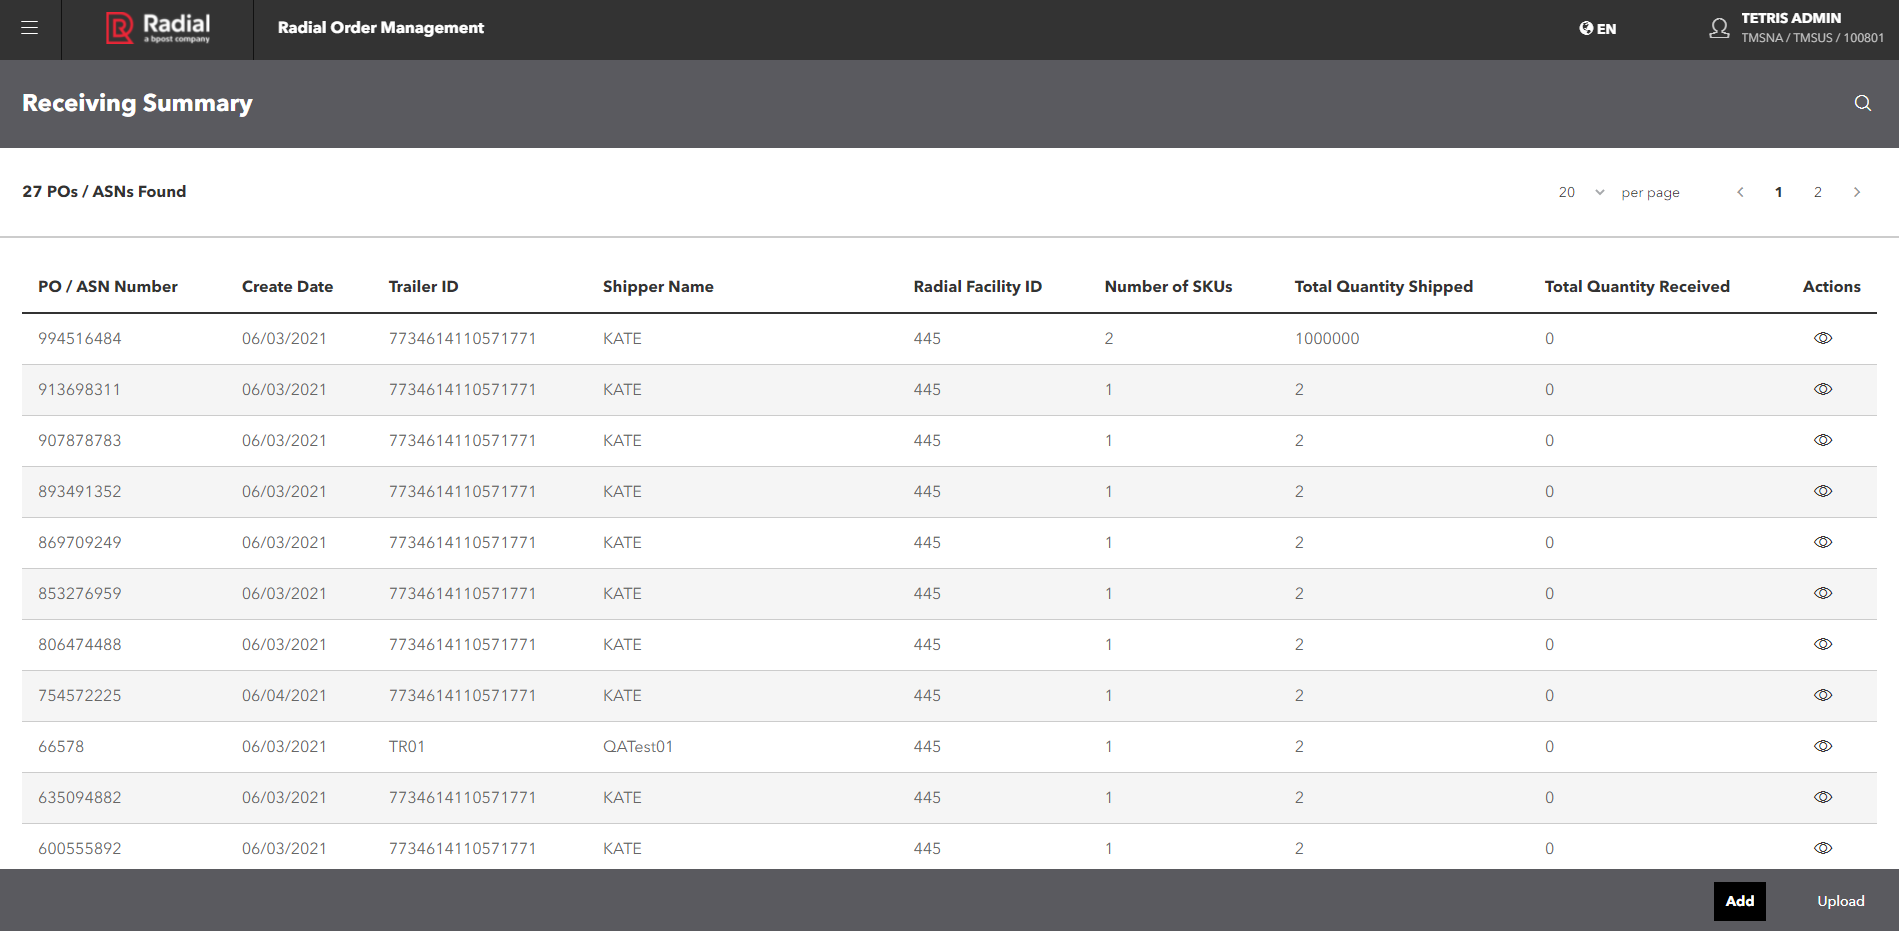
From the Main Menu, navigate to Receiving Details. The Receiving Summary search screen appears.

-
Enter your search criteria:
-
Receiving Type: Advance Ship Notice or Purchase Order
-
PO
 A supply type that means purchase order./ASN Number
 -
Client Item ID
-
Create From Date
-
Create To Date
-
-
Click or tap the Search button. The results appear on the Receiving Summary screen.


Upload Receiving Details
Note: This function is not available to FF Portal clients.
To upload a Receiving Details file to the ROM user interface:
-
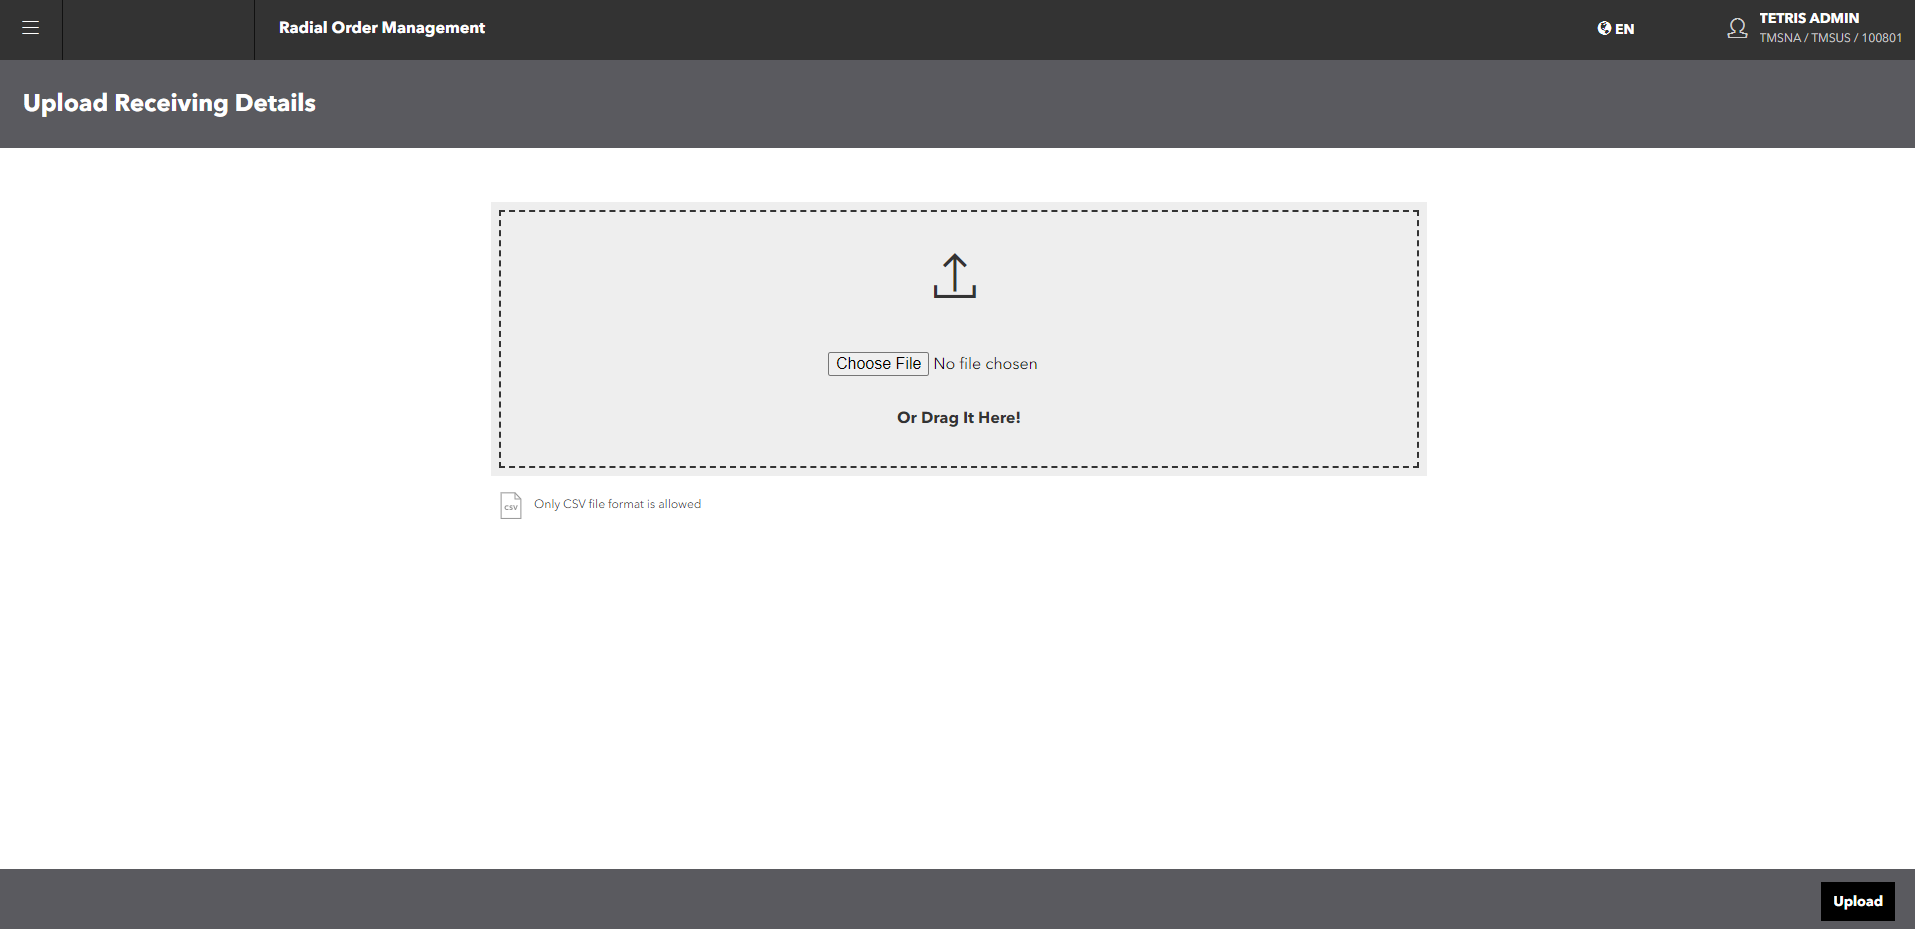
From the Main Menu, navigate to Upload Receiving Details. The Upload Receiving Details screen appears.

Note: You can also access this screen from the Receiving Summary Screen. Click or tap the Upload button.
-
To select the file to upload, click or tap the Choose File button and navigate to the file. You can also drag and drop the file into the upload tile.
Note: The file must be in .csv format.
-
Click or tap the Upload button.
As ROM uploads and processes the file, it validates the data within the file. If errors occur, they are listed in the Upload window for you to review.
When the upload is complete, ROM confirms the number of records that were successfully added and successfully updated. The uploaded records are then visible in the ROM user interface.
Add Receiving Details
Note: This function is not available to FF Portal clients.
In addition to uploading a Receiving Details file, you can also add Receiving Details to the ROM user interface manually, by ASN or by PO.
-
From the Main Menu, navigate to Receiving Details. The Receiving Summary search screen appears.
-
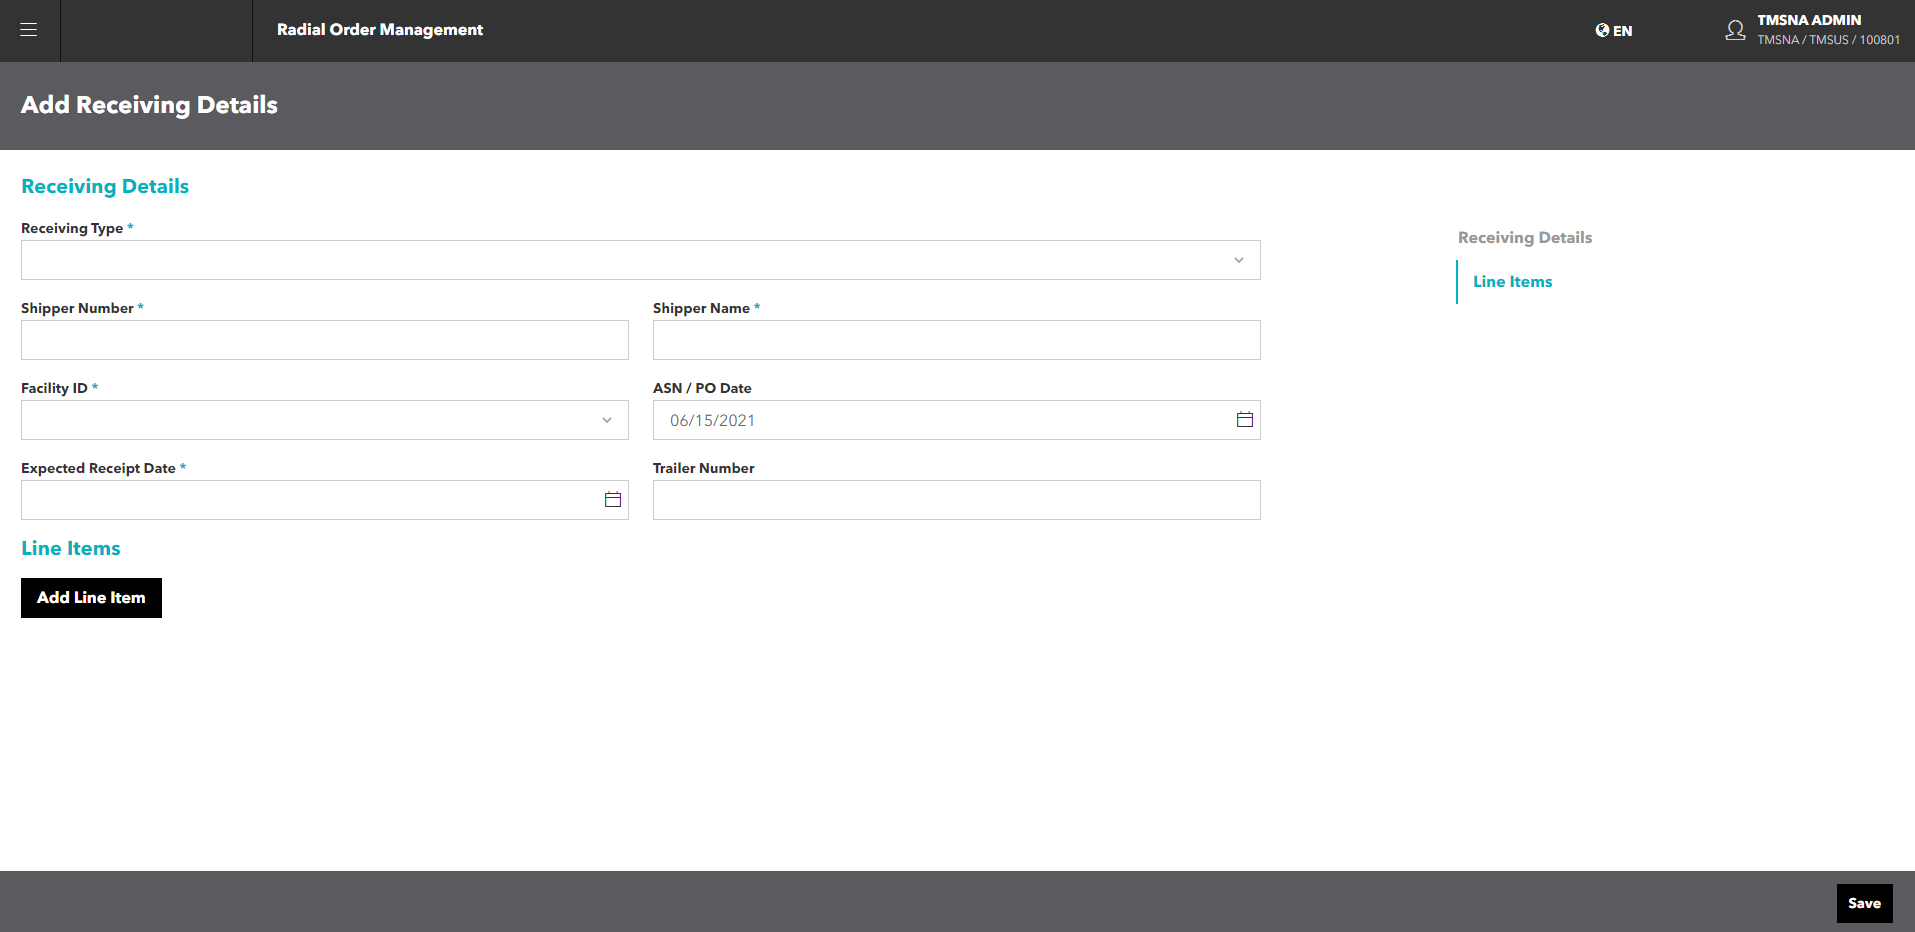
Click or tap the Add button. The Add Receiving Details screen appears.

The screen has two sections: Receiving Details and Line Items.
-
In the Receiving Details section, complete the following fields.
-
Receiving Type: Select Advanced Ship Notice or Purchase Order
-
ASN Number/Shipper Numbers: If you choose Advanced Ship Notice, enter the ASN Number. If you choose Purchase Order, enter the Shipper Number.
-
Shipper Name
-
Facility ID: Select the Facility ID from the dropdown.
-
ASN/PO Date
-
Expected Receipt Date
-
Trailer Number
-
-
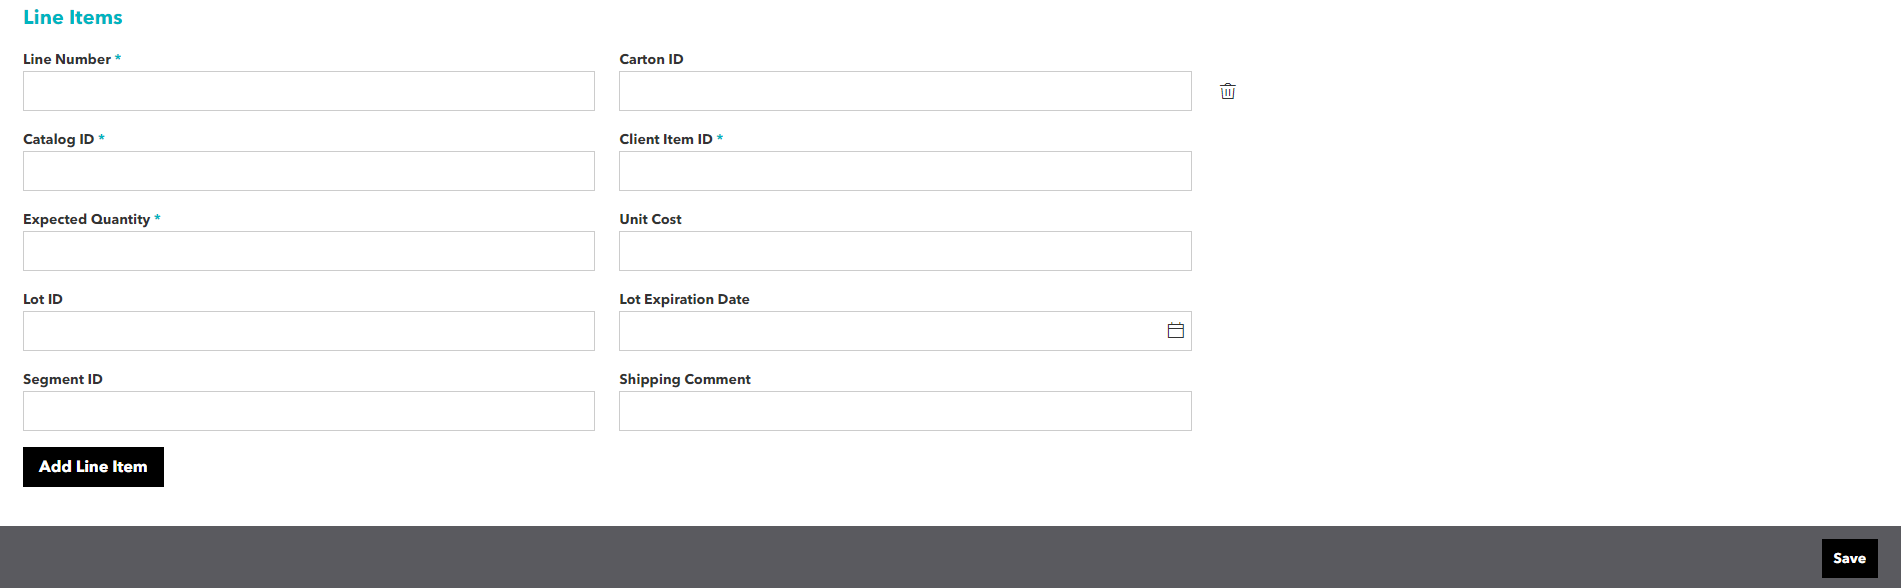
In the Line Items section, complete the following fields for the first line item.

-
Line Number
-
Catalog ID
-
Expected Quantity
-
Lot ID
-
Segment ID
-
Carton ID
-
Client Item ID
-
Unit Cost
-
Lot Expiration Date
-
Shipping Comment
-
-
To add another Line Item, click or tap the Add Line Item button. A new set of fields appears.
-
To delete a Line Item from this record, click or tap the
 icon. ROM delete the entire line item.
 -
To save the record, click or tap the Save button.