Use Filters
Filters constrain the data displayed in a dashboard or report. You can use filters to select the range of data that matches your area of interest or provides the answer to a specific question. For example, to see a specific facility's performance over the last six months, you can filter to show data only for that facility during that time period.
Each dashboard has its own filter options. Typically, you can filter by:
- date range
- business segment or operating facility
- other variables appropriate to each dashboard's data
Show and hide the filter pane
The filter pane is usually hidden when you first open a dashboard. To open the filter pane, click the filter handle. The handle can be seen at the vertical middle of the line that marks the right side of the main content window.
You can hide the filter pane to allow more room for the main content window. To hide the filter pane, click the filter handle.
Select a date range
To change the date range filter for a dashboard:
- Click the filter handle, if necessary, to display the filter pane.
- In the Date Range filter box, click the pencil icon. The Edit Filter popup displays.
- Do any of the following:
- Click List, and select specific days from the list of available days. (Tip: Use the popup menu at the top of the list to switch from Days to other time intervals, such as Months, Quarters, or Years.)
- Click Calendar, and use the calendar tool to select a beginning and end date.
- Click Time Frame, and make a selection from the list of options, for example, Last 90 Days.
- Click OK. The Edit Filter popup closes, and the main content window refreshes to apply the date range you selected.
Note: The Data Range filter shows all possible time frame options, but the dashboard might not have data for all time intervals. To find out the overall date range of a dashboard's data set, check the dashboard's title bar in the main content window.
Select filter options in the filter pane
To set a filter for the current dashboard:
- Click the filter handle, if necessary, to display the filter pane. The filter pane displays a box for each available filter.
- To edit a filter, click the pencil icon in the filter box. The Edit Filter popup displays the available options for that filter.
- Select filter options, then click OK.
- The Edit Filter popup closes, and the main content window refreshes to apply the filter options you selected.
Note: On some dashboards, after you change filter settings, a round refresh button  appears at the top right of the main content pane. If you see this button, click the button to apply your filter changes. The refresh button allows you to make several filter changes and refresh the dashboard only once.
Switch a filter on or off
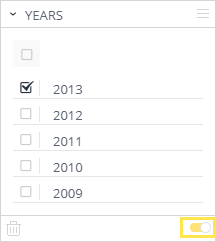
You can easily toggle filters on and off using the toggle switch. Use this option to compare states (with and without the filter), or to temporarily disable a filter, rather than deleting it.

Save current filters as your default
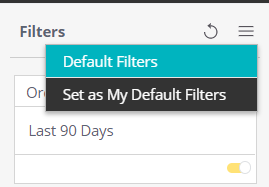
You can save the current set of filters as your personal default filter for that dashboard. The dashboard will then apply those filters each time you open the dashboard.
To save the current set of filters as your default for the dashboard:
- Click the filter handle, if necessary, to display the filter pane.
- In the Filters title bar, click the menu button, and select Set as My Default Filters.

Restore a dashboard's filters
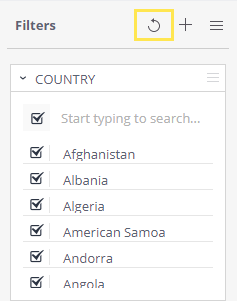
You can restore a dashboard's current filters to your default filters. If you haven't set your personal default filters, restoring will revert to the dashboard's default filters.
- Click the filter handle, if necessary, to display the filter pane.
- In the Filters title bar, click the Restore button (the counterclockwise arrow icon).

The main content window refreshes to apply the default filters.