Apple Pay Configuration
Before Radial can accept and process Apple Pay payments for your webstore, you must set up a certificate file on the Apple Pay Configuration page.
Note: Only users that have been assigned manager-level privileges for a webstore can complete this process.
Part of the certificate process is completed on the Apple Developer website, and it requires that your webstore have an Apple Developer account. To create a developer account with Apple, visit https://developer.apple.com/ and click Account.
Certificates expire after a period of time. Your Apple Developer account tells you when your certificates are scheduled to expire. Before a certificate expires, repeat the certificate setup process to generate a new certificate so that Radial can continue to process your store's Apple Pay payments without interruption.
Note: A certificate created in the Payments & Fraud Sandbox for an integration testing environment will not carry over to your webstore's live production processing. Before your store goes live, you must repeat the certificate setup process in the Payments & Fraud Portal.
Set up a Certificate
To set up an Apple Pay certificate, complete the following steps.
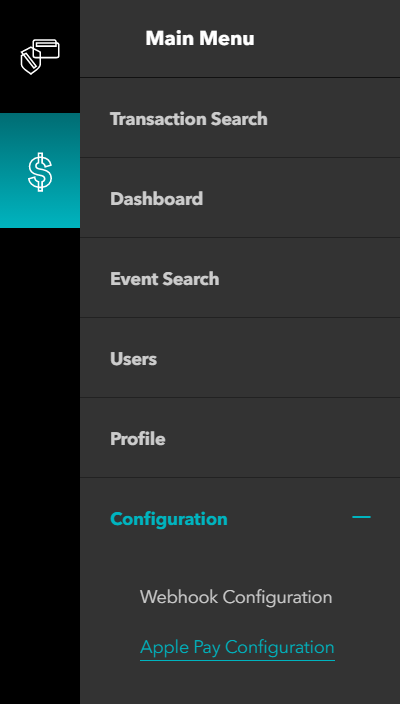
- In the Payments Menu, navigate to Configuration > Apple Pay Configuration.

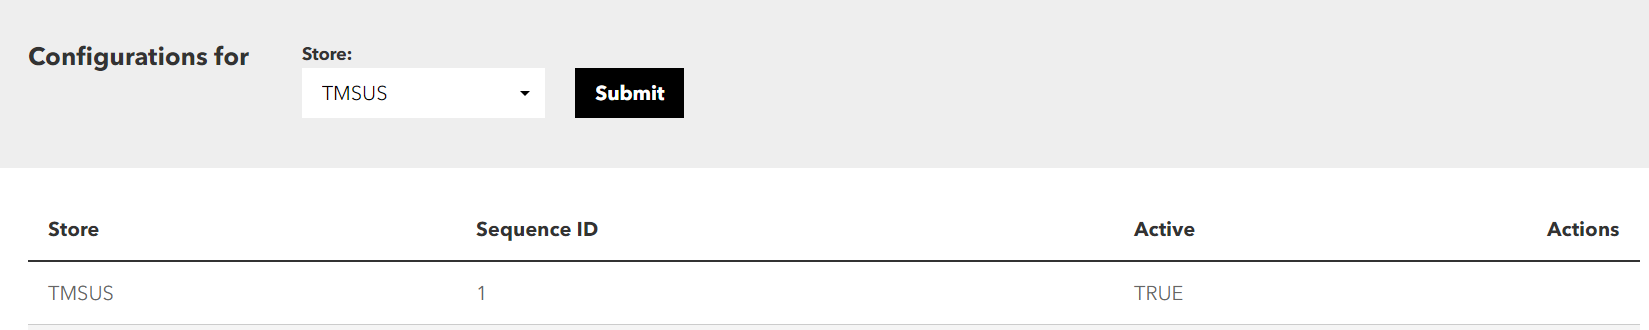
- In Store, select the webstore and click Submit.
Note: If your account has access to only one store, you can skip this step.
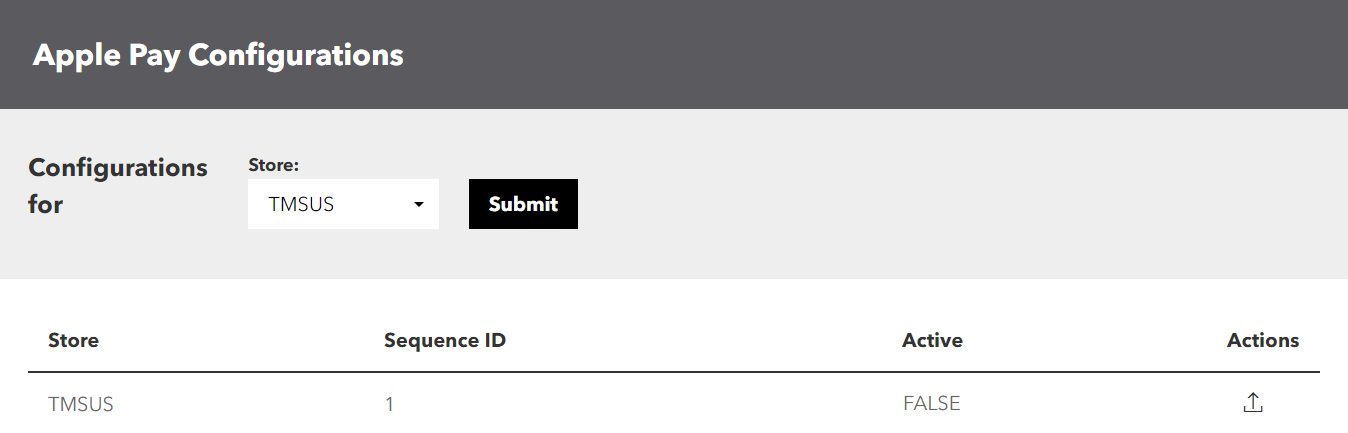
The store's previously set up certificates (if any exist) are listed in the bottom half of the page.

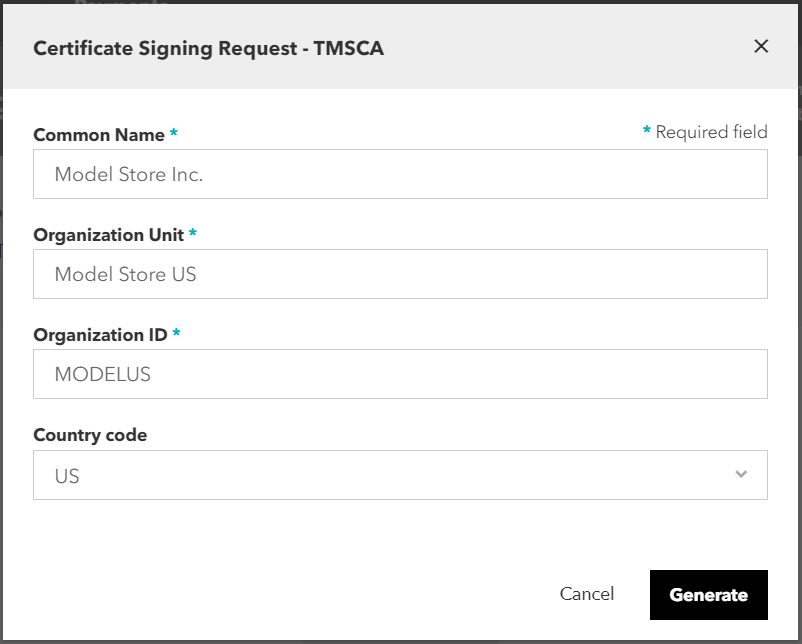
- Click Generate CSR file. The Certificate Signing Request popup displays.
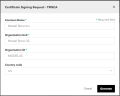
- Enter values for the Certificate Signing Request fields.
- Common Name is the name of your business
- Organization Unit is the specific department or unit within your business responsible for the certificate
- Organization ID is an identifier for the department or unit.
- Select a Country Code
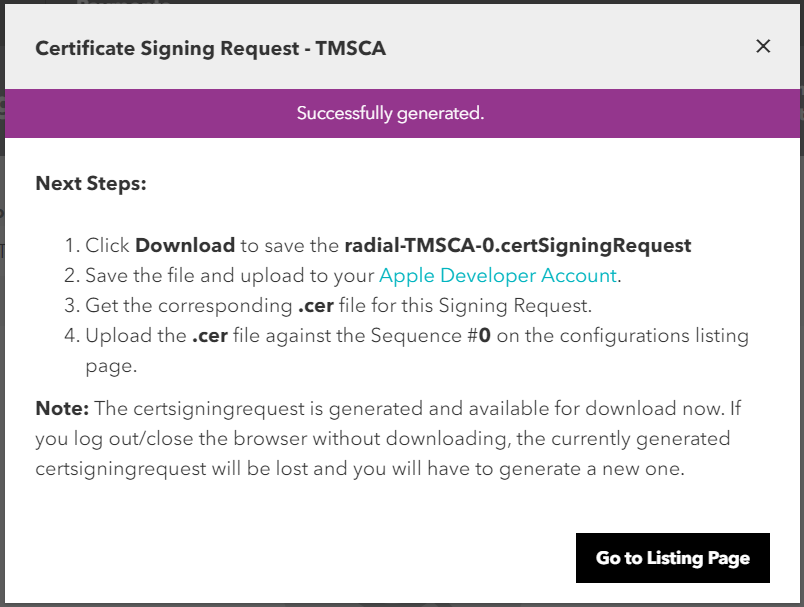
- Click Generate. The system creates a Certificate Signing Request file. A message displays Successfully generated. The Certificate Signing Request popup lists the next steps to complete the certificate setup.
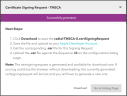
- To save the Certificate Signing Request file to your local computer, click Download. Select a location and save the file. The Download button is no longer visible on the Certificate Signing Request popup.

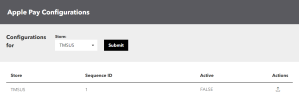
- Click Go to Listing Page. The popup closes, and the Apple Pay Configuration page displays. The new certificate is listed, with the Active field displaying FALSE, indicating that the certificate is not yet active. Note the Store and Sequence Id for the new certificate.
- In your Apple Developer account at developer.apple.com, upload the Certificate Signing Request file that you just generated. Your Apple Developer account will return that file as a CER file, a signed certificate. Download the CER file and save it on your local computer.
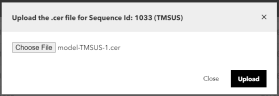
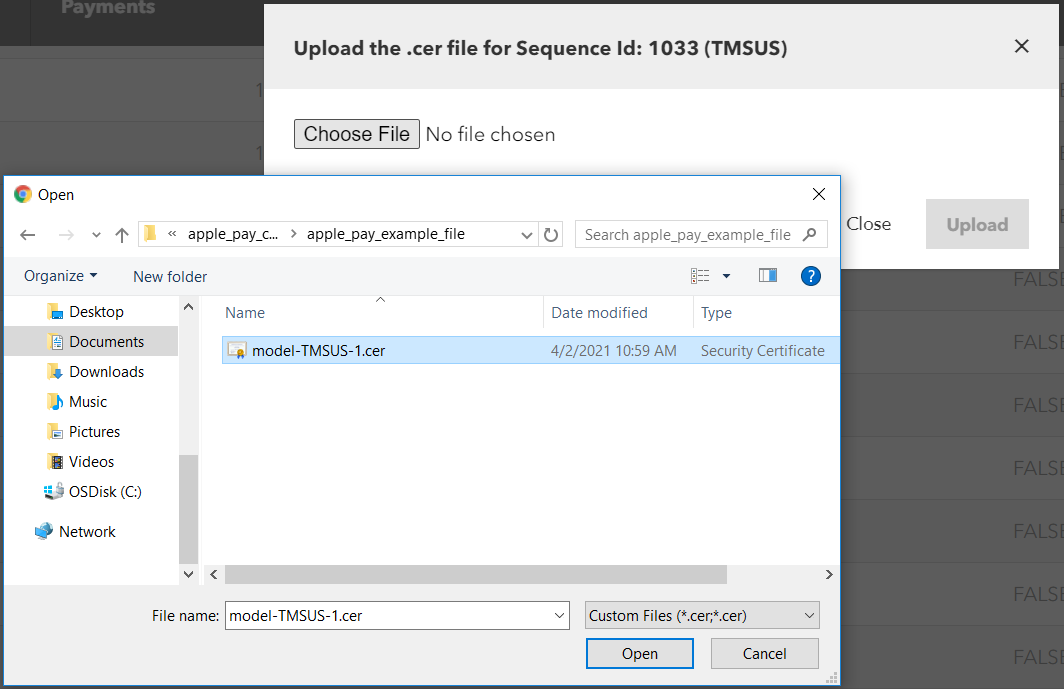
- Return to the Apple Pay Configuration page. In the list, find the Store and Sequence Id that matches the Certificate Signing Request file you generated earlier.
In the Actions column, click the Upload button. An Upload CER dialog displays.
- Click Choose File. A Open File dialog displays.

- Select the CER file on your local computer, and click Open.
- Click Upload.
- The Apple Pay Configuration page lists your certificate with an Active value of TRUE. This indicates that your certificate is active and ready to be used for processing payments.


If Setup Is Unsuccessful
If anything goes wrong in the process of downloading the Certificate Signing Request and creating and uploading the CER, the simplest thing to do is to start the process again. When you click Generate CSR File the second time, for example, a new Certificate Signing Request file is generated with a Sequence Id of 2. The inactive entry with the Sequence Id of 1 will remain on the list, but you can safely ignore it.
If you continue to encounter problems with the setup process, use the Contact Us link to send a message to Radial.