Manage Inventory Nodes
Inventory nodes are generally created and managed through a feed, which is the preferred method for creating and managing stores. However, you can also create and manage inventory nodes through the ROM user interface.
To manage inventory nodes:
- Click or tap the
 icon in the upper-left corner. The Main Menu appears.
 - Click or tap Omni Administration. The Omni Administration submenu appears.
- Click or tap Fulfillment Node. The Manage Inventory Nodes screen appears.

- From this screen, you can add a new node, or delete or modify existing nodes.
- To narrow the list, use the Search feature. Click or tap the
 icon. The Search menu appears.
 - You can search on the following:
- Node ID
- Node Type
- Shipping Calendar ID
- Fulfillment type: ISPU, SFS, STS, or AD
- Gift Wrap Allowed
- Availability
- Nodes Tracks Inventory
Select your search attributes, then click or tap the Search button.
Delete a Node
- To delete a node, click or tap the
 icon in the Actions column of the node that you want to delete. The system prompts you to confirm the deletion.
 - Click or tap the Confirm button to delete the node; otherwise, click Cancel.
If you delete a node, you cannot recover it. You must recreate it.
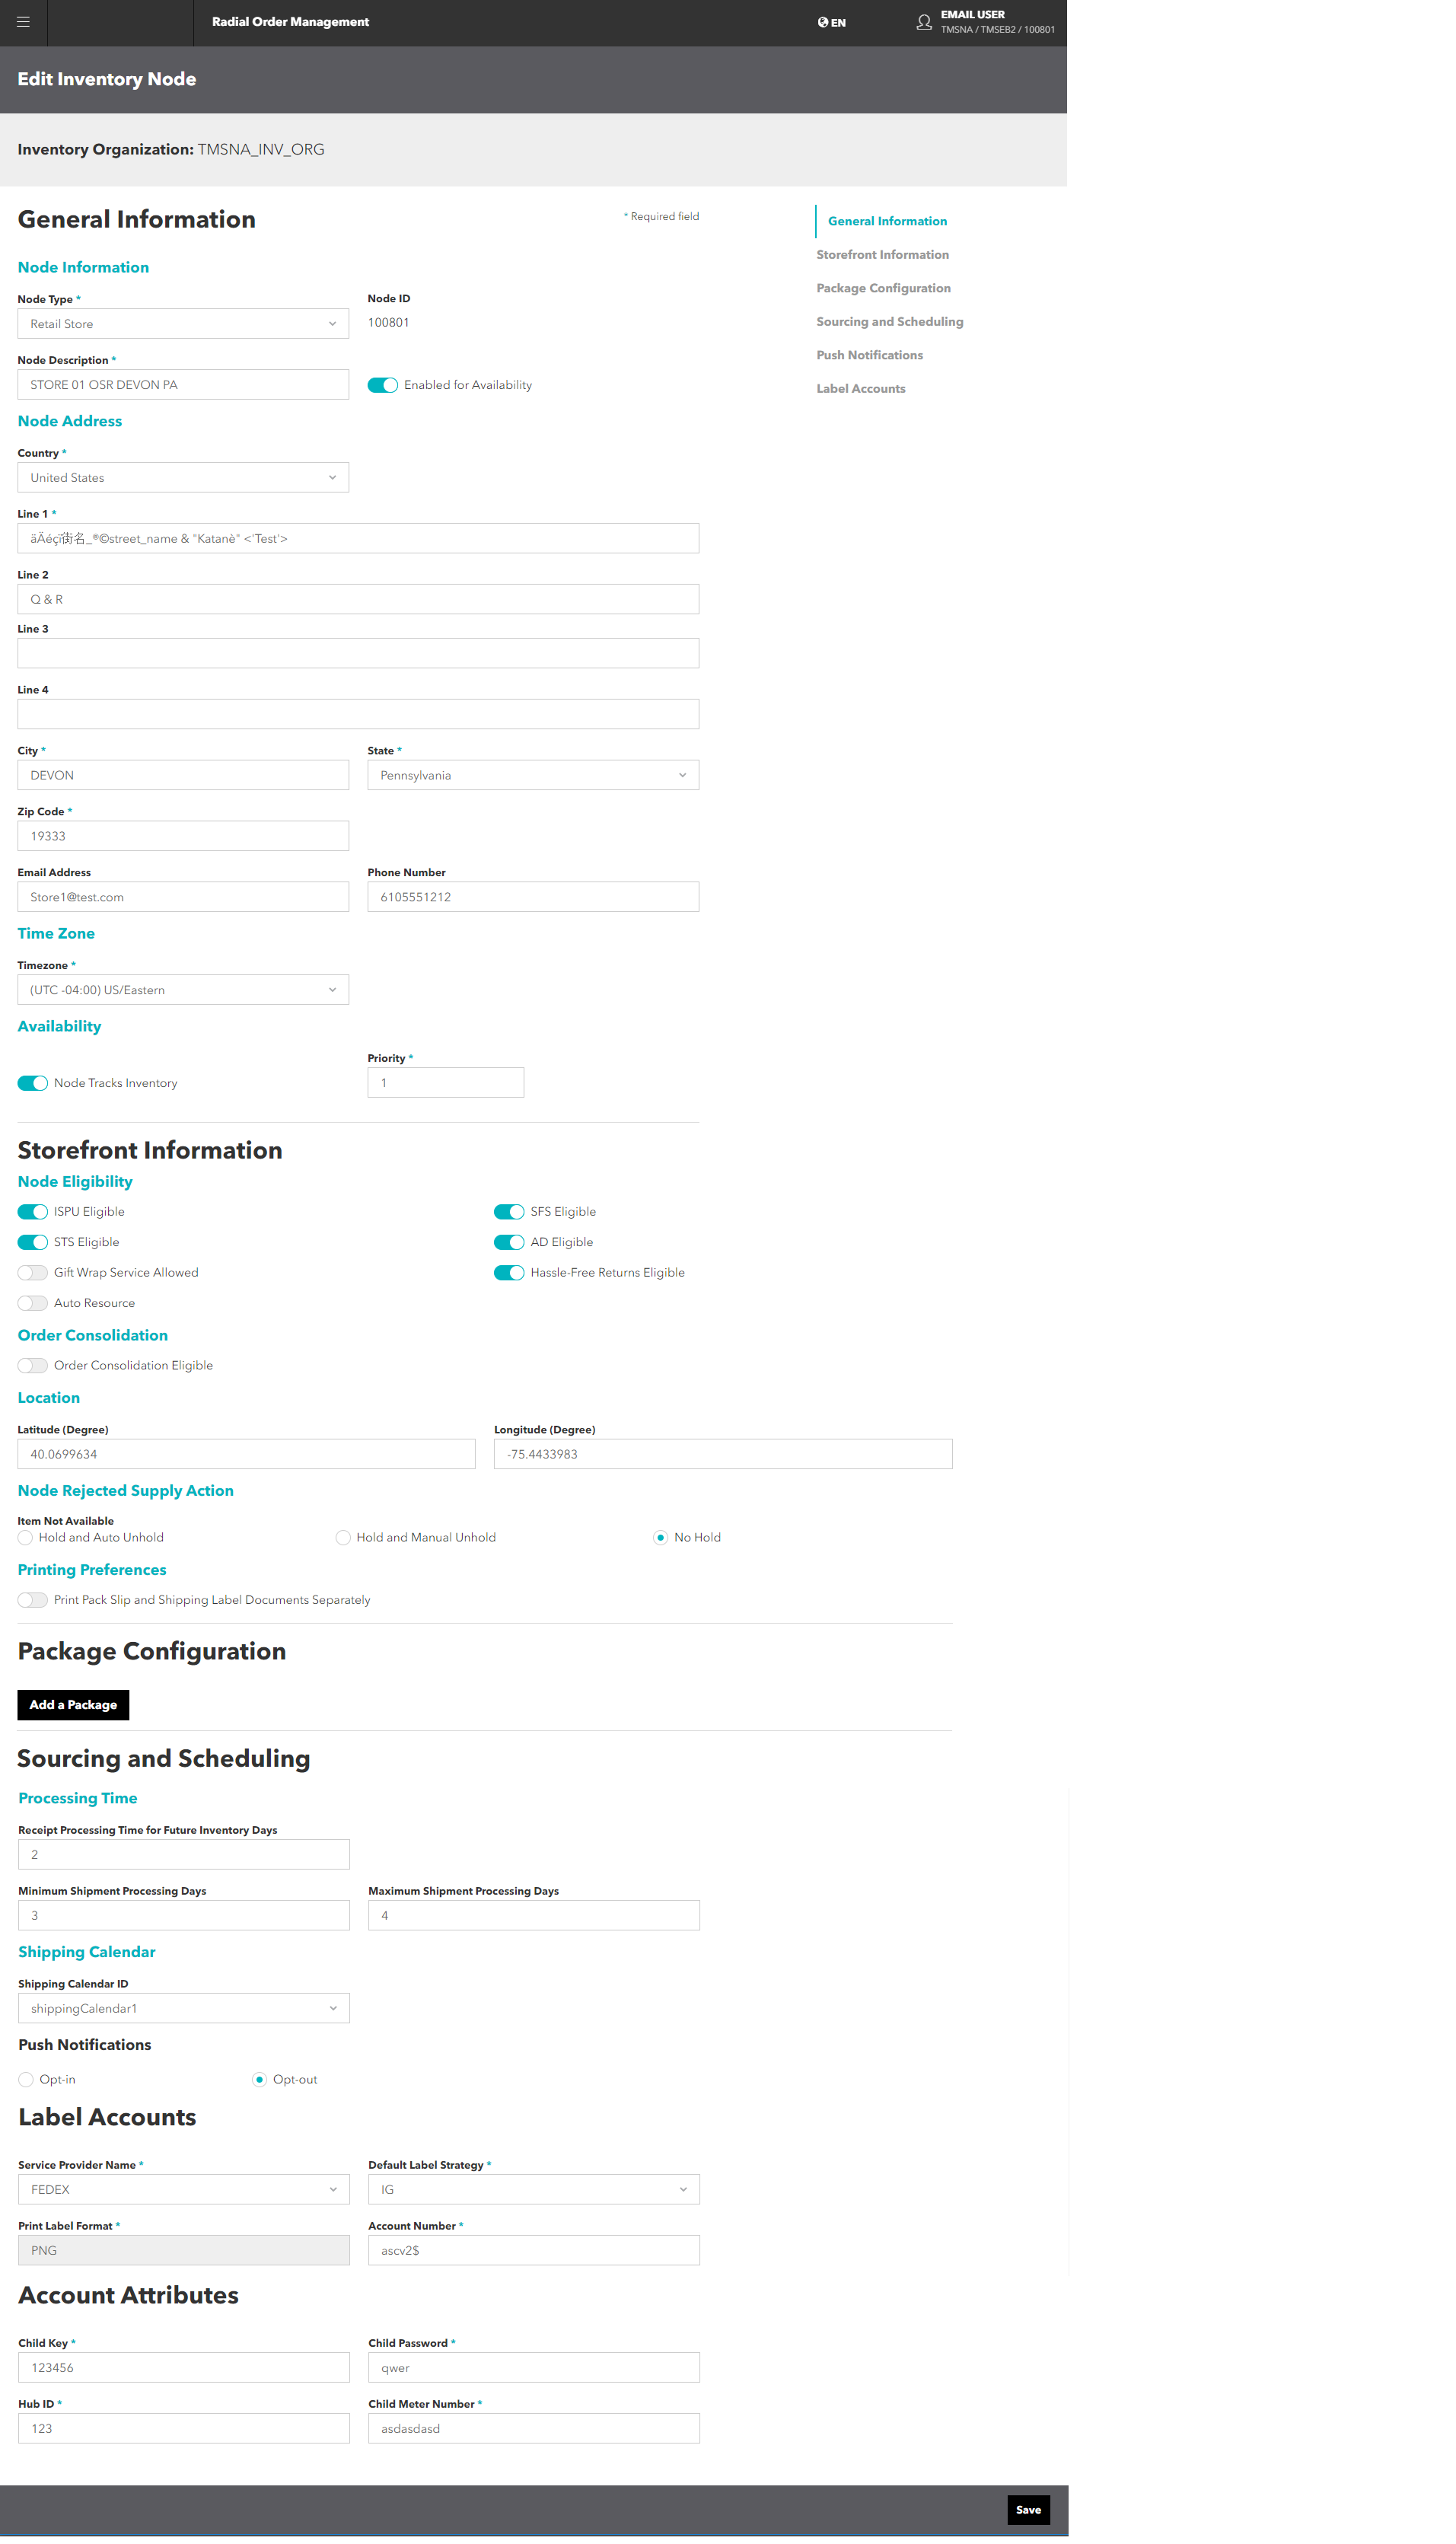
Modify a Node
- To modify a node, click or tap the
 icon in the Actions column of the node that you want to modify. The Edit Inventory Node screen appears.
- From this screen, you can modify:
- General Information: Node Information, Node Address, Time Zone, and Availability.
If you disable the Availability toggle, the node's inventory is not included in the ATP feed.
- Storefront Information: Node Eligibility, Order Consolidation Eligibility, Location, Node Rejected Supply Action, and Printing Preferences.
When the toggle is on Print Pack Slip and Shipping Label Documents Separately, you can print packing lists on a laser printer and shipping labels on a Zebra printer.
- Package Configuration: Package ID and dimensions. Note: You must enter a value greater than zero in the weight, packing material weight, height, width, and length fields; otherwise, you receive a validation error.
- Sourcing and Scheduling: Processing Time and Shipping Calendar
- Push Notifications: Opt-in or Opt-out. These options allow individual stores to opt in or opt out for store notifications. When opt in for store notifications, you must provide phone numbers or email addresses, depending on the configured delivery method for push notifications.
- Label Accounts: Service Provider Name, Default Label Strategy, Print Label Format, and Account Number. These options enable you to specify details for carriers you have accounts with. The dropdown choices reflect the Shipping Label configurations set up during implementation.
- General Information: Node Information, Node Address, Time Zone, and Availability.
- Update the fields that you need to modify.
- Click or tap the Save button.
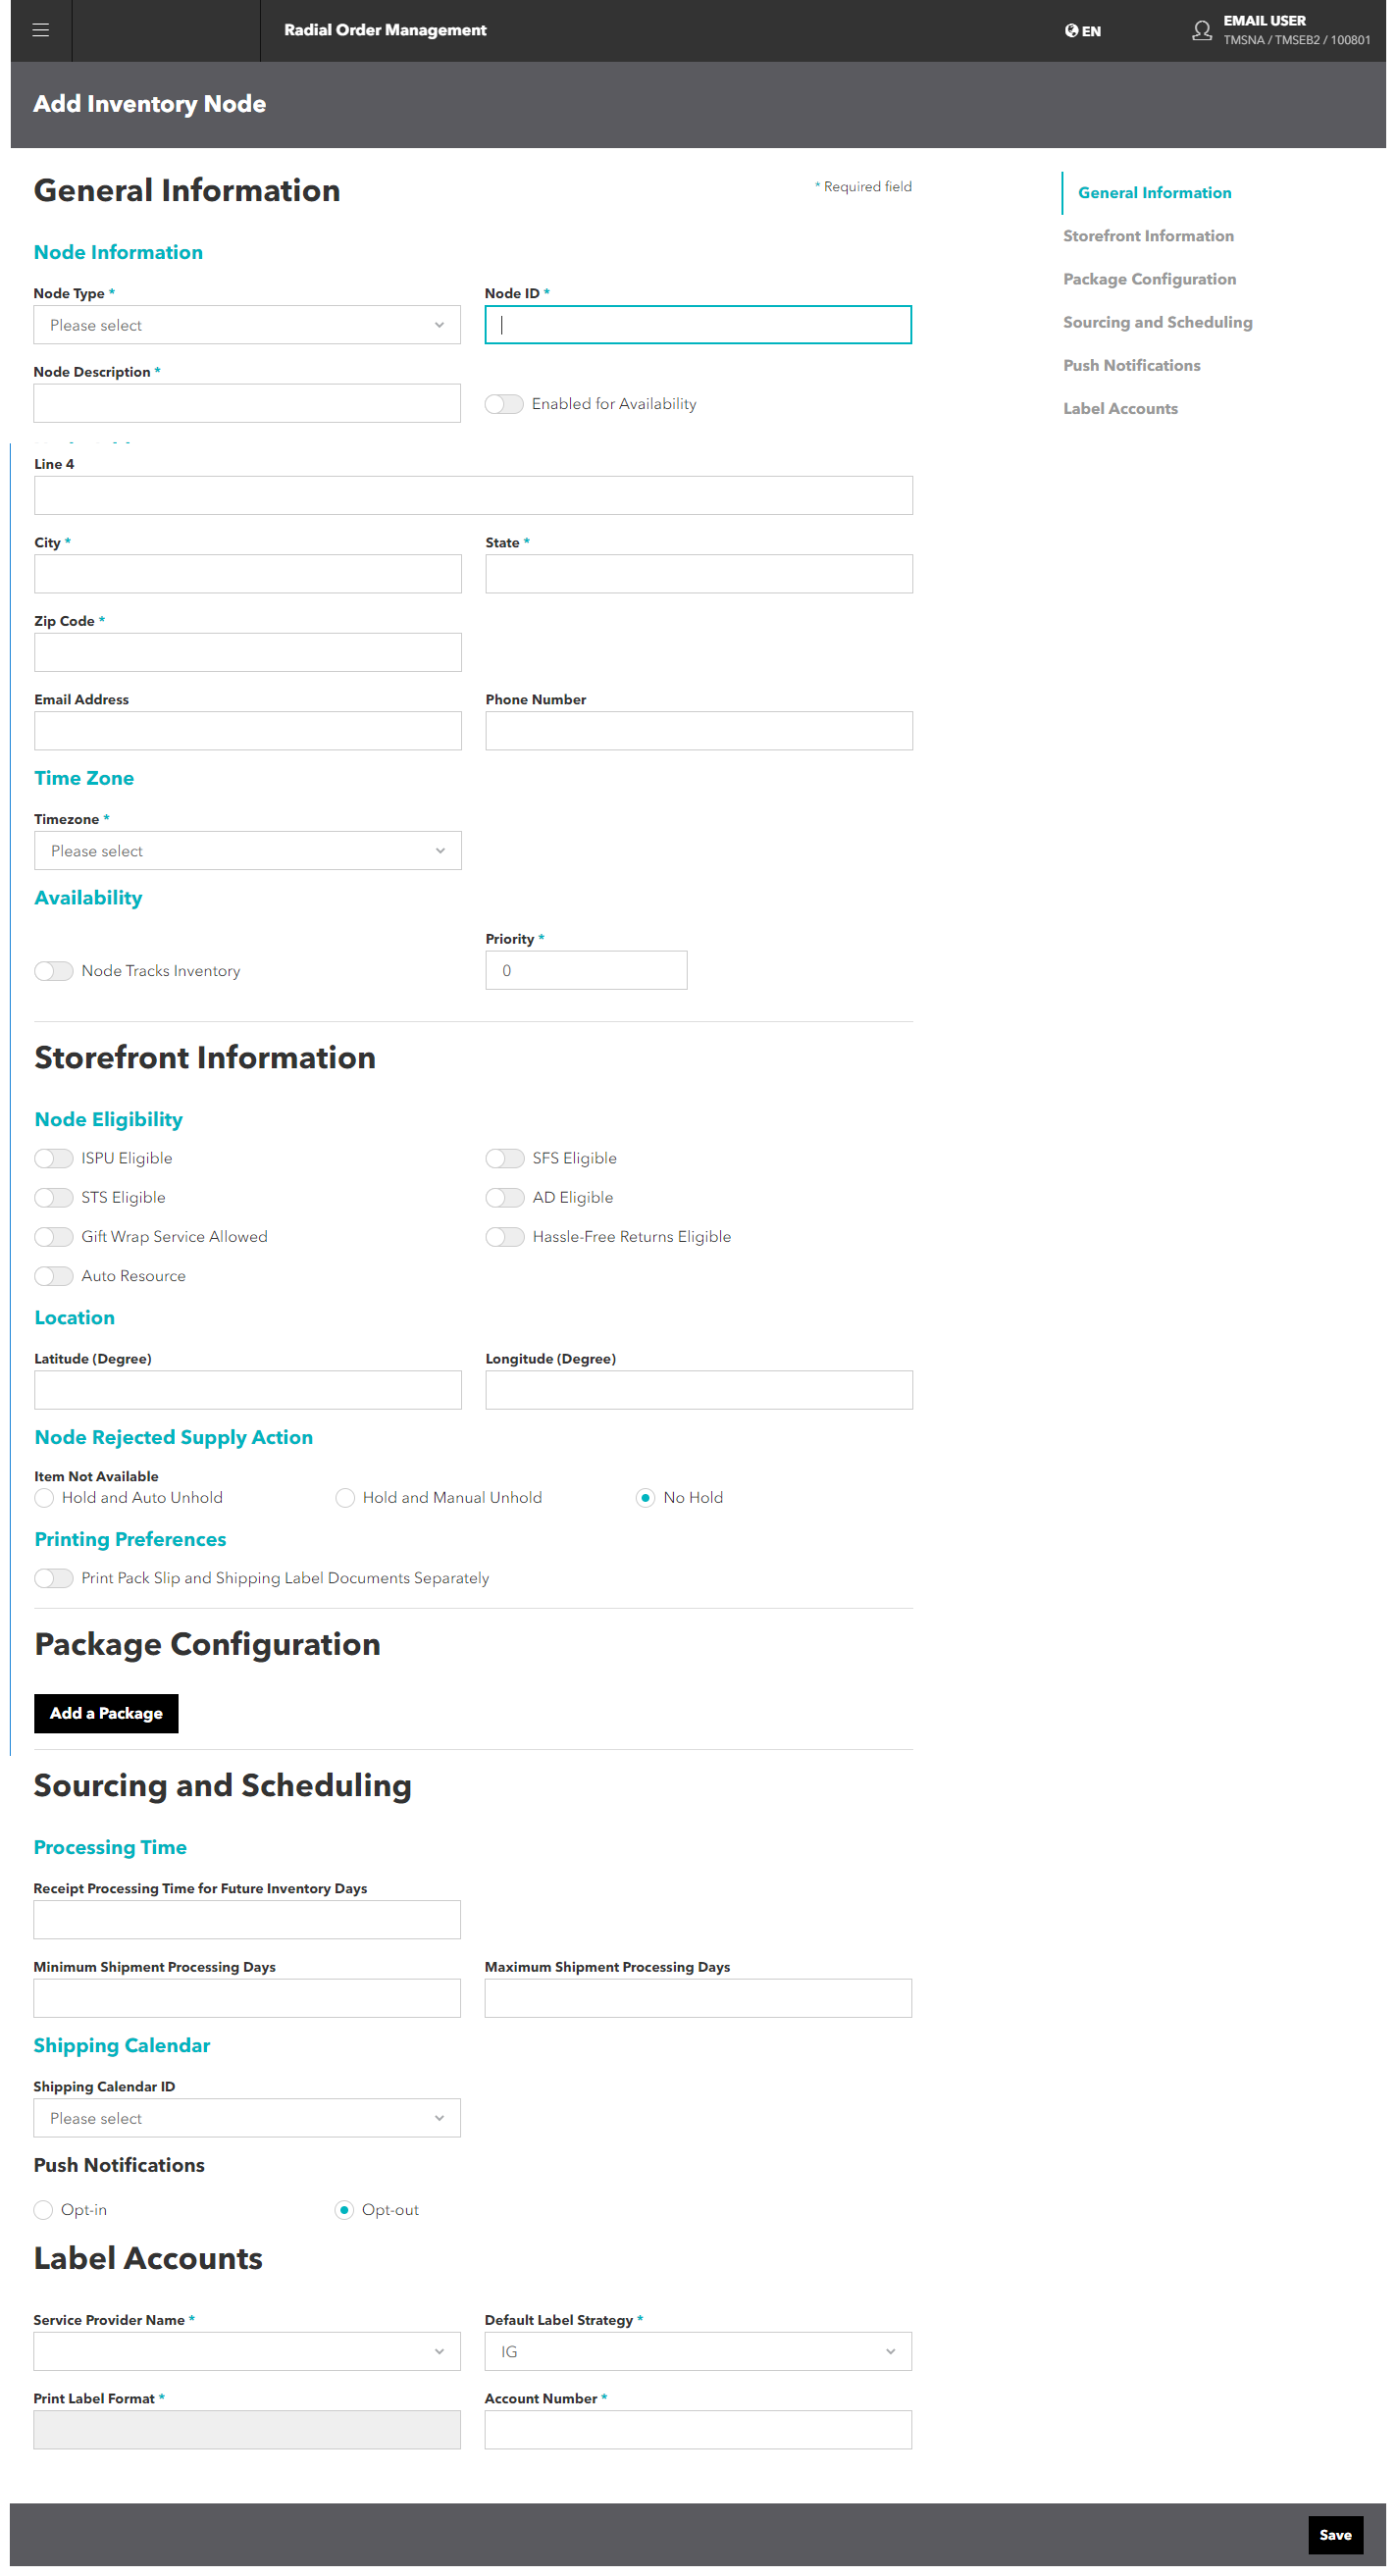
Add a Node
- To add a new node, click or tap the Add button in the Action Bar. The Add Inventory Node screen appears.

- On this screen, you add the node details:
- General Information: Node Information, Node Address, Time Zone, and Availability.
- Storefront Information: Node Eligibility, Order Consolidation Eligibility, Location, Node Rejected Supply Action, and Printing Preferences.
- Package Configuration. Note: You must enter a value greater than zero in the weight, packing material weight, height, width, and length fields; otherwise, you receive a validation error.
- Sourcing and Scheduling: Processing Time and Shipping Calendar.
- Push Notifications: Opt-in or Opt-out. If you select Opt-in, a phone number field appears. You can add additional phone number fields.
- Label Accounts: Service Provider Name, Default Label Strategy, Print Label Format, and Account Number. These options enable you to specify details for carriers you have accounts with. The dropdown choices reflect the Shipping Label configurations set up during implementation.
- When you finish adding the details of the new node, click or tap the Save button.
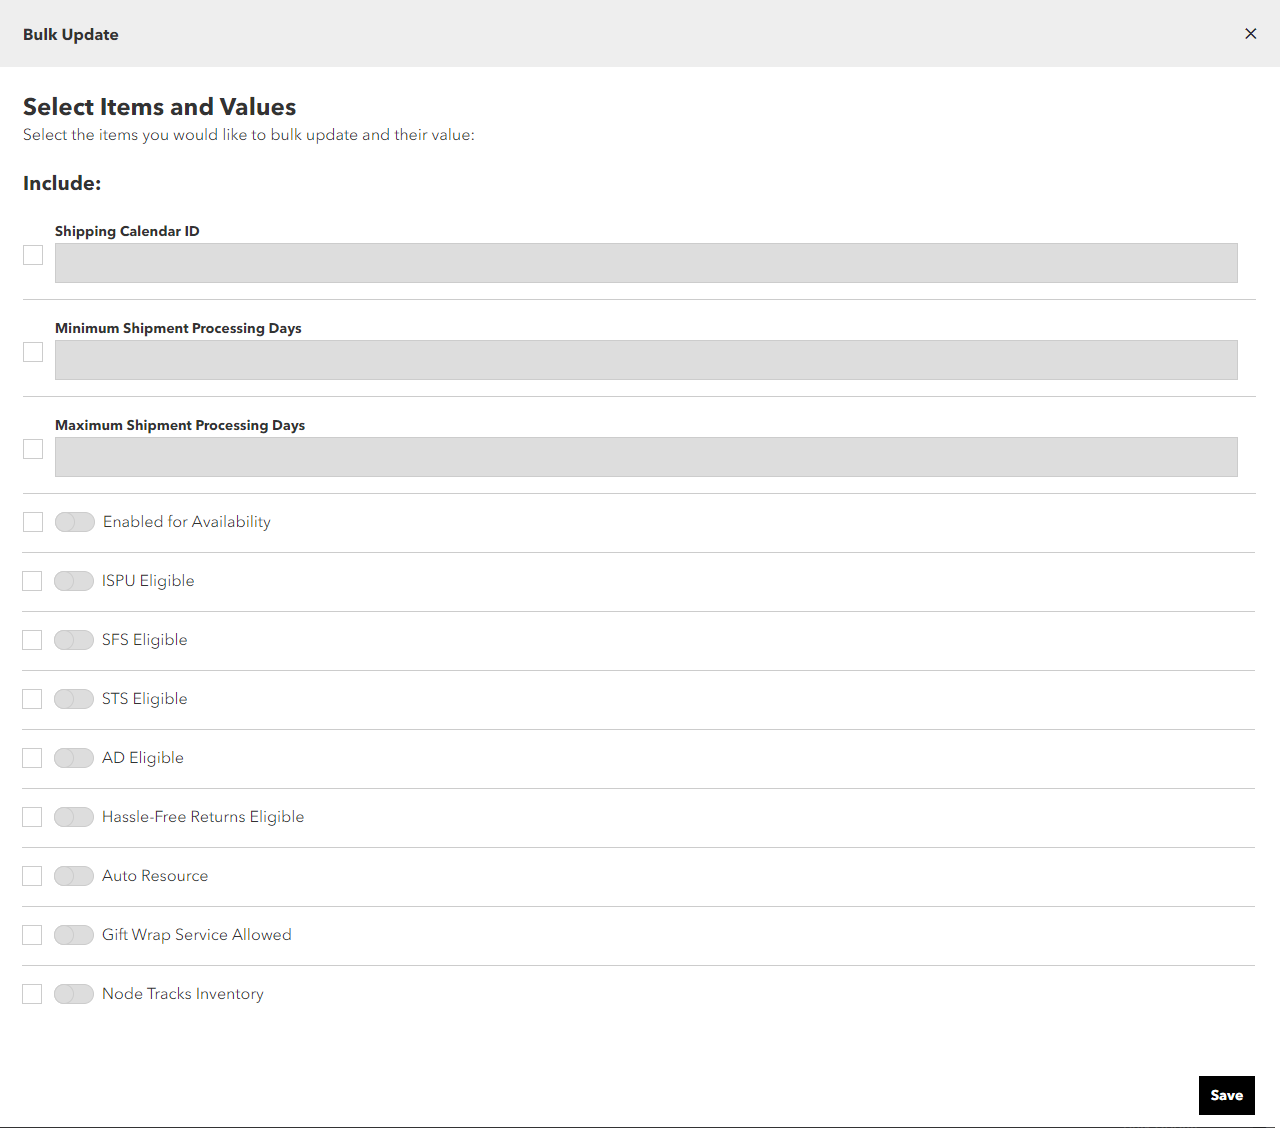
Use Bulk Update
If you need to make the same changes to more than one existing node, you can use the Bulk Update feature. To use this feature:
- From the Manage Inventory Nodes screen, select the nodes that you want to update by checking the box next to the node ID. The Bulk Update button activates.
- Click or tap the Bulk Update button in the Action bar. The Bulk Update screen appears.

- To select the attributes that you want to update, check the boxes next to those attributes:
- Enabled for Availability
- ISPU Eligible
- SFS Eligible
- STS Eligible
- AD Eligible
- Hassle-Free Returns Eligible
- Auto Resource
- Gift Wrap Service Allowed
- Node Tracks Inventory
- The attributes become active.
- Make your changes.
- To apply your changes, click or tap the Save button.