Manage Radial Roles
Initially, Radial Order Management and Radial Payments & Fraud come with a set of standard roles that you can use as is or customize to suit your business. Each role comprises a set of permissions that enable a user to perform various tasks within a Radial application. In Radial Order Management, Administrator roles may have permissions that enable them to define sourcing rules; set up fulfillment nodes, items, and groups; and/or create ATP rules. A Store Associate role may only have permissions that enable them to review, pick, and pack orders. In Payments & Fraud, a PTF portal user may only have permissions that enable them to view, seach, and and update fraudulent orders.
Permissions also determine what users can do with regard to other users' roles.
- Users can only edit roles whose permissions are a subset of their own. For example, a Store Manager can edit the Store Associate role, but cannot edit the Client Admin role.
- Users can only edit the roles of other users whose contexts and permissions are a subset of their own. For example, a Store Manager can edit a Store Associate that belongs to the same store, but not Store Associates at other stores, Regional Managers, or Client Admins.
- Users cannot edit their own roles, because the only change users could make would be to remove permissions from that role. Moreover, users cannot edit their own contexts or permissions, deactivate, or delete themselves.
- User can only see the permissions that are assigned to them.
The available permissions for Radial Order Management include:
- Add
- Adjust
- Bulk Decline
- Bulk Update
- Check-in
- Customer Pickup
- Delete
- Deliver
- Edit
- Lookup
- Move
- Pack
- Pick
- Publish
- Reassign
- View
The available permissions for Payments & Fraud include:
- Add
- Edit
- View
- Delete
- Lookup
Not all roles have the same set of permissions.
To manage roles:
- Click or tap Role Management tile on the landing page. The Manage Roles screen appears.

- From this screen, you can add a new role, or delete or modify existing roles.
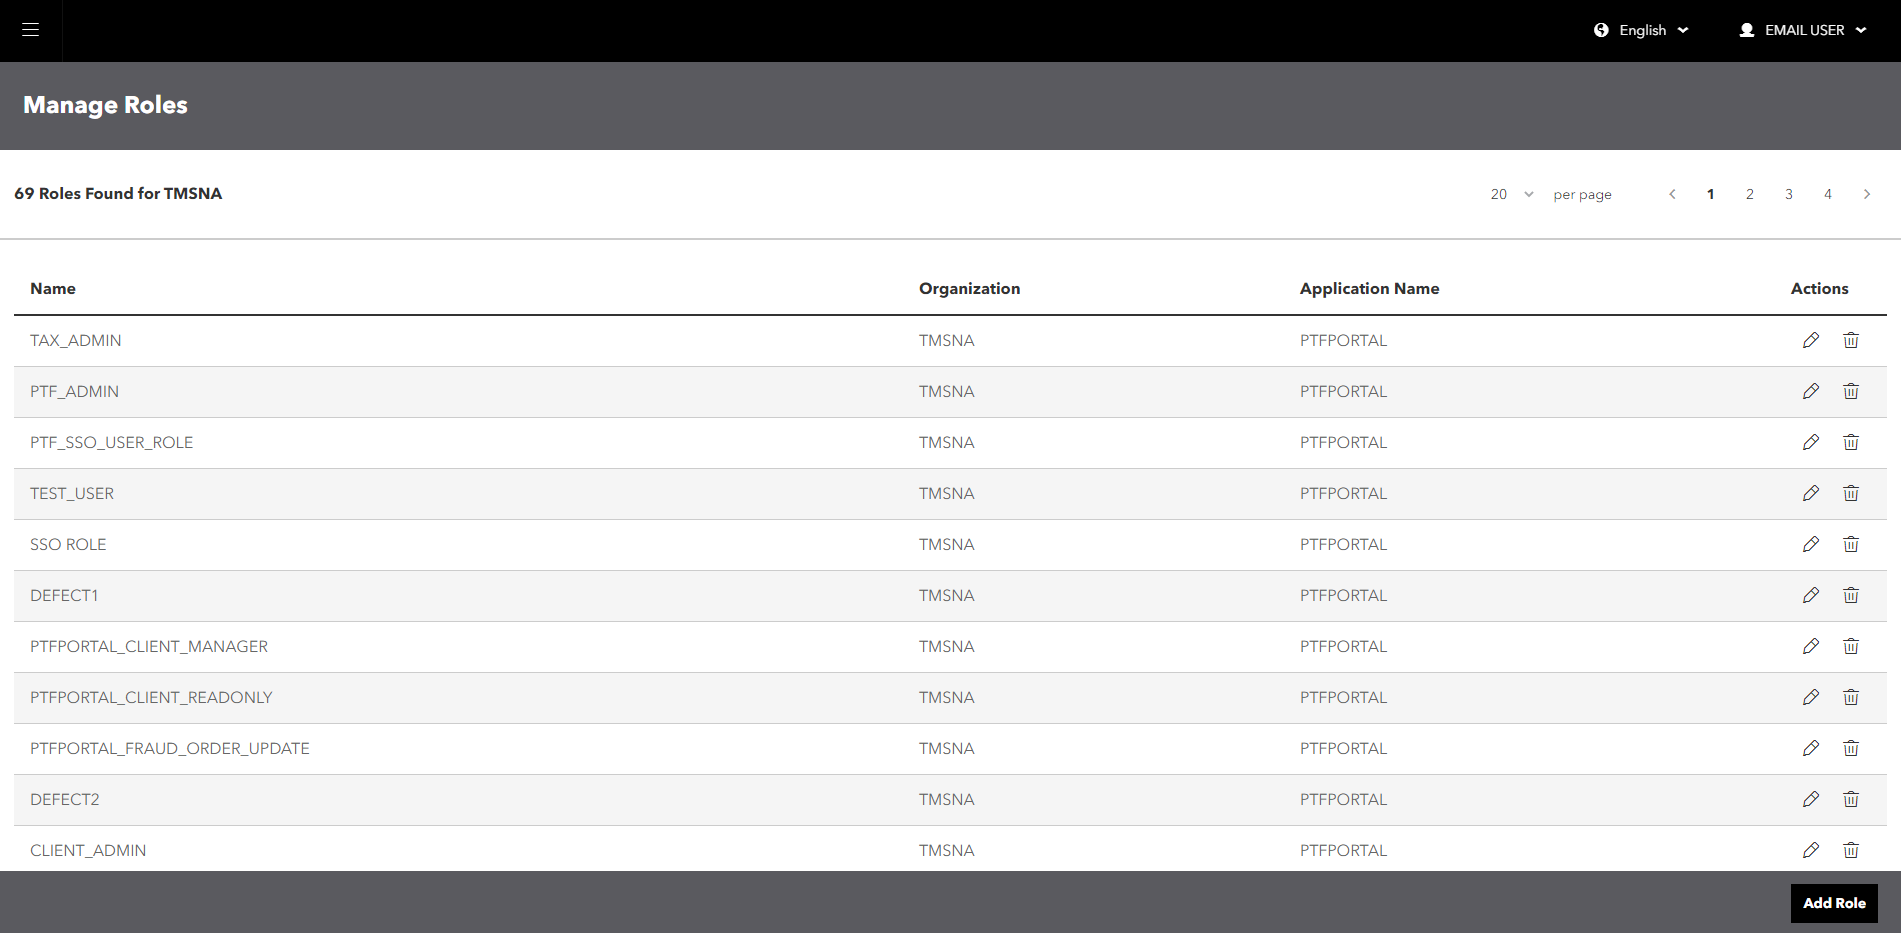
Delete a Role
- To delete a role, click or tap the
 icon in the Actions column of the role that you want to delete. The systems prompts you to confirm the deletion.
 - Click or tap the Confirm button to delete the role ; otherwise, click Cancel.
If you delete a role, you cannot recover it. You must recreate it.
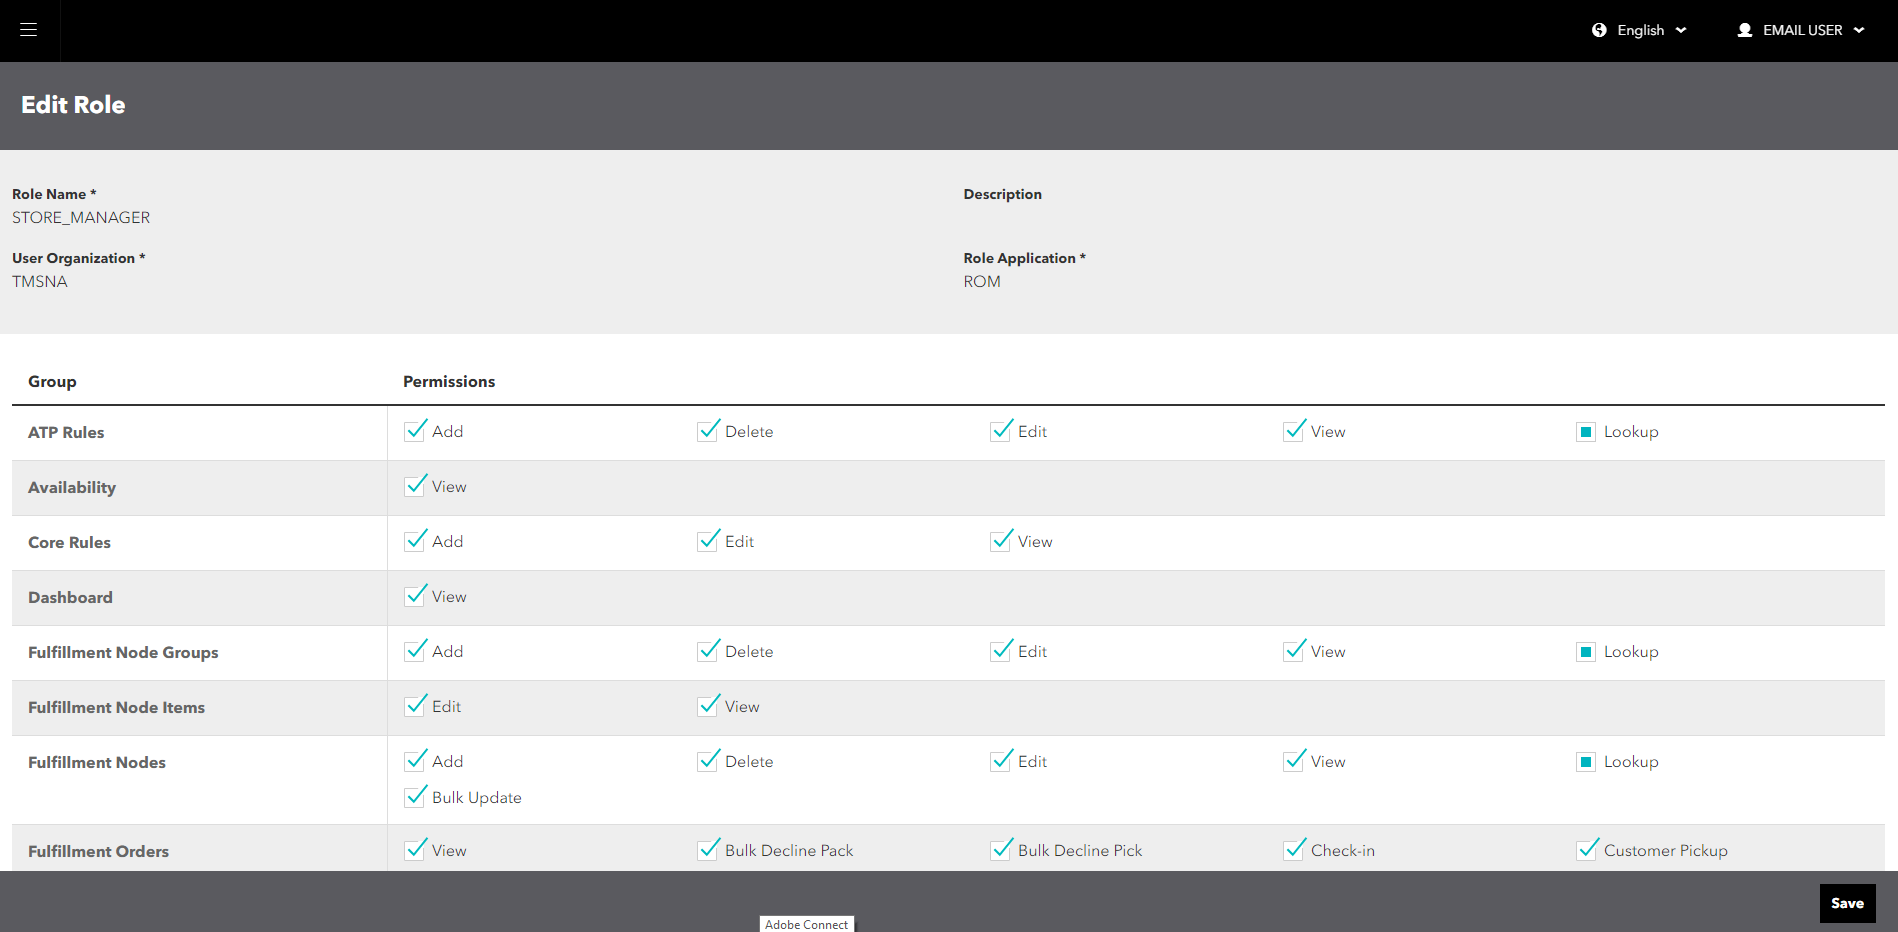
Modify a Role
Permissions are grouped by functional area. Some permissions depend on other permissions. If you select a permission that depends on other permissions, the system automatically select those other permissions. For example, the Add permission for the Inventory group depends on the View permission for that group. If you select the Add permission for the Inventory group, the system automatically selects the View permission. If you select any role within a group, you automatically select all of the roles within that group.
To modify a role:
- Click or tap the
 icon in the Actions column of the role that you want to modify. The Edit Role screen appears. This screen lists all of the available actions that a user can access.
This screen shot shows only a portion of the available role details for ROM.
- Update the role details that you need to modify.
- Click or tap the Save button.
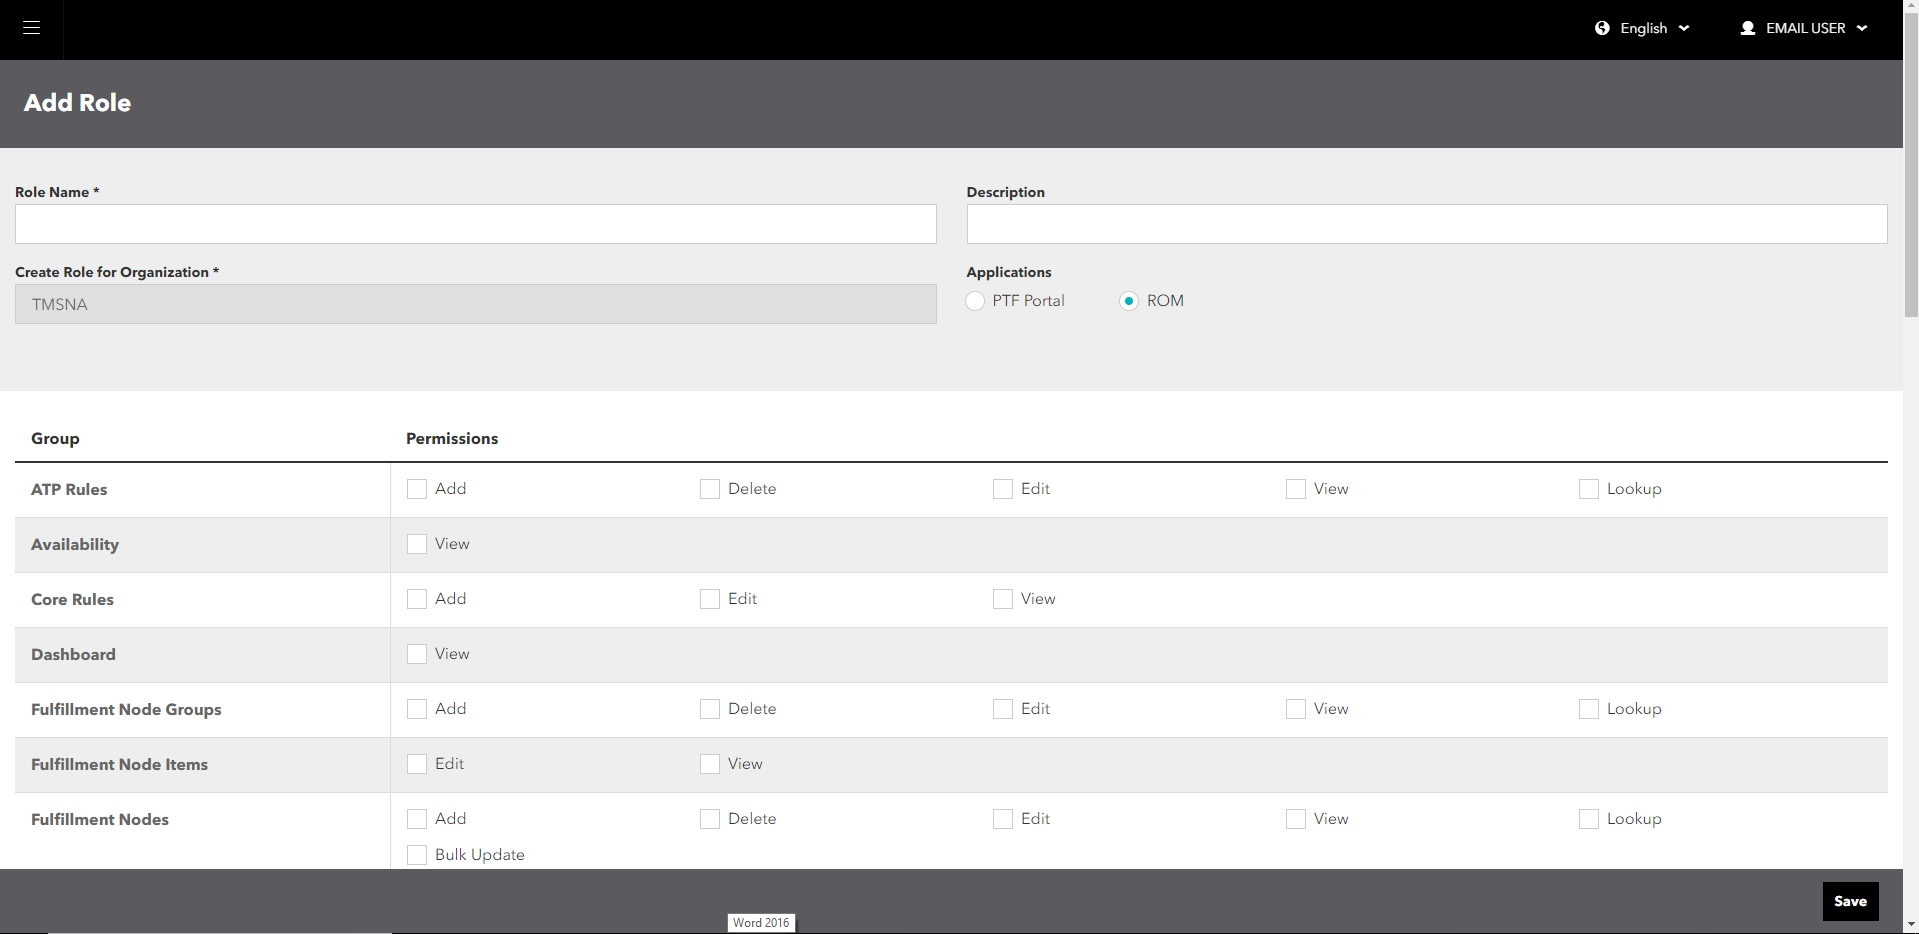
Add a Role
When you add a new role, you specify a Role Name and then define permissions for each functional area that the role must access. Depending on the selected permissions, a user may have access to specific functions within a functional area. For example, a user may have permissions to view Core Rules, but not to add or edit core rules.
To create a role:
- Click or tap the Add button in the Action Bar. The Add Role screen for ROM appears.

This screenshot shows only a portion of the available role details.
- Enter a name for the new role.
- Specify the role permissions for the functional groups, shown in the following tables.
ROM Role Permissions Functional Group Available Permissions ATP Rules Add, Delete, Edit, View, Lookup Availability View Core Rules Add, Edit, View Dashboard View Fulfillment Node Groups Add, Delete, Edit, View, Lookup Fulfillment Node Items Edit, View Fulfillment Nodes Add, Delete, Edit, View, Lookup, Bulk Update Fulfillment Orders View, Check-in, Customer Pickup, Deliver, Pack, Pick, Bulk Decline Pick, Bulk Decline Pack Inventory Add, View, Adjust, Move Inventory Audits View Inventory Organizations Edit, View Items Add, Edit, View, Lookup Node Calendars Add, Delete, Edit, View, Lookup Omnichannel Fulfillment Dashboard View Order Events View Order Exceptions Edit, Summary, View Order Queues Add, Delete, Edit, View Order Returns Add, View Orders Add, Edit, View, Cancel, Cancel Line Items Personal Profile Edit, View Pick Tickets Edit, View, Reassign Print Documents Add, Delete, Edit, View, Publish Putaway Items Edit, View Reason Codes Add, Delete, Edit, View Release Notes View Reprint Documents View Roles Add, Delete, Edit, View, Lookup Safety Stock Rules Add, Delete, Edit, View Seller Rules Edit, View Sellers Edit, View Ship Method Optimizations Edit Shipping Distance Groups Add, View, Lookup Shipping Region Groups Add, Delete, Edit, View, Lookup Shipping Regions Add, Delete, Edit, View, Lookup Shipping Zone Groups Add, View, Lookup Store Fulfillment Dashboard View Store Messages Add, Delete, Edit, View Users Add, Delete, Edit, View, Lookup Zero Cost Order Add, Edit Payments & Fraud Role Permissions Functional Group Available Permissions Api Test
Add
Apple Pay
Add, Delete, Edit, View
Client
View
Event
Edit, View
Fraud
Edit, View
Payment
View
Personal Profile
Edit, View
Roles
View, Lookup
Users
Add, Delete, Edit, View, Lookup
Webhook
Add, Delete, Edit, View
- When you finish adding the details of the new role, click or tap the Save button.