Review and Pick Order for Ship-from Store
This topic explains how to review orders and pick them for eventual shipment to the customer.
- From the Dashboard, click or tap the Pick tile for the Ship From Store workflow.
Depending on your role, either the Queues screen or the Waiting to Pick screen appears.
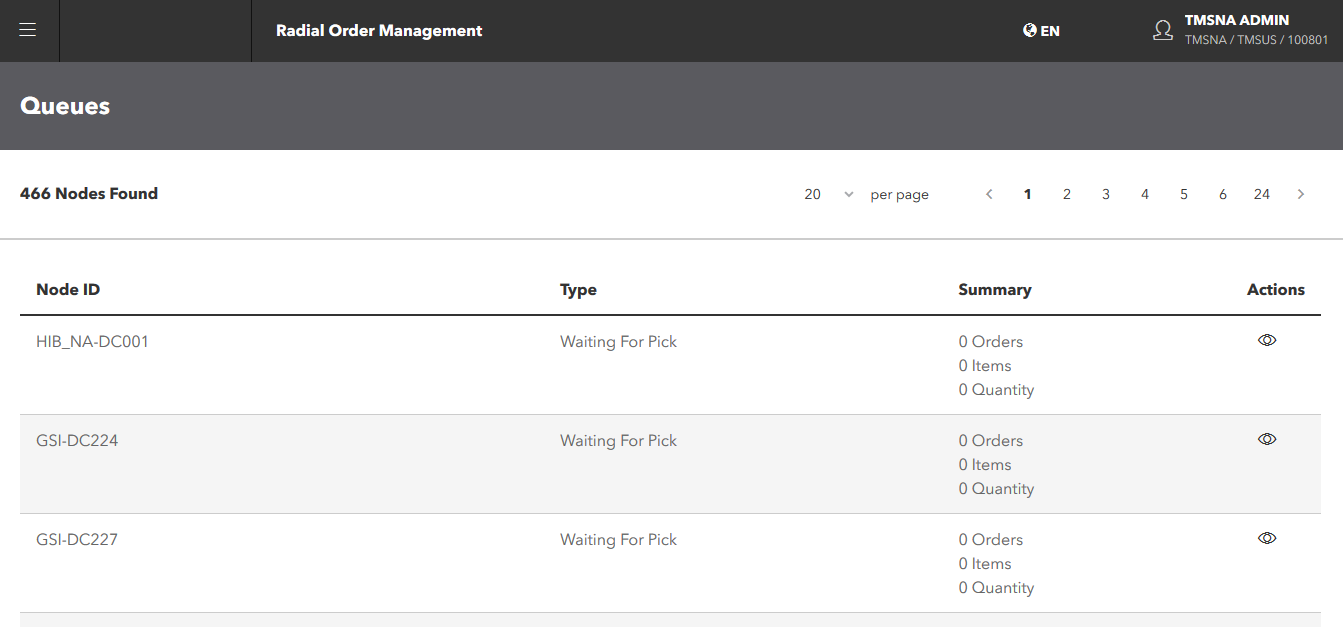
If you have permission to access multiple fulfillment nodes, you see the Queues screen. It displays the orders, items, and quantities for all the nodes that you have access to. From this screen, you can view the orders to be picked at each node.
To see the orders that are waiting to be picked, click the
 icon for the queue that want to see. The Waiting to Pick screen appears.
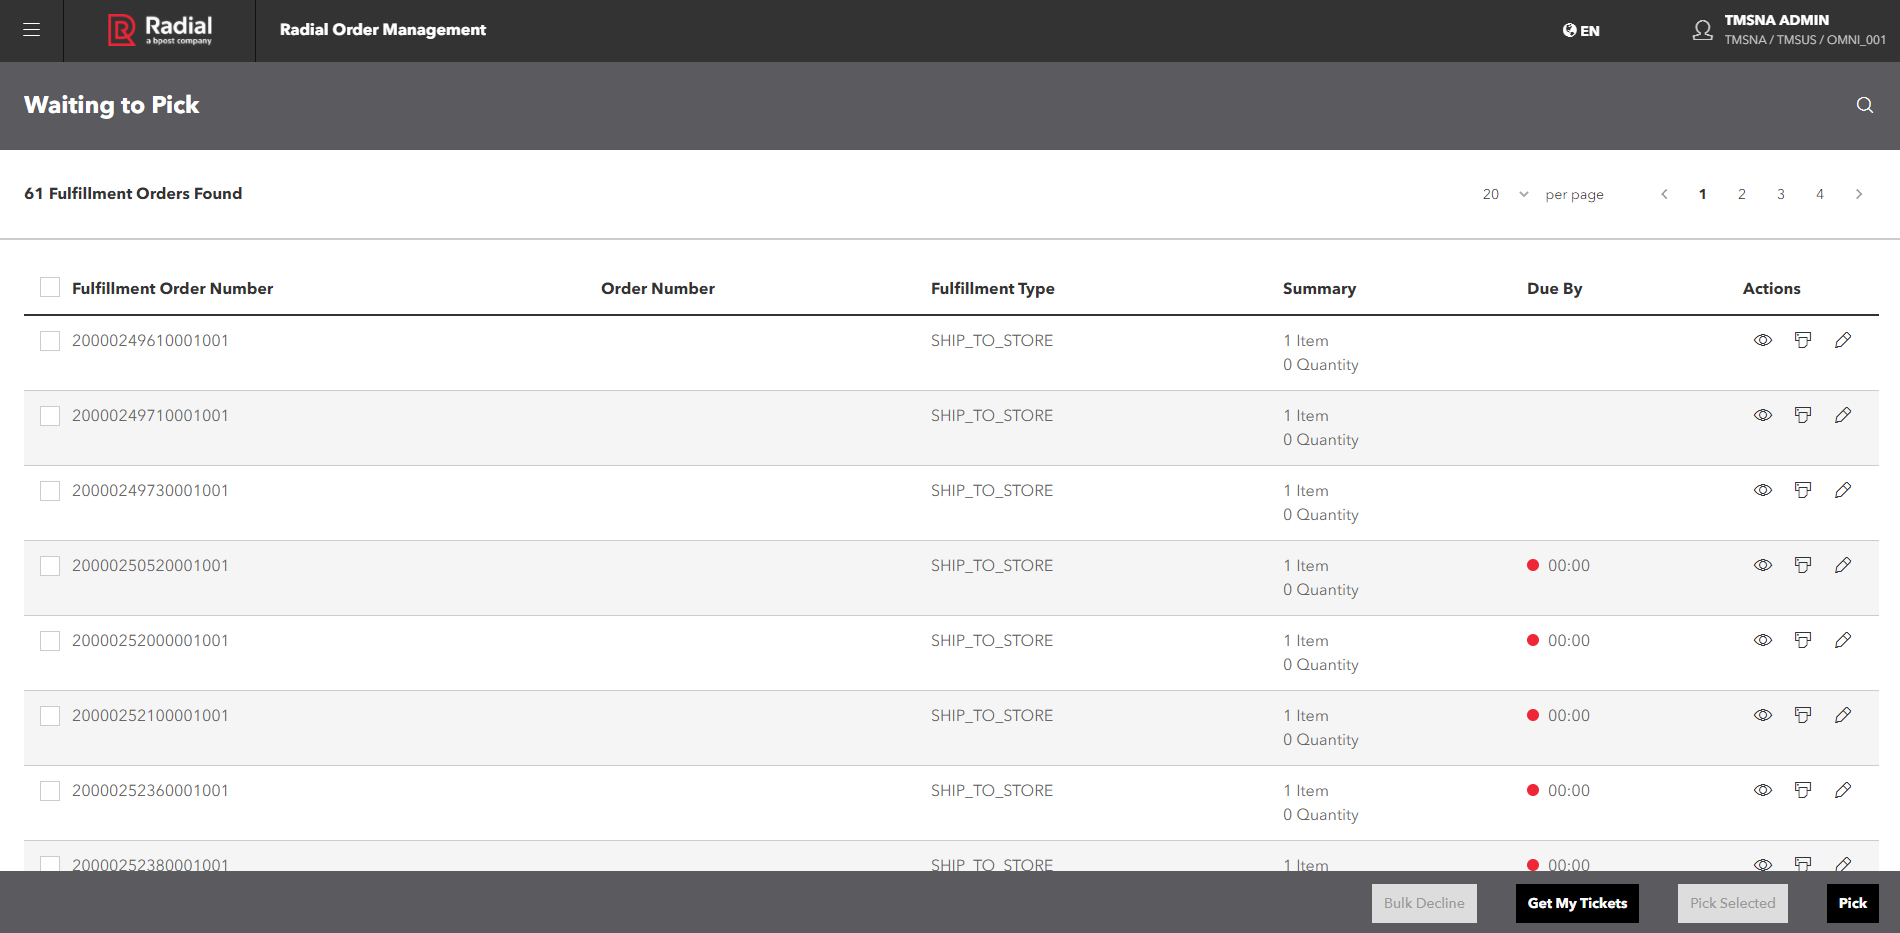
If you have access to only one node, the Waiting to Pick screen appears automatically.

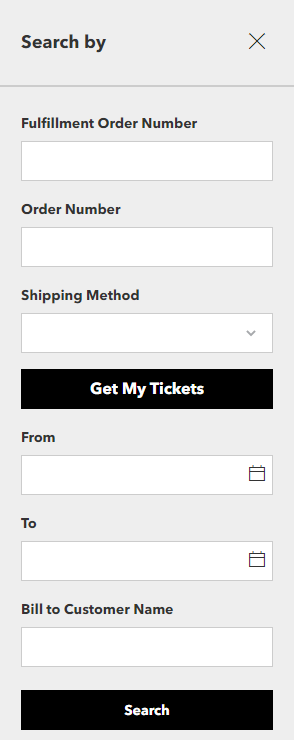
To narrow the results, you can search for a specific order or group of orders.
 Read more about this.
- Fulfillment Order An order that is ready to be picked, packed, shipped, and/or picked up. Number: The number assigned by the scheduling process.
- Order Number: The number assigned by the OMS when the order is placed.
- Fulfillment Type: Either ISPU In-Store Pickup. (In-Store Pickup A fulfillment process in which the shopper picks up orders in a retail store rather than having the orders shipped. Also called ISPU. See also Ship to Store./Ship-to Store A fulfillment process in which orders are shipped to a retail store where shoppers can pick them up. Also called STS. See also ISPU.), SFS Ship-from Store. (Ship From Store), or AD (Associate Delivery A fulfillment process in which retail store associate delivers orders to shoppers.), depending on the workflow.
- Summary: Show the number of items and the total quantity of items in the order. For example, if a shopper order four identical shirts, the summary would show 1 Item(s) and 4 Quantity.
- Due By: Shows the time remaining for the order to be picked. This time corresponds to the Service Level Agreement A commitment between the retailer and customer that defines the level of service. For ROM, the service level agreement defines the elapsed time between order placement and fulfillment. Also known as SLA. for the store. Teal indicates that there is plenty of time left, yellow indicates that there is only a short time left, and red indicates that time has run out.
- Actions: These icons that represent the actions you can perform.
 Create a pick ticket for the order.
 Create and print a pick ticket for the order.
- View the fulfillment order -- you can't edit it or create a pick ticket for it.
- Fulfillment Order
- Now you're ready to create a pick ticket. You can do this is several ways:
To create pick tickets for the orders assigned to you, click or tap the Get My Tickets button in the Action Bar.
- To allow the system to select the highest priority orders from the queue and create a pick ticket for them, click or tap the Pick button in the Action Bar. (The number of orders included in a single pick ticket is based on the system configuration.)
- To create pick tickets for specific orders in the queue:
- Select the orders by clicking or tapping the check box next to the order number.
- Click or tap the Pick Selected button.
- To create a pick ticket for one specific order in the list, click or tap the icon.
- To create and print a pick ticket for a specific order in the list, click or tap the icon. Keep in mind that, although the pick ticket is created and printed, you are not transferred to the Pick Ticket A document that specifies the items in an order. The Store Associate uses the pick ticket to assemble the order. Detail screen. To access that screen, click or tap the Get My Tickets button. The Pick Ticket Summary screen appears, and you can then navigate to the appropriate Pick Ticket Details screen.
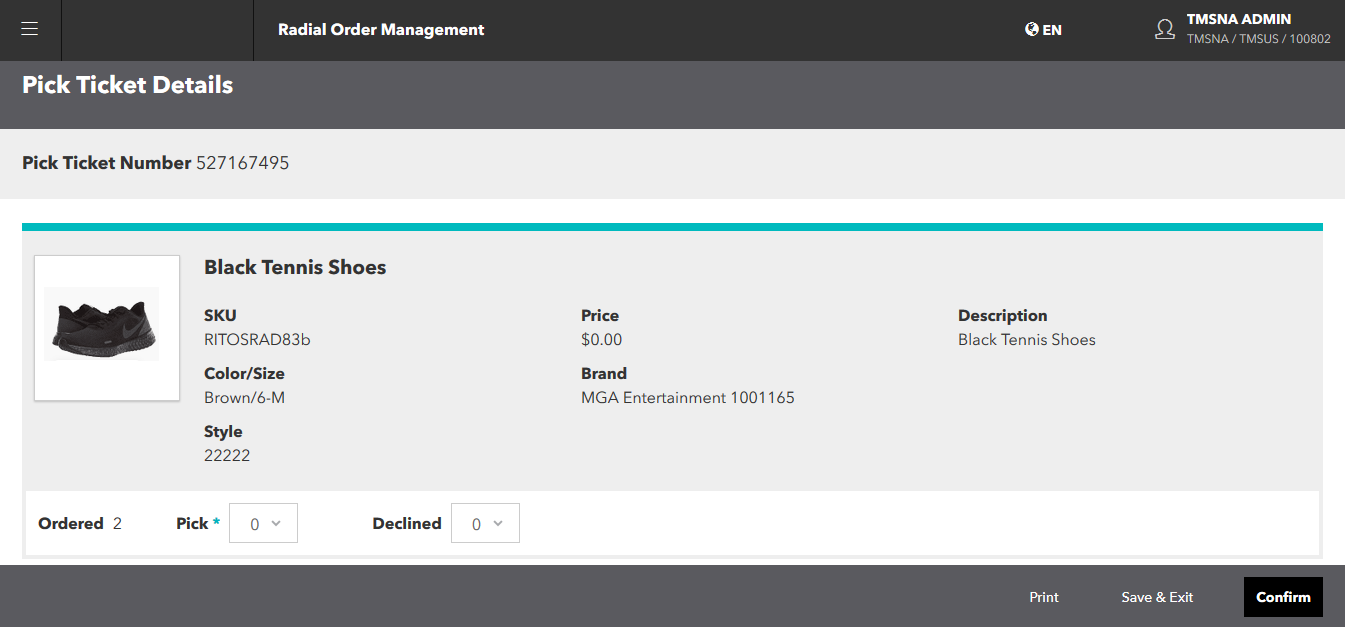
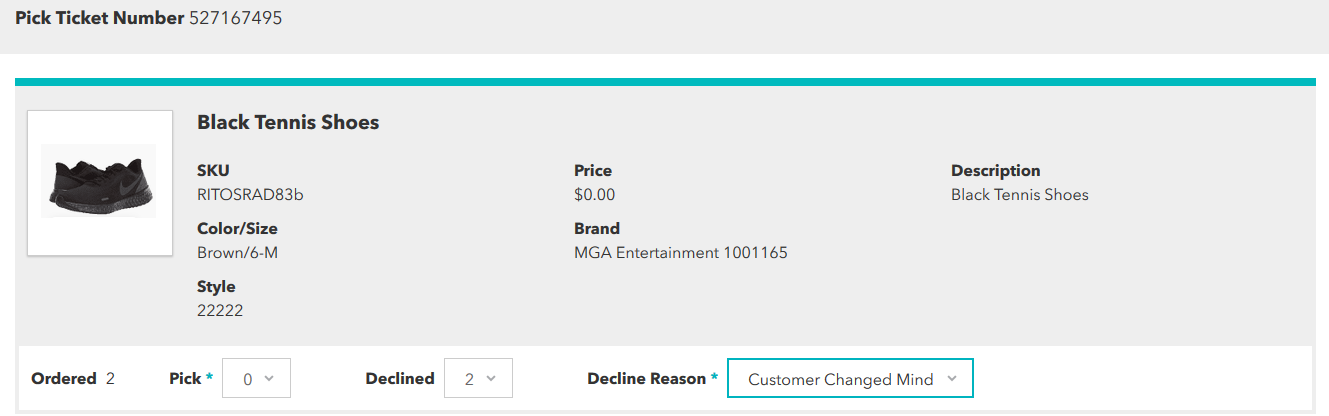
Regardless of how you create the pick ticket(s), the Pick Ticket Details screen appears.

- This screen enables you to record the picked order. If you're picking the order without a paper pick ticket, select the quantity of each item in the Pick field. You can do this in two ways:
- Scan the items (recommended). As you scan items, the pick quantity updates automatically. To scan the items, you can use one of the supported scanners or a supported mobile device.
- Select the pick quantity for each item.
- If you can't pick the ordered quantity, you must select a reason for the decline.

Select the applicable decline reason from the dropdown.
- The buttons at the bottom of the screen enable you to confirm the picked order or save it for later completion and confirmation.
If you've completed the pick, click or tap Confirm.
- In the confirmation dialog, enter the staging location, then click or tap Continue.
 icon. The Search panel appears.