ROM Connect Setup Guide
Need to get your eCommerce presence in place quickly? Radial can help!
Doing eCommerce right isn't always easy. You need to consider everything from order taking and payments to fraud, fulfillment and customer service. Putting all of the pieces in place isn’t automatic and can take time — but that's where Radial can help.
ROM Connect provides our fastest time to market solution yet. ROM Connect can have you set up with the ability to take and fulfill orders in a matter of hours. Drive revenue and watch customer satisfaction climb, and do it all before the end of the week.
ROM Connect is a great way to create your initial integration with Radial’s Omnichannel Technology platform, and it makes it easy to grow and add more features as the needs of your business and customers also grow.
Step 1 – Configure
Getting your store created is easy with Radial's Provisioning Center. The Provisioning Center can be found in Radial's Integration Center web site. (If you're not familiar with the Integration Center, don't worry. We’ll cover it in more detail in the section on testing your integration.)
First, head over to the Integration Center and click the Get Started link.
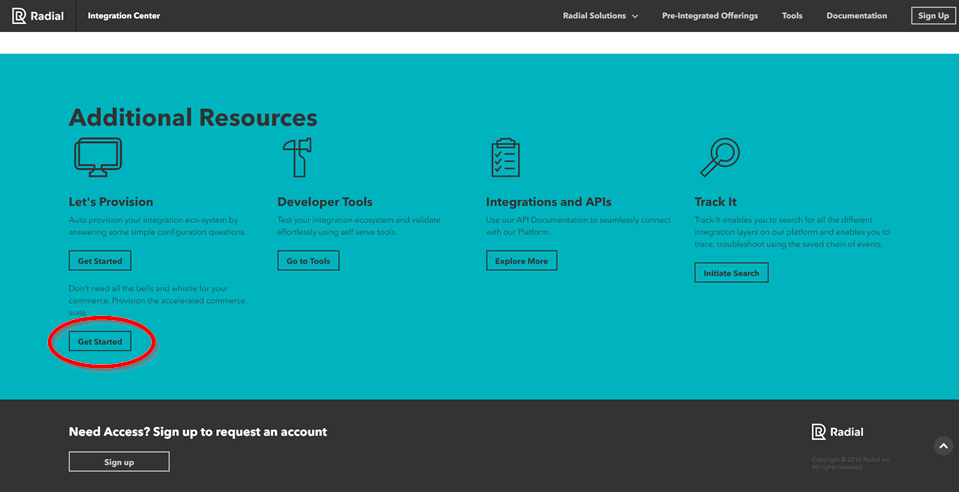
This will take you to the Radial Provisioning Center. The Provisioning Center will ask a series of simple questions. Radial needs answers to these questions in order to setup your store properly.
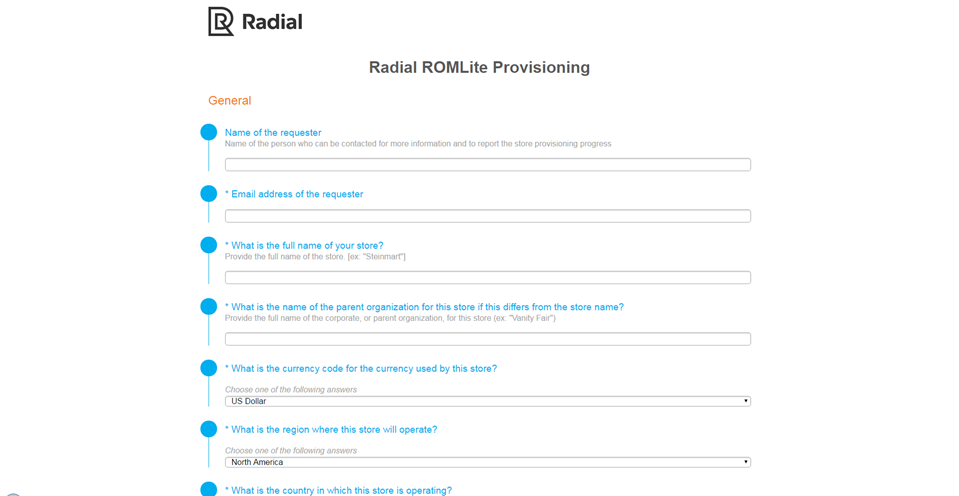
Continue through the survey, providing answers to all the required questions, and when you are done click Submit to start the provisioning process. Your store will be ready in no time! You’ll be contacted via email when your store setup is completed.

When your store is provisioned you should receive several identifiers and other important pieces of configuration information. These include:
- Radial store code
- Radial catalog ID
- Radial customer prefix ID
- Radial order prefix ID
- Radial API security key
You will also be provided with an FTP location, as well as the domain for your sandbox to use when making REST calls to the Radial API layer.
These are all important pieces of configuration information and we will cover them in detail later. For now, just know that you will need all of this information to complete your integration, so don’t lose it.
Step 2 - Connect
Now that your store has been created, we can get to work on your integration. (If you haven’t created your store, you'd better go back and start from Step 1.)

Catalog Integration
Your catalog is the complete listing of products that you will sell in your store. Radial needs to know what items your store will sell in order to process orders for your store. The way to get this information to Radial is via an Item Master.
The Item Master is an XML file that you create that defines all of the items in your catalog. Item Master files are delivered to Radial via SFTP. Item Master files follow a specific naming convention and conform to a well defined XSD.
After you upload an Item Master file, Radial will read the catalog information and store the contents in Radial Order Management system.
Below are links to additional details on the ROM Connect Item Master including standards, XML examples and links to the XSD files.
- Documentation: Item Master Feed
-
Example file: ItemMasterSample.xml
-
Schema: ItemMaster.xsd
Inventory Integration
Your store is created, your catalog is in place — but we're not quite ready to start taking orders. We need to establish inventory levels for the items in your catalog. This is done through an Advanced Shipment Notification (or ASN) file.
The ASN is an XML file that you create that states the inventory levels for each of the items in your catalog. ASN files are delivered to Radial via SFTP. ASN files follow a specific naming convention and conform to a well defined XSD.
After you upload an ASN, Radial will read the inventory information and update each catalog item with the provided inventory level in Radial Order Management.
Below are links to additional details on the ROM Connect ASN including standards, XML examples and links to the XSD files.
- Documentation: Inventory Available to Promise Feed
-
Data Structure: Structure of Inventory Available to Promise Feed
-
Example File: BIRetooling_Feeds_ATP_Feed_XSD_example
Radial API Integration
It’s time to integrate your front end with Radial's APIs.
Inventory Calls
Before placing an order, we will want to make sure we have inventory available and to be able to reserve that inventory for the order. With the Radial API, this is all handled through a few simple REST API calls. For a complete list of inventory related API calls, see below.
Order Calls
Order taking is easy with the Radial API. In fact, we can do a lot more that just take orders! With a few simple rest calls, you can take orders, view orders and even modify them. For a complete list of order related API calls, see below.
- Submit an order with the Create Order API call
- See the complete Order API for other order calls
Test your Integration
The Radial Integration Center is a great resource for integrating with the Radial platform. (If you haven't already bookmarked it, make sure you do!) Here you can find all of the documentation and tools you will need to complete and test your integration.
Tools
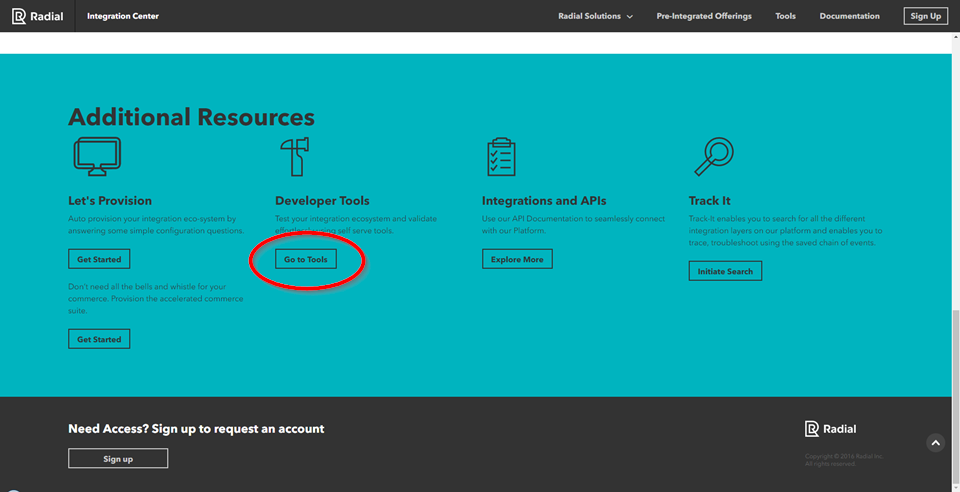
Radial offers tools to help complete and test your integration. To gain access to the tools, see the instructions here: Register for Tools
The tools can be found in the Radial Integration Center. After you are registered, head over to the Integration Center and click the Go To Tools link.
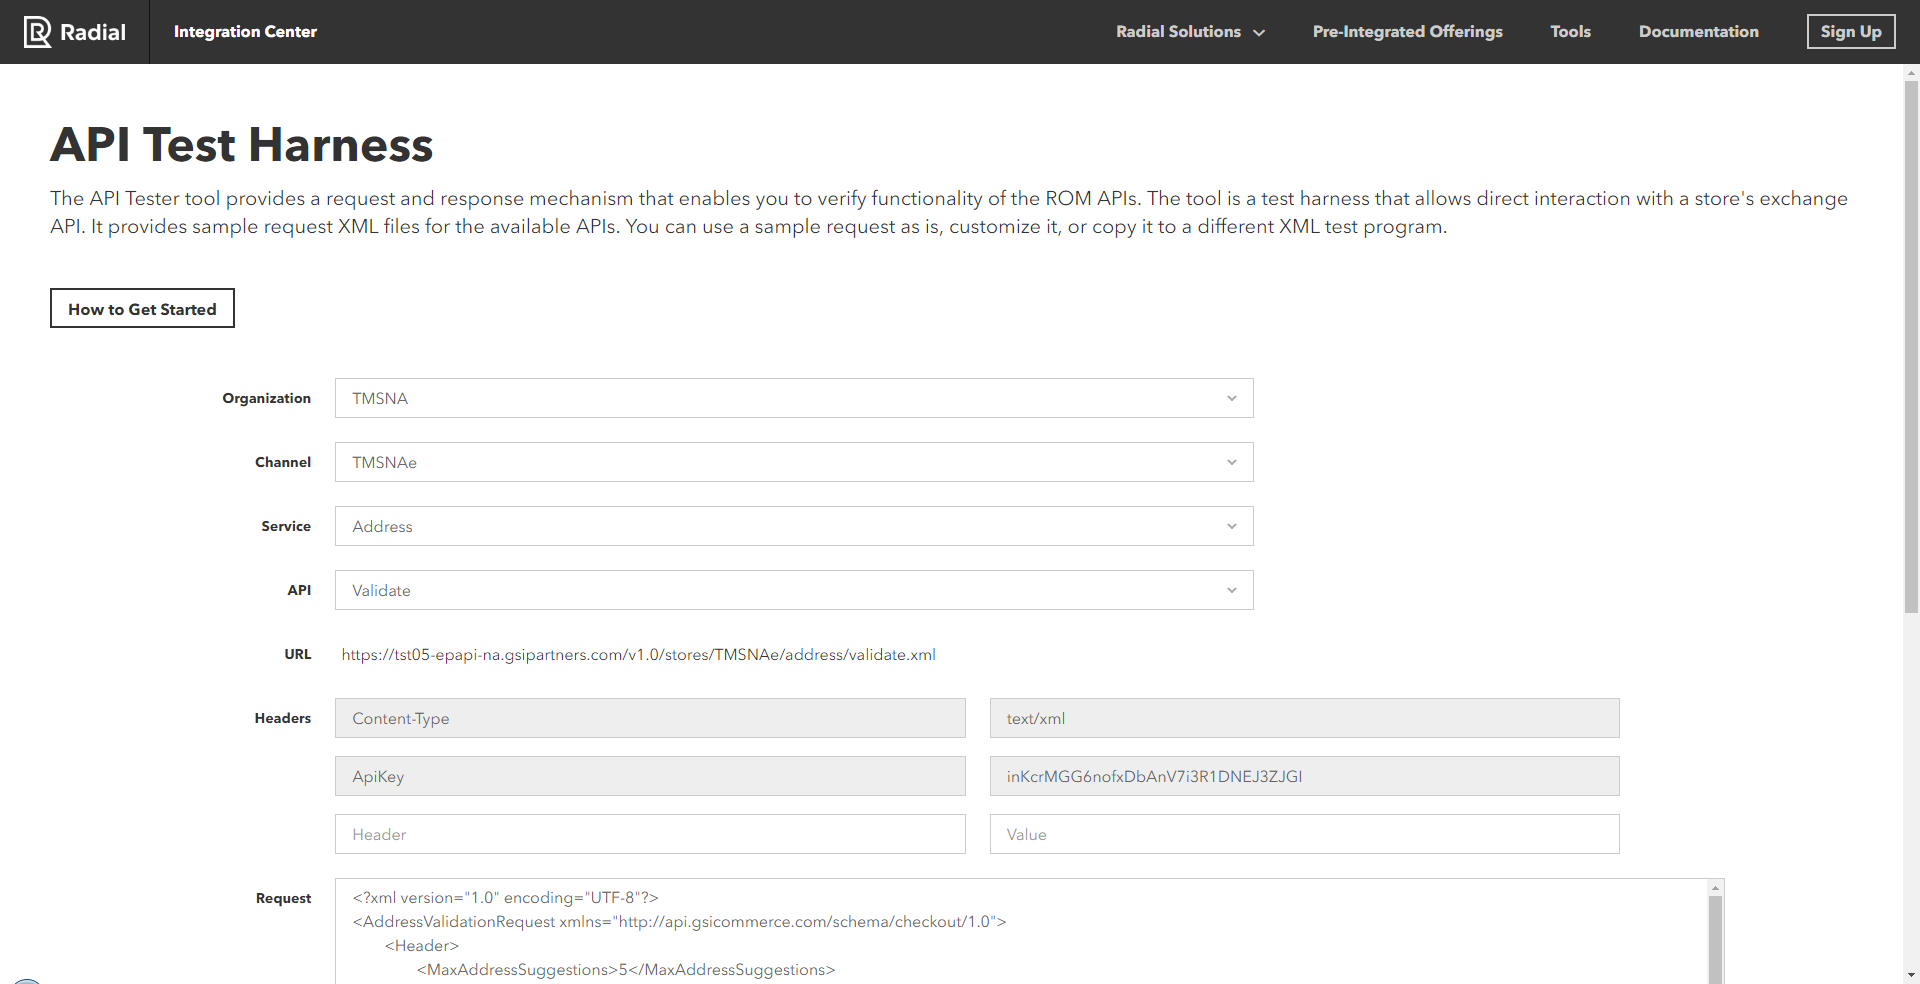
Here you can find our API Test Harness that will show you all the details you need to construct your XML messages. The Test Harness also allows you to submit messages to any of our services in a sandbox environment and view the responses. This is a great tool for troubleshooting and debugging.
Step 3 - Launch!
Your integration is complete! That's all there is to it.
Now that it's time to launch, Radial staff will assist you with pointing your integration to a live production environment where you can quickly start taking orders.
Now that your store is live, it's easy to add additional ROM features to your web store in the future. There are a number of other features available to help your business grow and provide great services to your customers.
The Radial web site and the Integration Center are good places to learn about what else Radial can offer your business and your customers.
Congratulations on your web business!